In This Article
Introduction
Service Management CD provides flexible scheduling tools to help you manage service work efficiently. The primary scheduling functions are found within the Tickets, Technicians, and Bays tabs.
- Tickets Tab: This view displays a list of Tickets and shows when a technician has been scheduled to work on each one.
- Technicians Tab: This view displays a list of your technicians and shows the Tickets they are assigned to. This is the most common view used by dealers for managing technician schedules.
- Bays Tab: This view displays a list of your service bays and the Tickets assigned to them. This can be useful for scheduling specialized tools or specific service vehicles. These are set up by your Administrator.

Select the Division/Job Control/Branch to filter which data you see.

Navigating the Scheduler
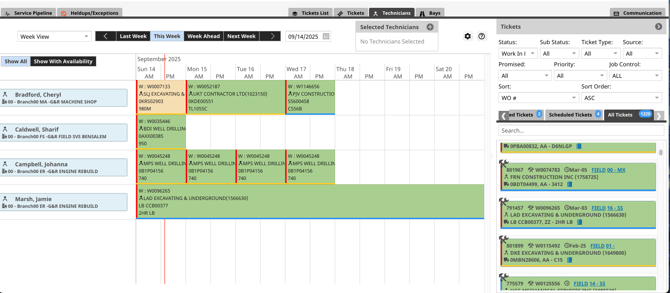
Although the Scheduler offers different views, the basic layout and navigation tools remain the same across the Tickets, Technicians, and Bays tabs.
- The left side of the screen lists the Tickets, Technicians, or Bays, depending on your chosen view.
- The center of the screen is a grid that represents the days of the week, where you will schedule work.
- On the right, you will find a list of Tickets available to be scheduled.
At the top of the page, you will find various configuration options to help you customize your view and streamline your scheduling process.
View Adjustments
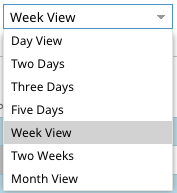
- Adjusting the Grid: You can choose how many days you want to view at once by using the dropdown menu. Options range from a single day up to an entire month.
- Navigating Dates: Based on your selected view, you can navigate between the current, previous, or future time periods. Use the arrow icons to move forward or backward in time.

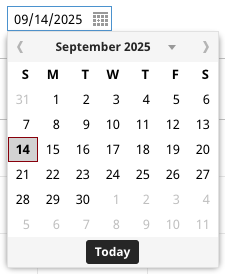
- Calendar View: To jump to a specific date, Select the calendar icon and choose the desired date.
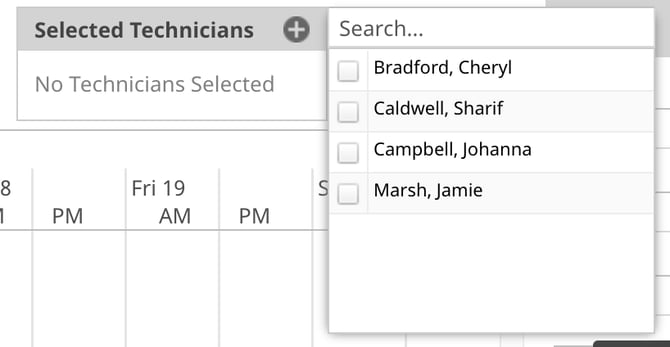
- Selected Technicians (Tickets and Technicians tabs): Select this option to choose specific technicians you want to display, which helps you focus on specific schedules.
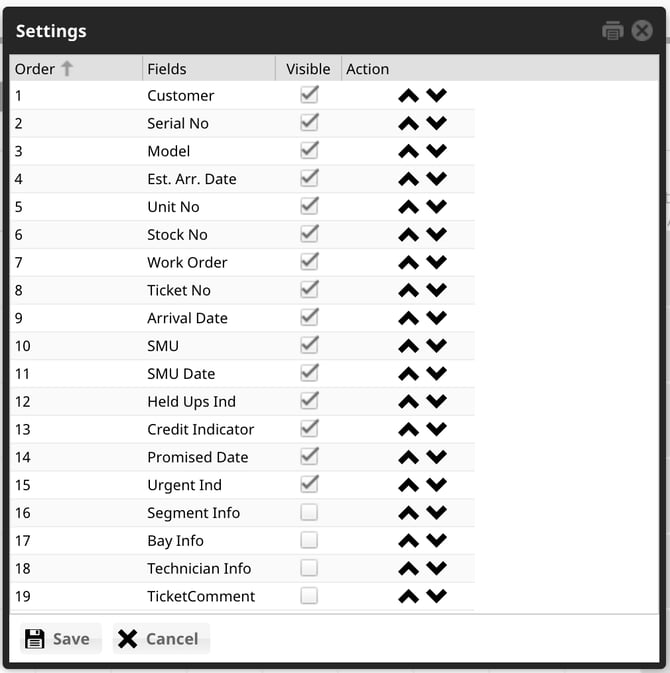
- Gear Icon: Select this icon to adjust which fields are displayed on the jobs shown in the main grid.
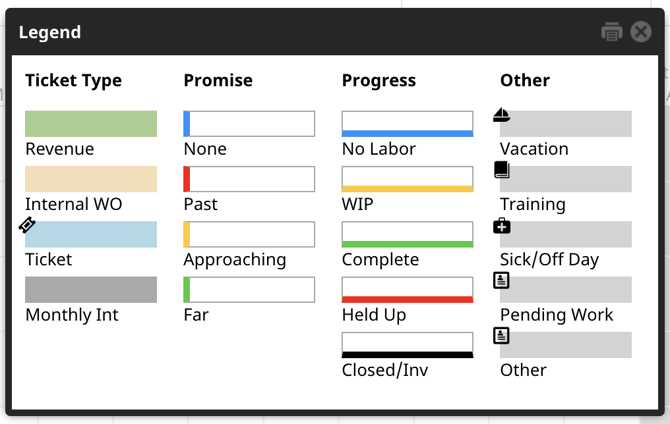
- Legend (Question Mark Icon): Select this icon to view the Legend. The Legend explains the meaning of the different colors for the jobs on the grid.
- Show All/Show with Availability (Technicians and Bays tabs): Select this icon to show which technicians/bays are available vs unavailable.

Ticket Selection
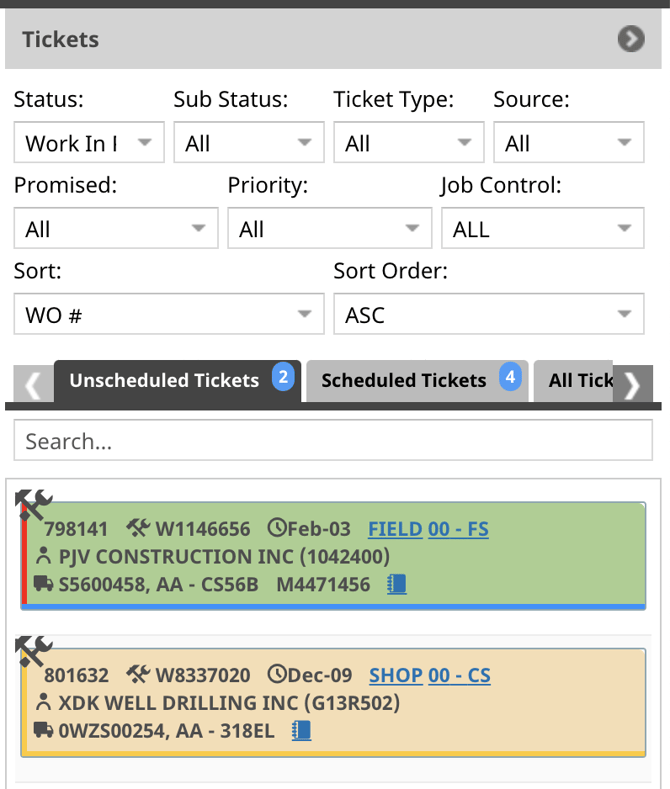
- Tickets List: This section includes various filters, such as Status, Source, and Promise Date, to help you find specific Tickets. For example, you can use the Source filter to find Tickets from PSQ, EMT, DBS, etc.
- Scheduled/Unscheduled: Use the filters to toggle between displaying Unscheduled and Scheduled Tickets.
- Search Bar: You can also use the search bar to find a specific Ticket by typing in information like the Ticket number.
The section can be minimized by clicking the arrow in the top-right corner.
Scheduling a Ticket
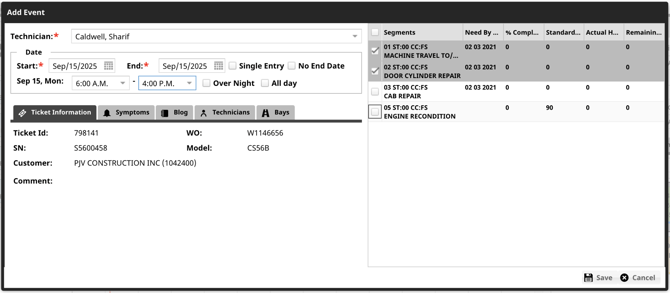
Once you have found the Ticket you want to schedule, drag and drop it onto the grid at the desired time. A pop-up window will appear, allowing you to configure the job details.
- Select the technician you want to assign to the job.
- Set the Start and End Dates for the job. You can also Select the No End Date option to schedule the job indefinitely.
- Note: Use the Single Entry option if the job is multiple days. This will show as 1 job on the schedule, vs an individual job per day.
- Set the specific start and end times for the job.
- Note: If the technician has a roster assigned, their scheduled hours will automatically appear. If a roster is not assigned, the times will default to the Branch Operational Hours set in Service Management CD.
- You can assign the technician to specific segments of the job or assign them to all of the segments.
- Review the job and technician information by navigating through the various tabs.
- Once all the details are correct, Select the Save button to add the job to the schedule.
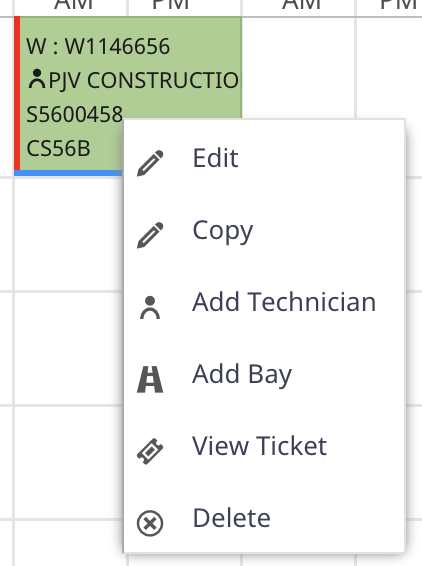
Once a Ticket has been scheduled, you can manage the job directly from the grid.
- Right-click on any scheduled job to open a menu of options.
You can also add events to the schedule that are not directly related to a Ticket, such as training or vacation time.
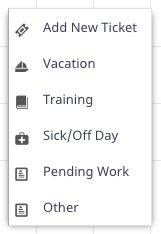
- Right-click on any empty space within the scheduling grid. A menu will appear with options such as Vacation, Training, and more.
- Select the type of event you wish to add.
- Fill in the details for the event in the pop-up window that appears.
- Select Save to add the event to the schedule.