In This Article
Introduction
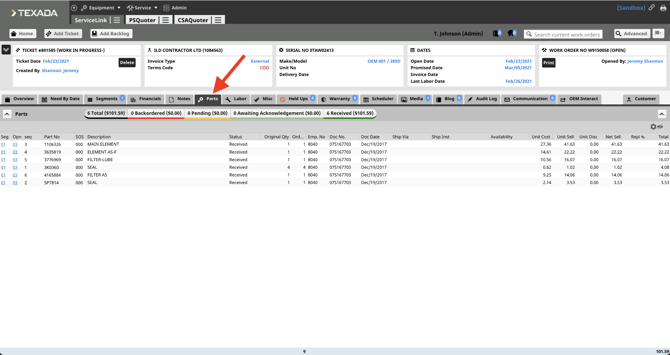
The Parts tab serves as a central repository for all Parts recorded across every segment and operation within the Ticket. This view allows you to quickly audit the Parts without navigating to individual segments. You cannot add new Parts here and instead need to do that in the Segments tab.
Navigating the Parts View
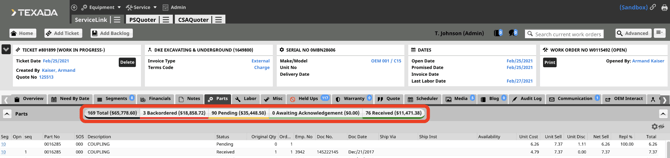
- Filter by Category: Select any of the category tabs at the top of the page to filter the Parts displayed. The number next to each label indicates the Total price for each category.
- View Customization: Use the Eye icon to adjust your columns.
- Total: The blue row on the bottom of the page shows the totals for the Original Quantity and Total columns.
Returned Sheets
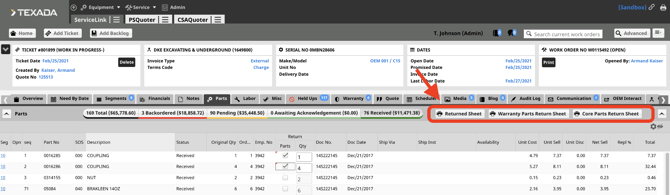
For Parts that were ordered and received, if you need to return them, you can select them to generate a Returned Sheet containing all return details. For Parts on a Warranty Segment, you can generate a Warranty Parts Return Sheet. For Core Returns, you can generate a Core Parts Return Sheet.
- Select the Received section within the Parts tab.
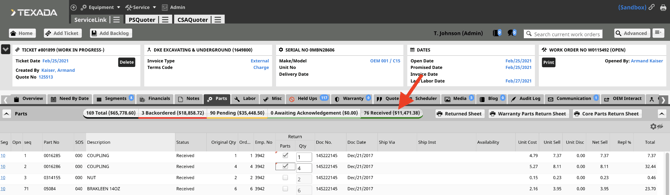
- Locate the Return column that appears.
- Select the check box for the specific Parts you want returned under the Parts column.
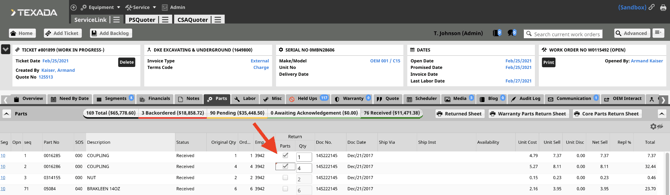
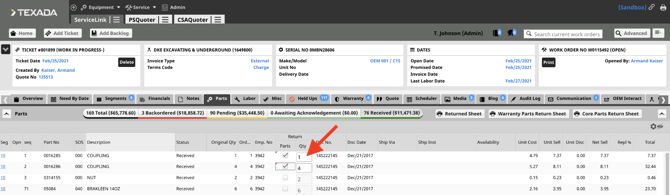
- Type the number of items you are returning in the Quantity column.
- Select the Returned Sheet that you want to generate.
- Review the pop-up window that appears with the return information. Note that generating this sheet will automatically save a copy in the Documents section of the Media tab for future reference.
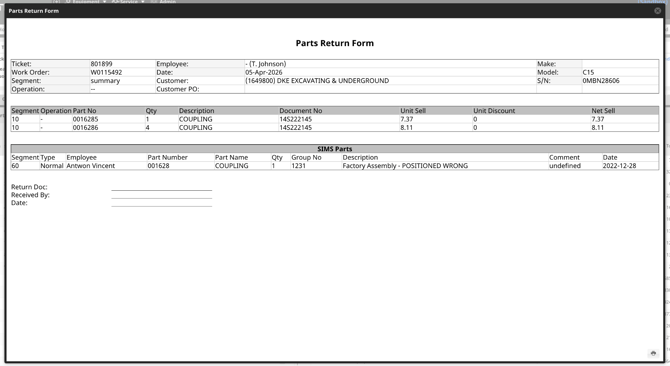
- Select the Print button at the bottom right to download a copy.
Columns
- Segment: Displays the segment number; select the link to view details in the Segments tab.
- Opn: Displays the operation number; select the link to view details in the Segments tab.
- Seq: The sequence number assigned by the ERP system once labor is approved to uniquely identify the entry.
- Part No: The specific Part number for the entry.
- SOS: The Source of Supply for the Part entry.
- Description: The description of the Part.
- Status: The current status of the Part entry (e.g., Pending, Ordered, Received).
- Original QTY: The initial quantity of the Part added to the system before an order was placed.
- Order Qty: The current quantity of the Part; if ordered, this reflects the total quantity placed.
- Emp. No: The identification number of the employee who placed the order.
- Return: For Parts in Received status, you can use this field to generate a Return Sheet.
- Parts: Select this checkbox to include specific Parts on the Return Sheet.
- QTY: Use this field to select the specific quantity of Parts being returned.
- Doc No.: The document number generated by the ERP system once the Parts are ordered.
- Doc Date: The date the order was placed.
- Ship Via: The specific carrier or method for transporting the Parts to the service location.
- Ship Inst: Instructions required for the delivery, such as gate codes or specific drop-off points at a jobsite.
- Availability: The current stocking status of the Parts, indicating whether they are in inventory at your branch or need to be ordered
- Unit Cost: The cost of a single unit of the Part.
- Unit Sell: The sell price of a single unit of the Part.
- Unit Disc: The discount amount applied to the Part, if applicable.
- Net Sell: The final sell price (Unit Sell minus Unit Discount).
- Repl %: This represents the Replacement Percentage, which helps track how often a specific Part is replaced during this type of repair for future planning.
- Total: The total value calculated by multiplying the Net Sell by the quantity.