
In This Article
- Introduction
- How it Works
- Step 1: Create Enrollment Numbers in SAQ
- Step 2, Option 1: Schedule a PM Event in Equipment Monitoring Toolkit
- Step 2, Option 2: Create a Segment In Service Management CD
- Tracking Machines Under Contract
- Configuration
Introduction
New integrations are coming to Texada’s Service Management CD suite! These updates are designed to strengthen the ties between Service Agreement Quoting (SAQ), Equipment Monitoring Toolkit (EMT), and Service Management CD, saving time, reducing repetitive data entry work, and preventing errors!
How it Works
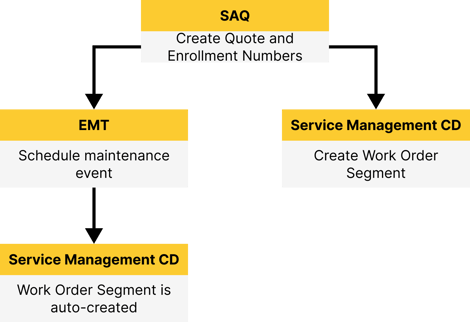
This update affects two existing processes across SAQ, EMT, and Service Management CD:
- Scheduling PM Events in Equipment Monitoring Toolkit: Scheduling a Preventative Maintenance (PM) Event in EMT will now cause the resulting Ticket in Service Management CD to be automatically populated with the PM Event’s full SMCS code and flat rate pricing. (Previously, only the Job and Component codes were sent.)
- Creating Work Order Segments in Service Management CD: When manually creating a Work Order Segment in Service Management CD, you can now select an SAQ Enrollment Number to automatically populate it with information from the original SAQ Quote.
Both of these processes make use of SAQ Enrollment Numbers to import Quote information. Keep reading to learn how to leverage these tools for your organization!
Step 1: Create Enrollment Numbers in SAQ
The first step in the process is to build out a Quote in Service Agreement Quoting and ensure that each piece of equipment on the Quote has an Enrollment Number. This number will later be used by EMT and Service Management CD to import Quote information.
In Service Agreement Quoting
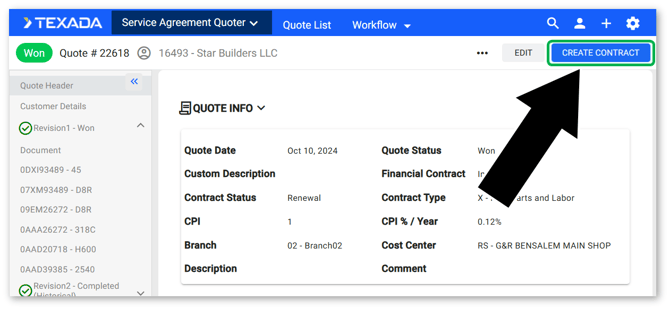
- Create a Quote in Service Agreement Quoting and send it for approval. Once the Quote has been won, a member of the CVA admin team can use the “Create Contract” button in the top-right corner of the Quote Details screen to create a CVA Contract for that Quote.
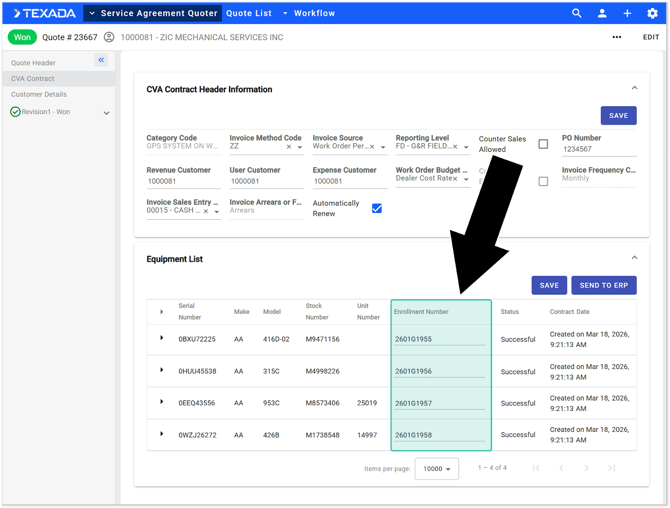
- Once a CVA Contract has been created, give each piece of equipment on the Quote an Enrollment Number. Depending on your system’s configurations, these numbers can either be manually entered, or generated using the “Send to ERP” button on the CVA Contract tab.
Step 2, Option 1: Schedule a PM Event in Equipment Monitoring Toolkit
Using Equipment Monitoring Toolkit, you can schedule PM Events for your customers’ equipment. Scheduling a PM Event will trigger the creation of a Ticket in Service Management CD, which can then be assigned to your technicians for completion.
When a Ticket is created in this way, pricing and discount information, as well as Parts, Labor, and Misc components, will be automatically imported based on the original Quote created in SAQ.
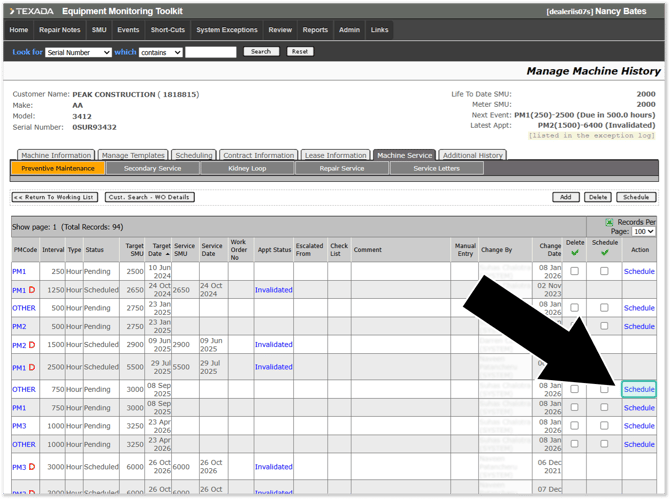
In Equipment Monitoring Toolkit
- Open the machine for which you’d like to schedule a PM Event and navigate to the Machine Service tab. Locate the desired PM Event and click “Schedule” to schedule it.
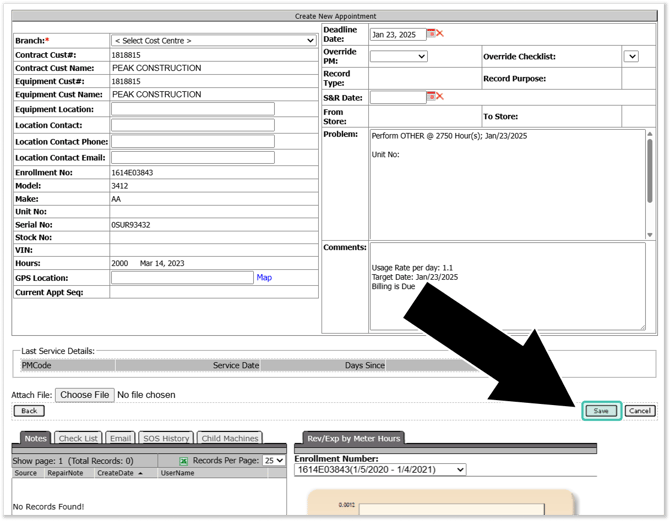
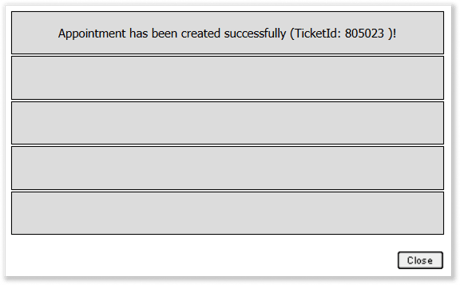
- Fill out any additional details as needed, then click “Save” to schedule it as a Ticket in Service Management CD. Record the Ticket number for future reference.
In Service Management CD
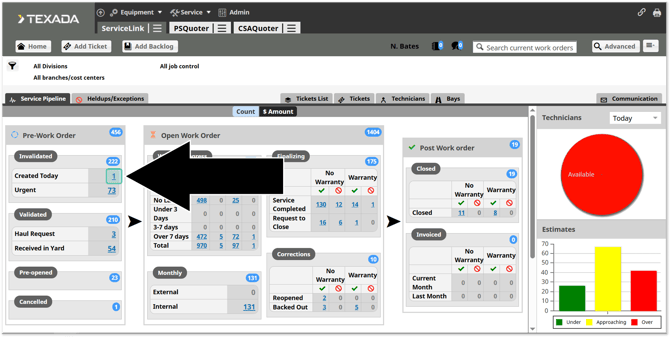
- Locate and open the Ticket you created in EMT. The easiest way to do this is by using the “Created Today” hyperlink in the Service Pipeline. You can also search the Ticket’s number using the search bar in the top-right corner of the screen.
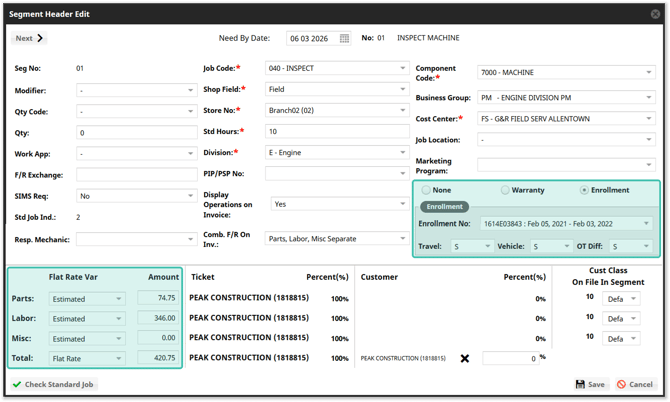
- Navigate to the Segments tab and select a Segment. Click the “Edit” button in the top-right corner of the Segments tab to open the Segment Header Edit window. From here, you can see that the Enrollment No field has been automatically filled out, and the Parts, Labor, and Misc field values have been imported as Estimated amounts with a Flat Rate Total.
Similarly, all Parts, Labor, and Misc information of the Segment will be imported automatically.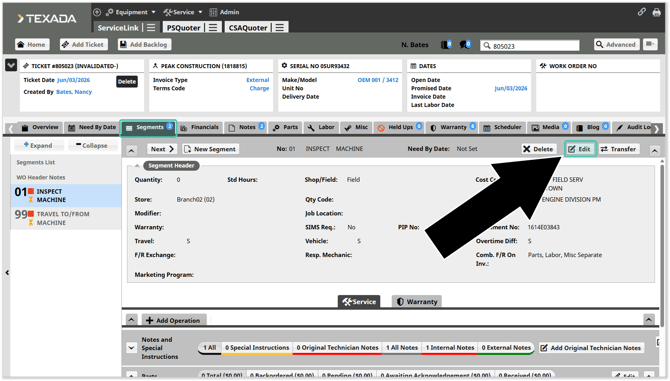
Synchronization between SAQ, EMT, and Service Management CD only happens once, when you click “Save” after scheduling a new PM Event in EMT. Once the Ticket has been created in Service Management CD, further changes made to the Quote in SAQ will not be reflected in Service Management CD and vice versa.
Step 2, Option 2: Create a Segment In Service Management CD
You can also create Work Order Segments directly in Service Management CD. When you do this, you’ll have the opportunity to associate your new Segment with an existing Enrollment Number from SAQ, automatically populating it with information from the original SAQ Quote.
In Service Management CD
- Open the Work Order to which you’d like to add a new Segment. Navigate to the “Segments” tab, then click “New Segment”.

- Fill out the basic information for your new Segment, including at minimum a Job Code and Component Code. If you receive a “Found the matched standard job” message upon selecting a Component Code, make sure to select “No”, as you will be using the configurations from the SAQ Quote in lieu of those from the standard job.
Once you have filled out the Job Code and Component Code, check the “Enrollment” checkbox to reveal the Enrollment panel. Use the “Enrollment No” drop-down to select the Enrollment Number corresponding to the SAQ Quote you created earlier.
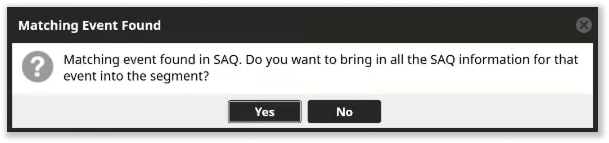
- Once you have selected an Enrollment No, click “Create”. The following message will appear, informing you that a matching event was found in SAQ. Click “Yes”.
- Your Segment will now be automatically populated with information from SAQ, including parts, pricing, and any applied discounts. Note that pricing amounts (Parts, Labor, and Misc) will be imported as estimates with flat rated totals. This preserves the pricing the customer signed off on when the original Quote was won.
* This will also link the status of the Work Order in Service Management CD back to the PM Event associated with the Enrollment Number in EMT.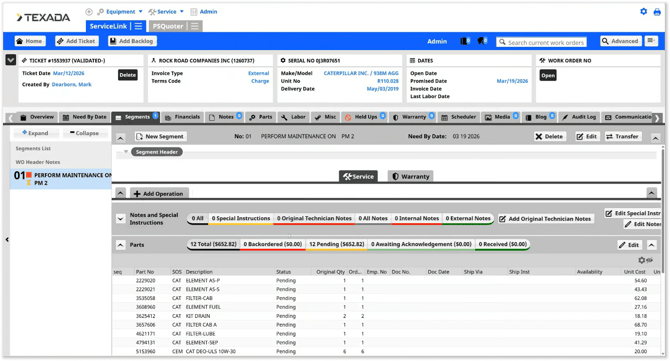
Synchronization between SAQ and Service Management CD only happens once, when you click “Yes” in the Matching Event Found window while creating a Segment. Once the Segment has been created, further changes made in SAQ will NOT be reflected in Service Management CD and vice versa.
Tracking Machines Under Contract
The SAQ Active Contracts tool in CloudLink Console allows you to track machines that are currently under contract in SAQ, as determined by the presence of an Enrollment Number. To reach this tool, log in to CloudLink Console and select Usage → SAQ Active Contracts from the left navigation menu.
This tool will only be available while the SAQ to Work Order module is enabled. If you don’t see this menu option in CloudLink Console, SAQ to Work Order is not enabled in your system.
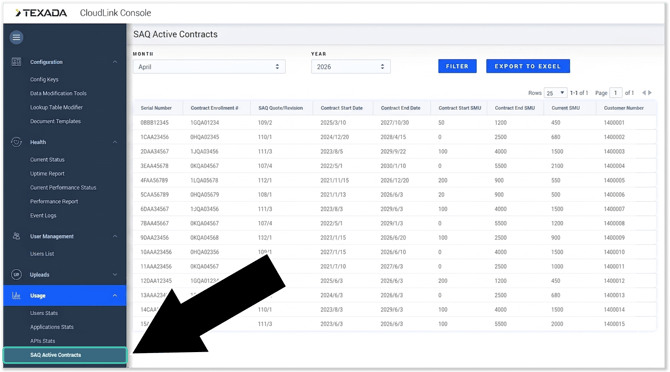
This screen lists the machines that currently have an Enrollment Number in SAQ. Use the Month and Year drop-downs at the top of this screen to filter machines by their contract dates. Click the “Export to Excel” button to download the table’s contents as an Excel (.xlsx) file.
Configuration
This feature is available as part of the SAQ to Work Order Module, a paid add-on module for Service Agreement Quoting. If you are interested in implementing this module for your organization, please reach out to your Texada account representative.