.png?width=365&height=50&name=Texada%20Logo%20(Black).png)
Schedule
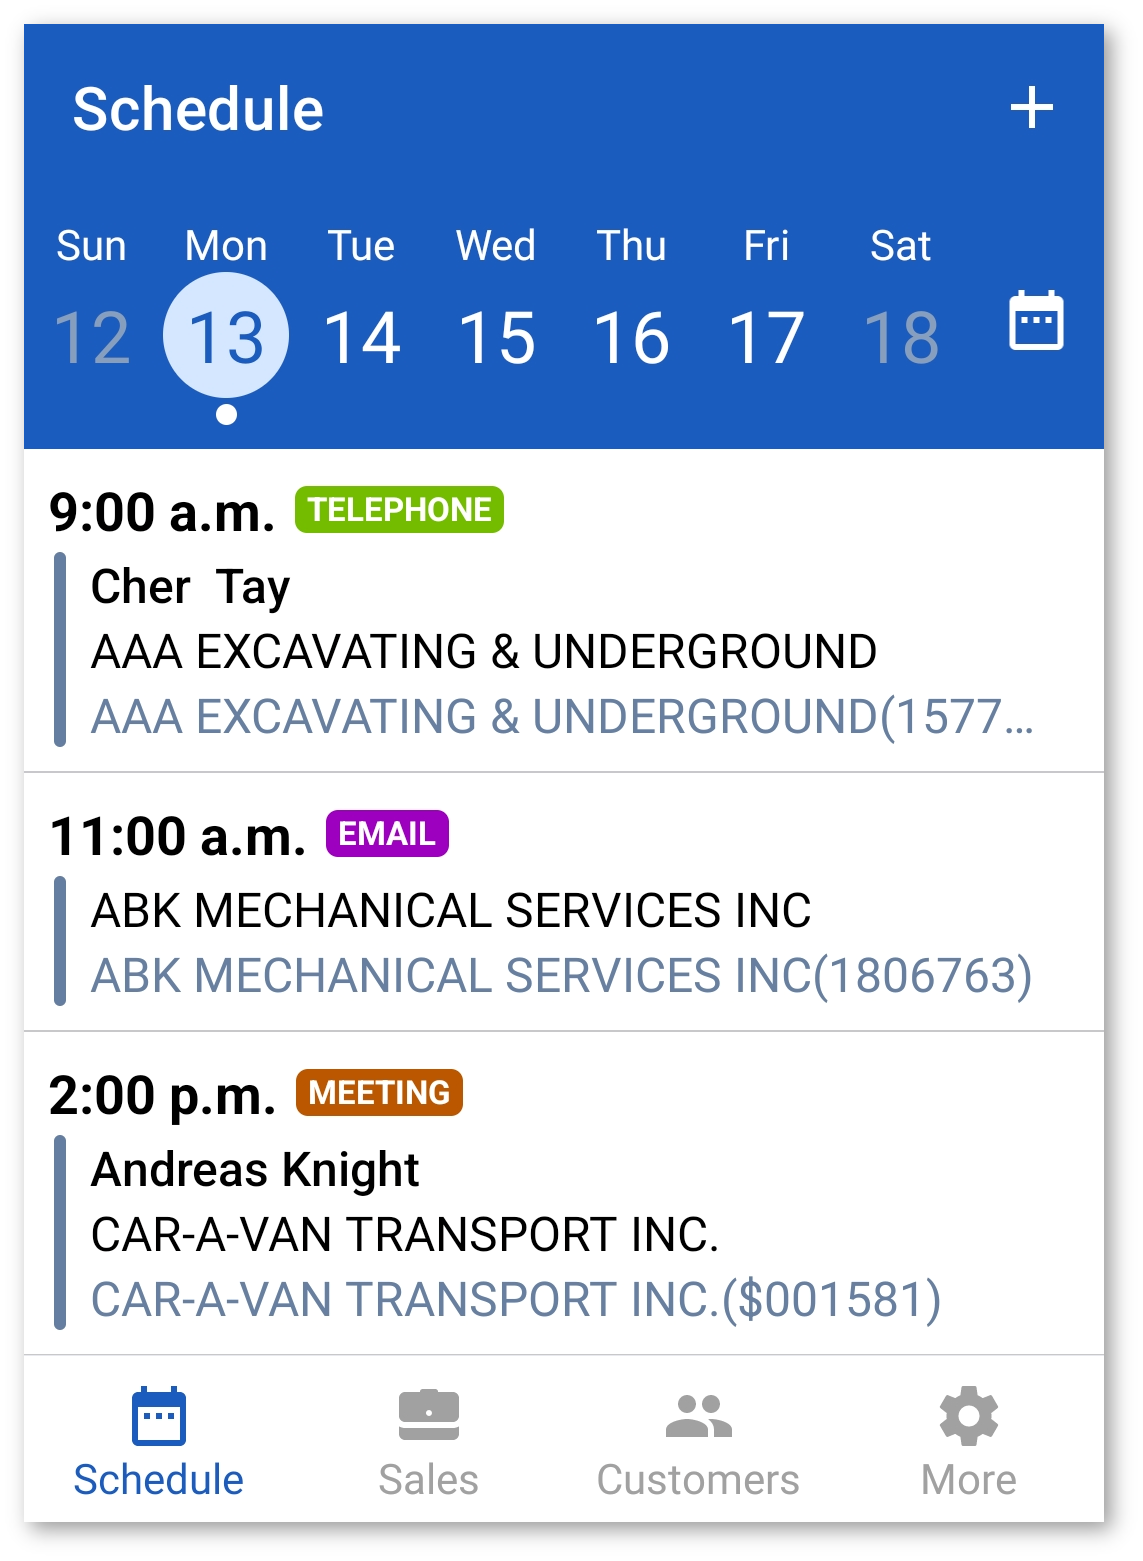
After successfully logging in you are automatically taken to the Schedule tab, which displays a breakdown of all your scheduled activities for the day. Each activity in the list displays basic details:
- Time activity is scheduled to occur
- Type of activity (Telephone call, Email, Lunch Meeting, etc.)
- Name of company and/or contact person
- Company ID number
Tap on another day of the week at the top of the screen to view the scheduled activities for that day, or tap the Calendar icon to the right to view a different week/month.
Tap on an activity to view its Activity page.
Activity
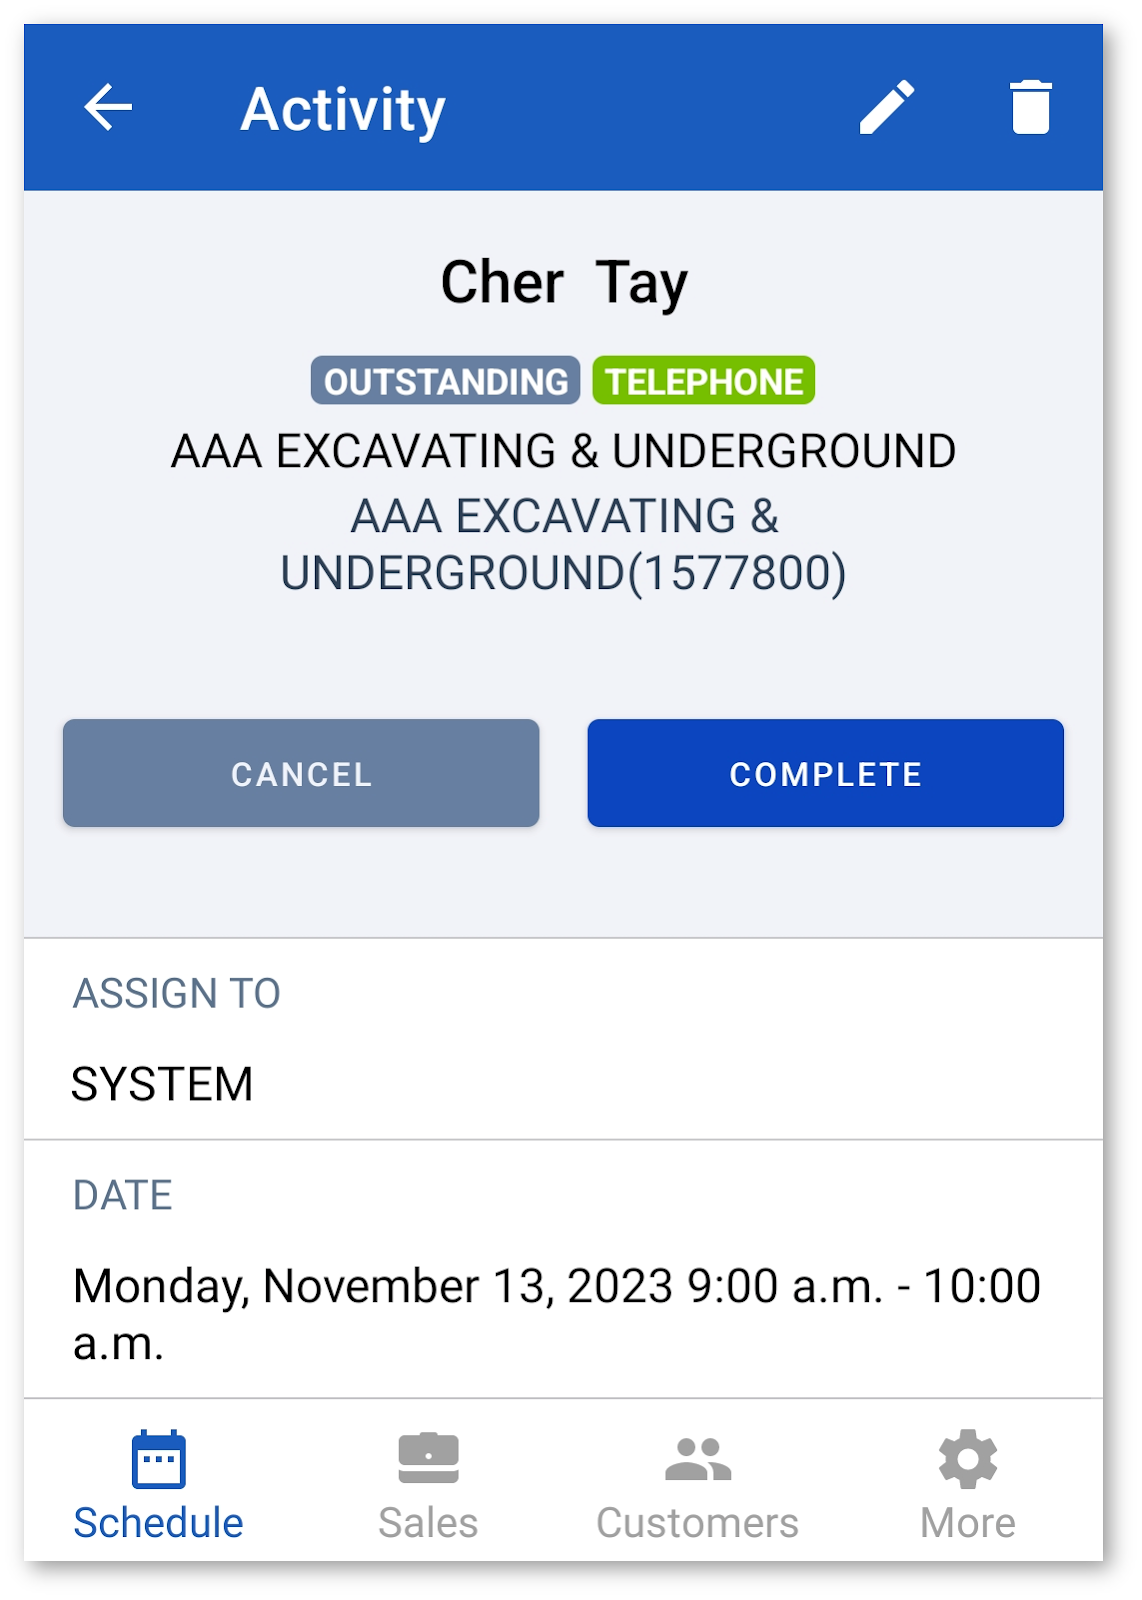
The Activity page displays more in-depth information about a specific activity:
- Customer Name
- Customer ID Number
- Contact Person
- Status
- Date and Time of Activity
- Division
- Address
- Quick access to contact details including division, activities, all contacts, leads/opportunities, issues, equipment units, attachments, and rentals.
- Notes
Tap the three dots at the top right of the screen to Edit or Delete the activity.
Tap on the contact person’s name to view their Contact Details page.
Scroll down to view a map of the activity address. Tap on the map to open the location in your preferred mapping application if you need directions or more information.
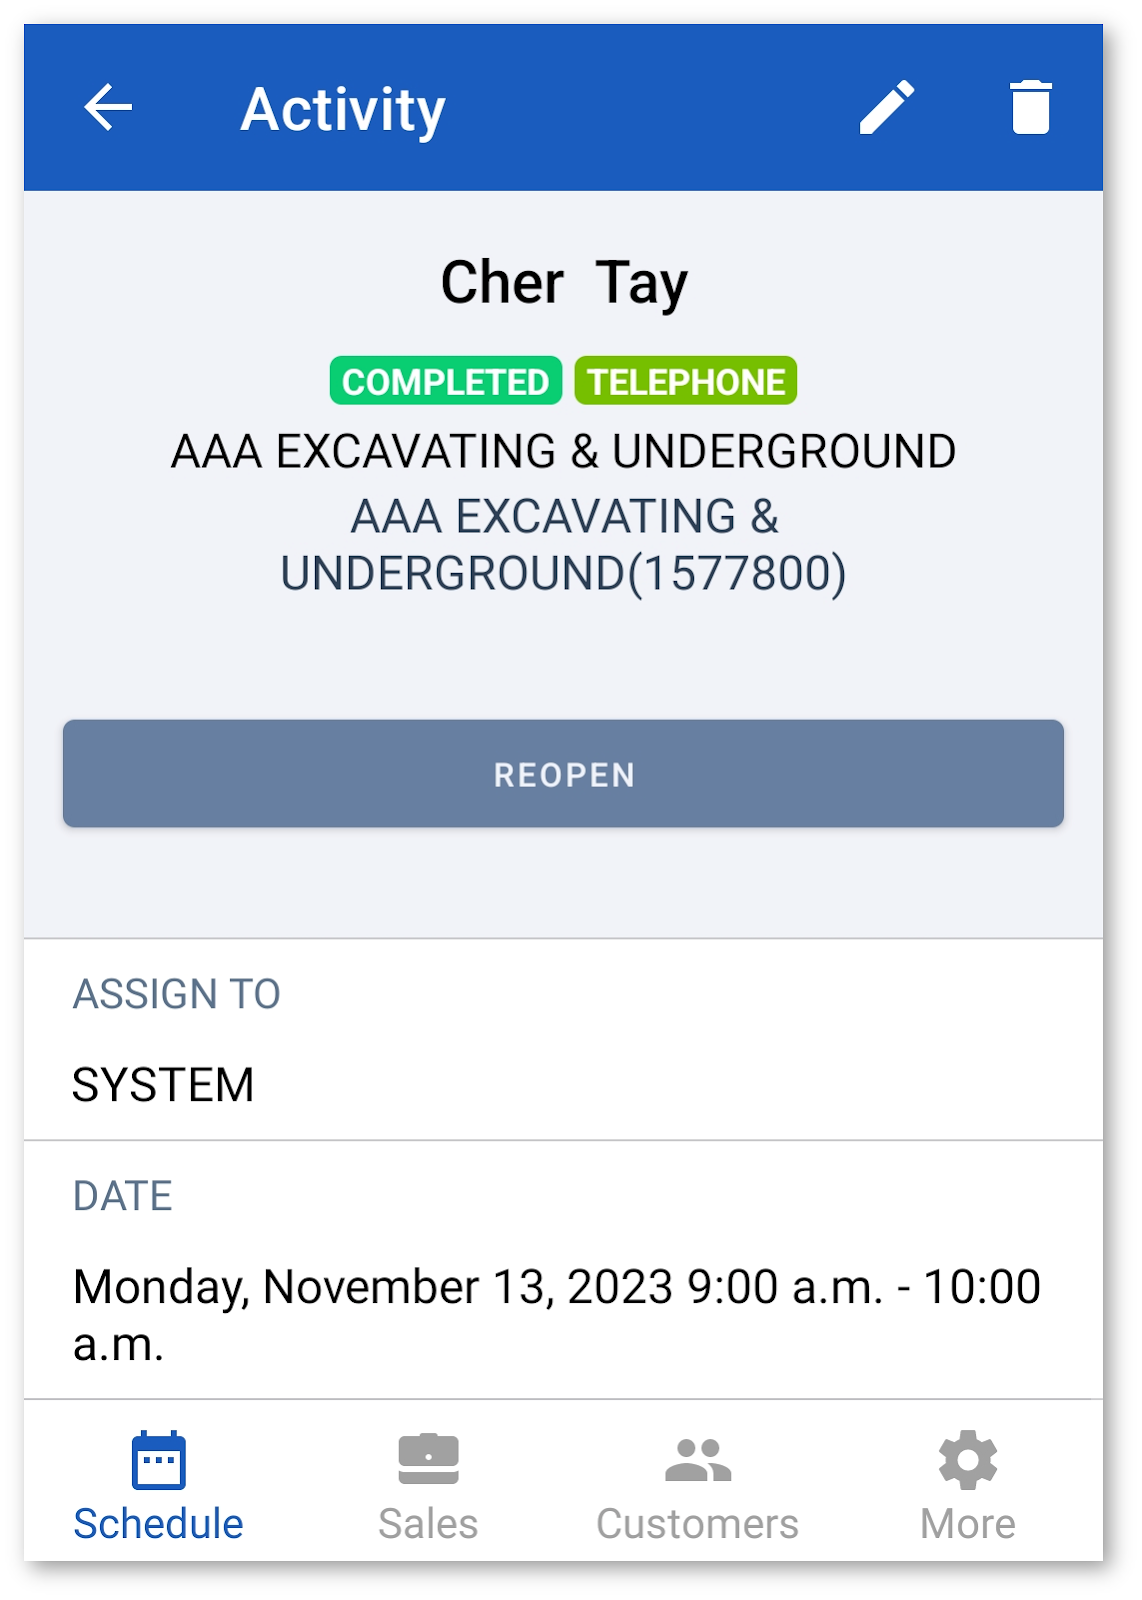
Either tap the [Complete] button once the activity has been completed or tap the [Cancel Activity] button if you’d like to cancel the activity. You also have the option to [Reopen] the activity, if desired.
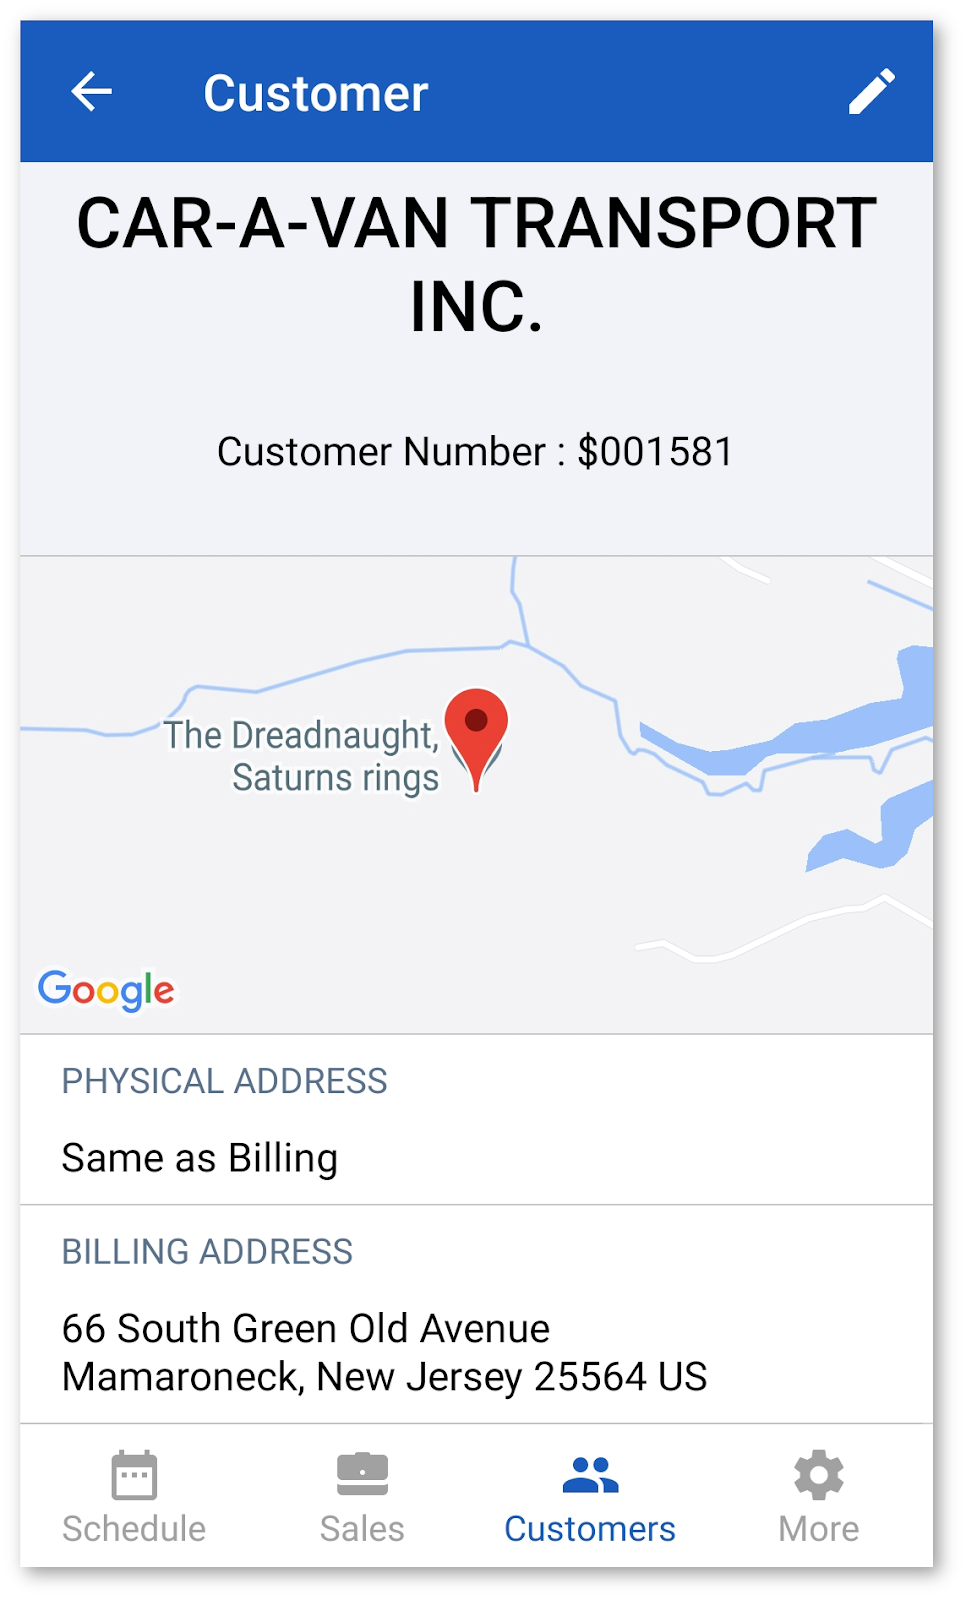
Tap Customer Details to view the Customer Details page.
Tap Related Activities to view any other activities with this Contact and/or Customer.
Tap Related Issues to view any open Issues with this Customer. For more information, see the Issues section.