.png?width=365&height=50&name=Texada%20Logo%20(Black).png)
Introduction
Tap the Customers tab at the bottom of the screen. This tab provides you with the necessary tools to maintain your relationship with your customers. Customers is divided into three sections:
- Customers
- Contacts
- Issues
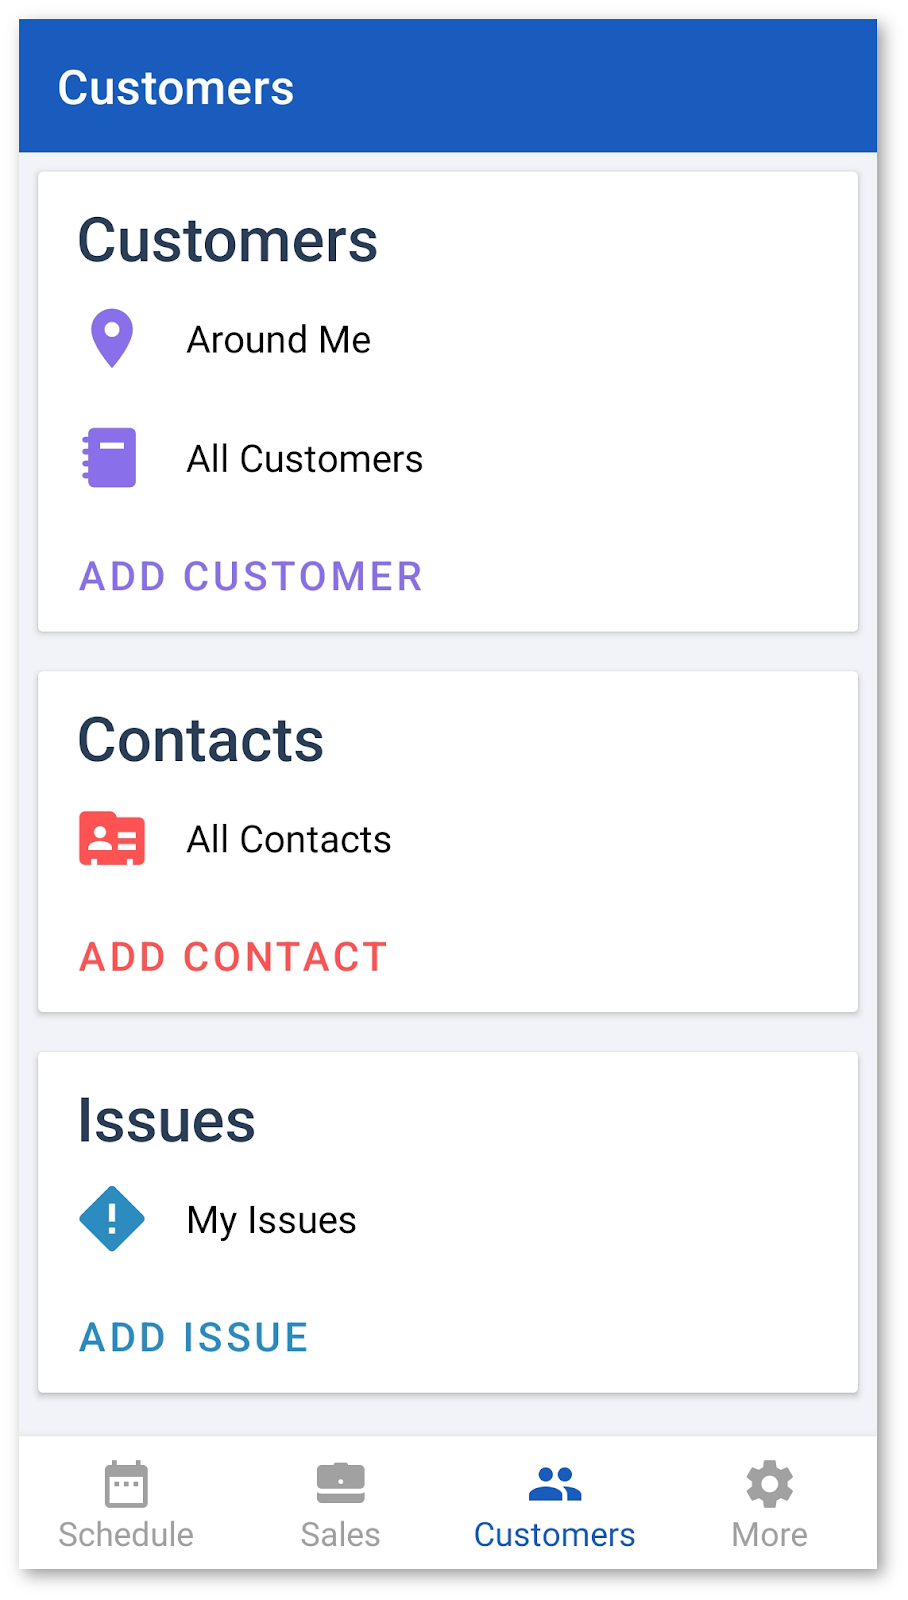
Customers
All Customers
Tap All Customers to view an alphabetical list of all of your customers. Scroll through the list to find a specific customer, or search for them using the Search bar at the top of the screen.
You can also tap the Plus (+) icon at the top right of the Customers list to add a new customer. For more information, see the Add Customer section.
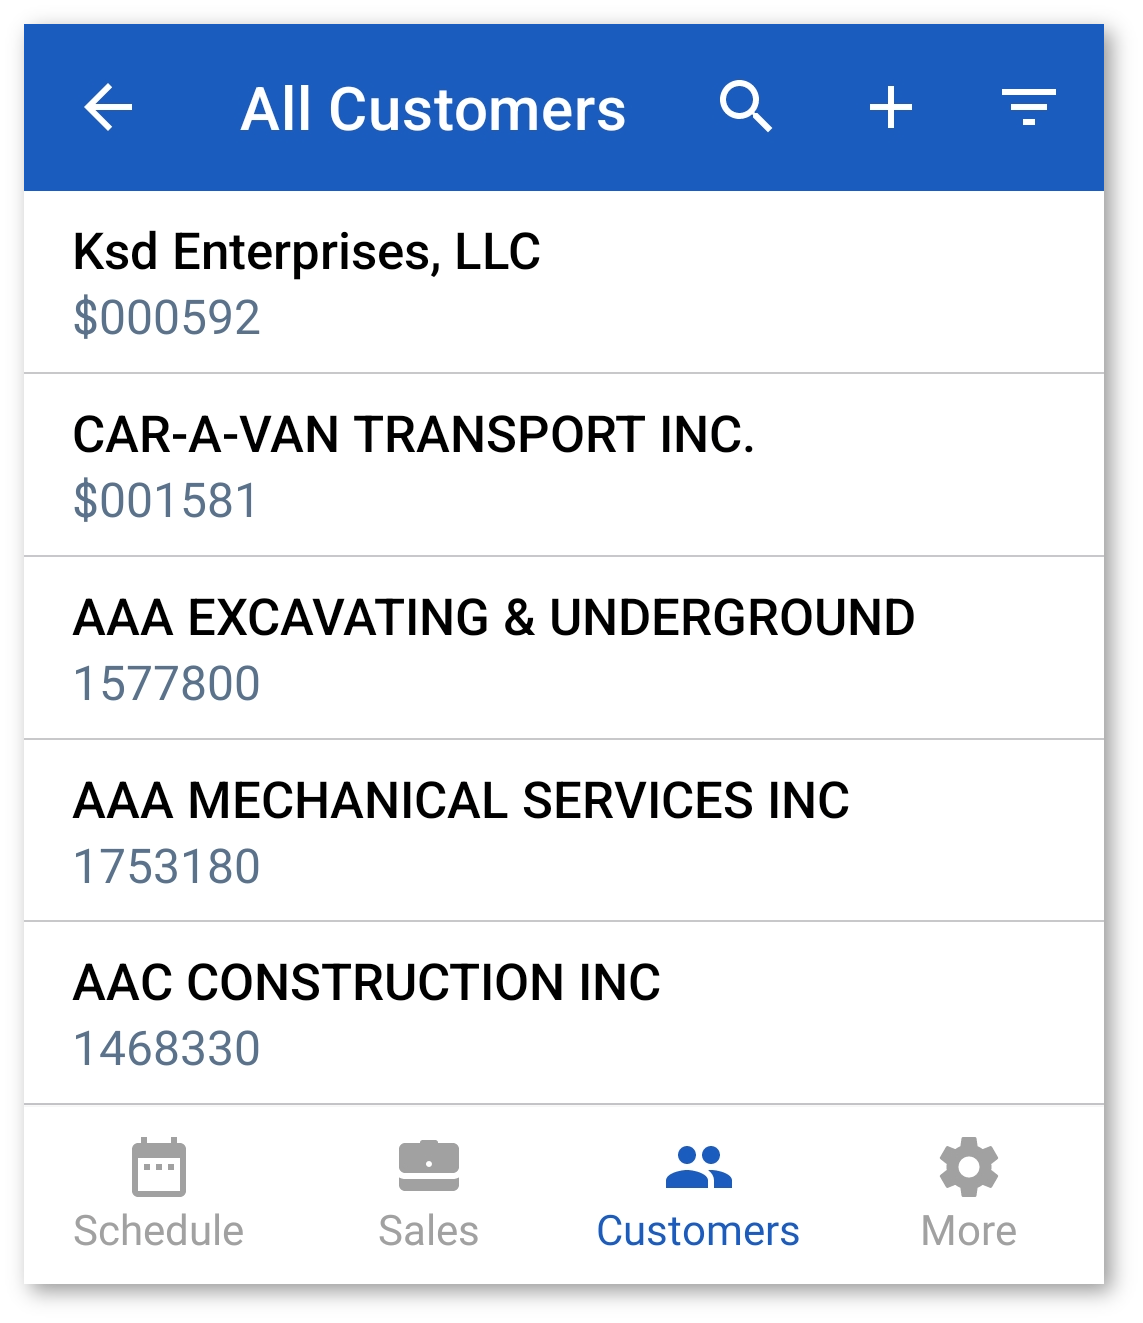
Tap on a customer to display their Customer Details page, which provides you with detailed information about the customer:
- Name
- Customer Number
- Address/Phone
- Location Map
- Divisions
- Overview (Related Activities, Contacts, Leads/Opportunities, etc.)

Add Customer
On the customer list page, tap the [Add Customer] button to add a new customer.
Complete all required fields:
- Type
- Name
- Tax Number (Optional)
- Division
- Phone
- Fax (Optional)
- Branch (Optional)
- Address 1
- Address 2 (Optional)
- Address 3 (Optional)
- City
- Postal/Zip Code (Optional)
- Country
- State/Province (Optional)
- County
- Physical Location
Tap the [Save] button to save the customer.
Contacts
All Contacts
Tap All Contacts to view an alphabetical list of all of your contacts. Scroll through the list to find a specific contact, or search for them using the Search bar at the top of the screen.
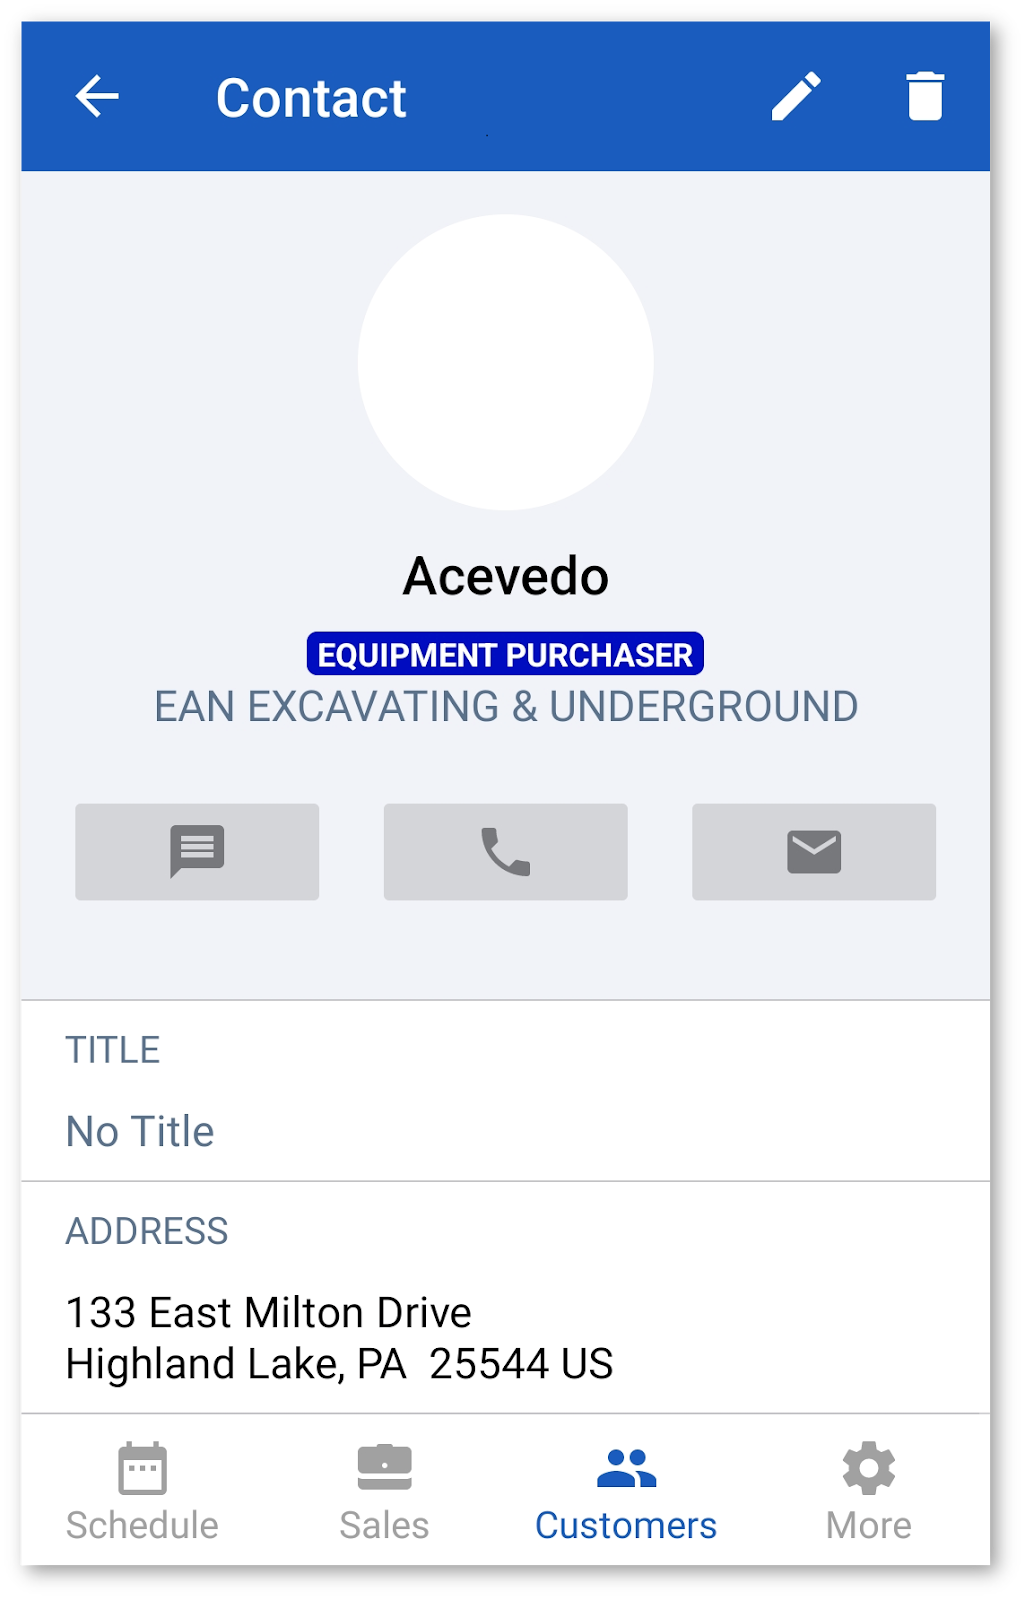
Tap on a contact to display their Contact Details page, which provides you with detailed information about the contact:
- Name
- Company
- Address
- Customer
- Customer Number
- Type
- Division
Tapping one of the buttons under the contact name allows you to Message, Call, or Email the contact.
Tap the three dots at the top right of the screen to Edit or Delete the contact.
You can also tap the Plus (+) icon at the top right of the Contacts list to add a new customer. For more information, see the Add Contact section.
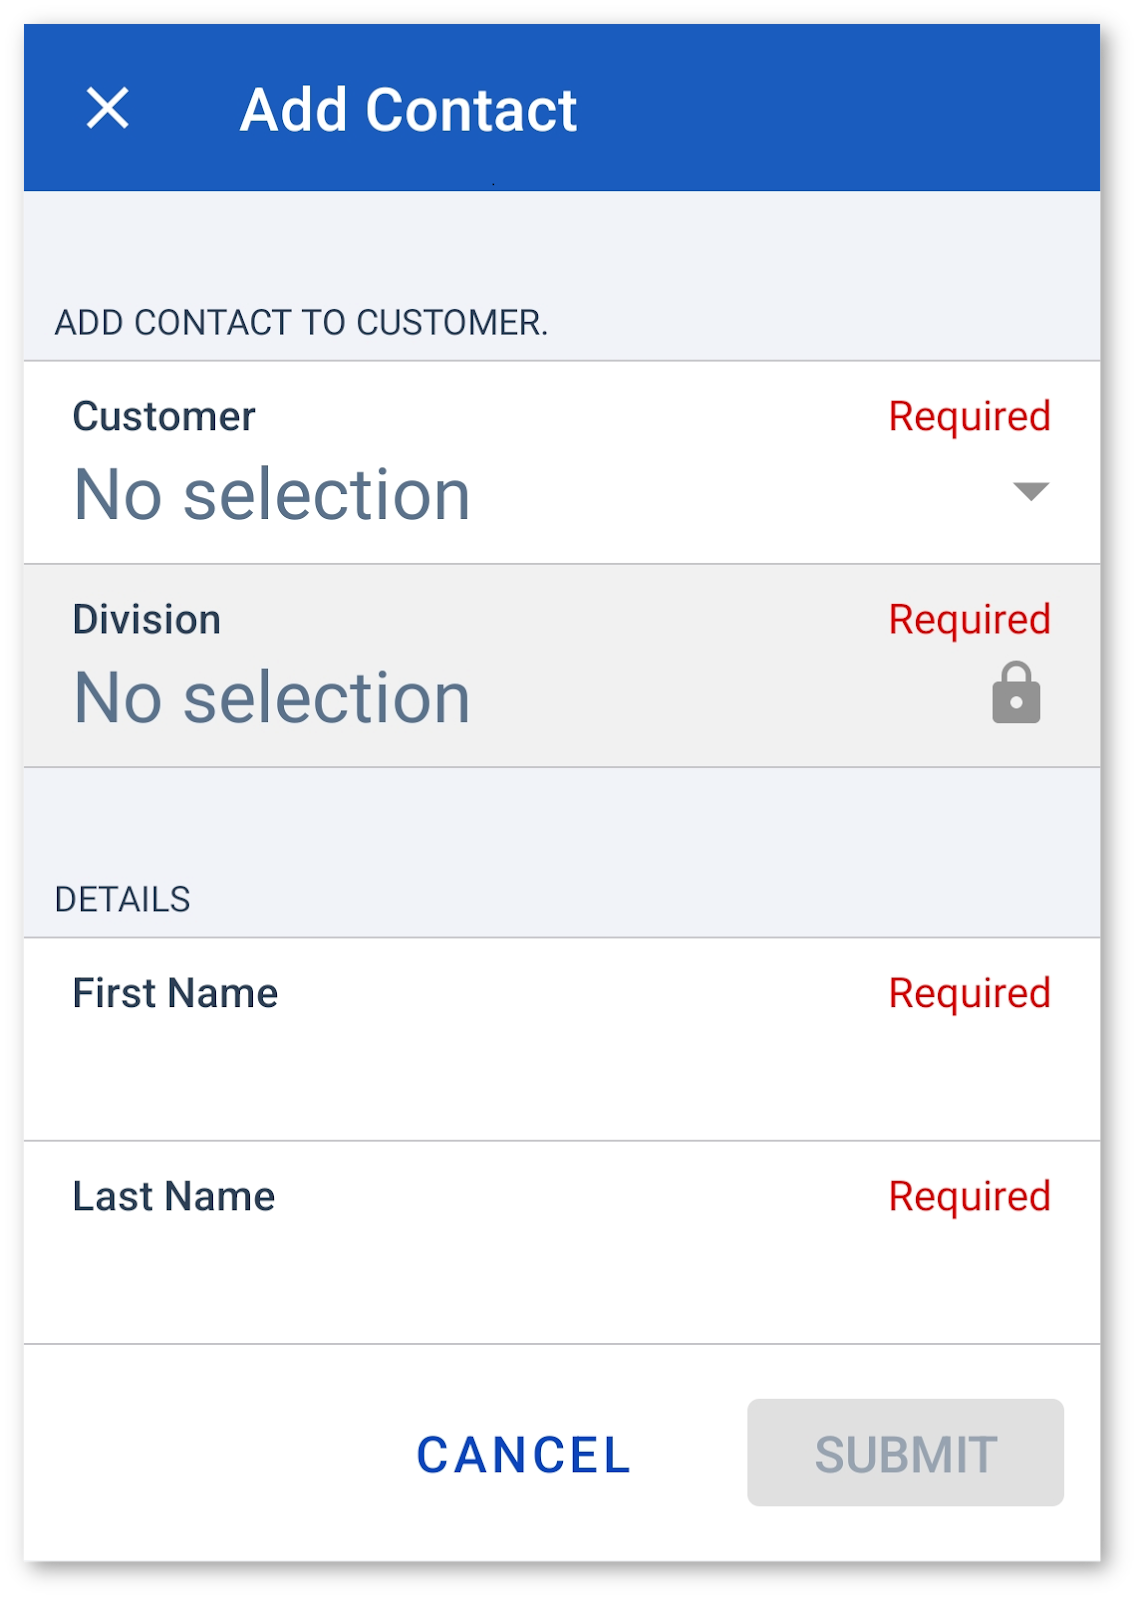
Add Contact
Tap the [Add Contact] button to add a new contact.
Complete all required fields:
- Type (Prospect/Customer)
- Name
- Tax Number
- Division
- Phone
- Fax (Optional)
- Address
- Physical Location
Tap [Submit] to save.
Issues
All Issues
Tap My Issues to display a list of all Open and Resolved issues. Scroll through the list and tap on an issue to view its Issue Details page.
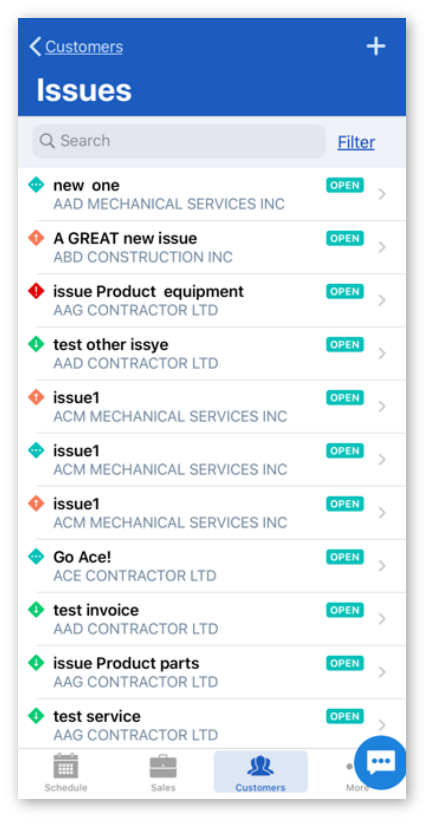
You can also search for a specific issue using the Search bar at the top of the screen or tap the [Filter] button to narrow down your list.
- Select a Type, Status, Start Date, and To Date you want to filter by.
- Tap the [Submit] button to filter the list.
You can add a new issue by tapping the Plus (+) icon at the top right of the screen. For more information, see the Add Issue section.
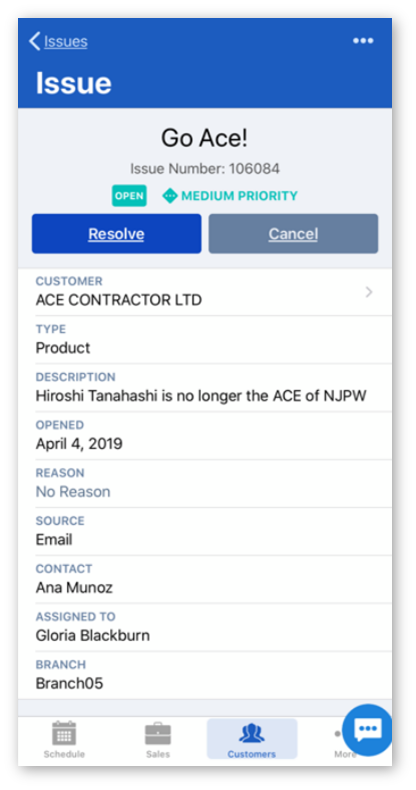
Issue Details
Tap on an issue to view its Issue Details page. The Company Name, Company ID, and Open or Resolved status is displayed at the top. Tap the [Resolve] button if the issue has been resolved, or [Cancel] to delete the issue.
Other details:
- Status
- Subject
- Type
- Opened
- Priority
- Source
- Reason
- Description
- Invoice No.
- Invoice Amount
- Work Order No.
- Dispute Amount
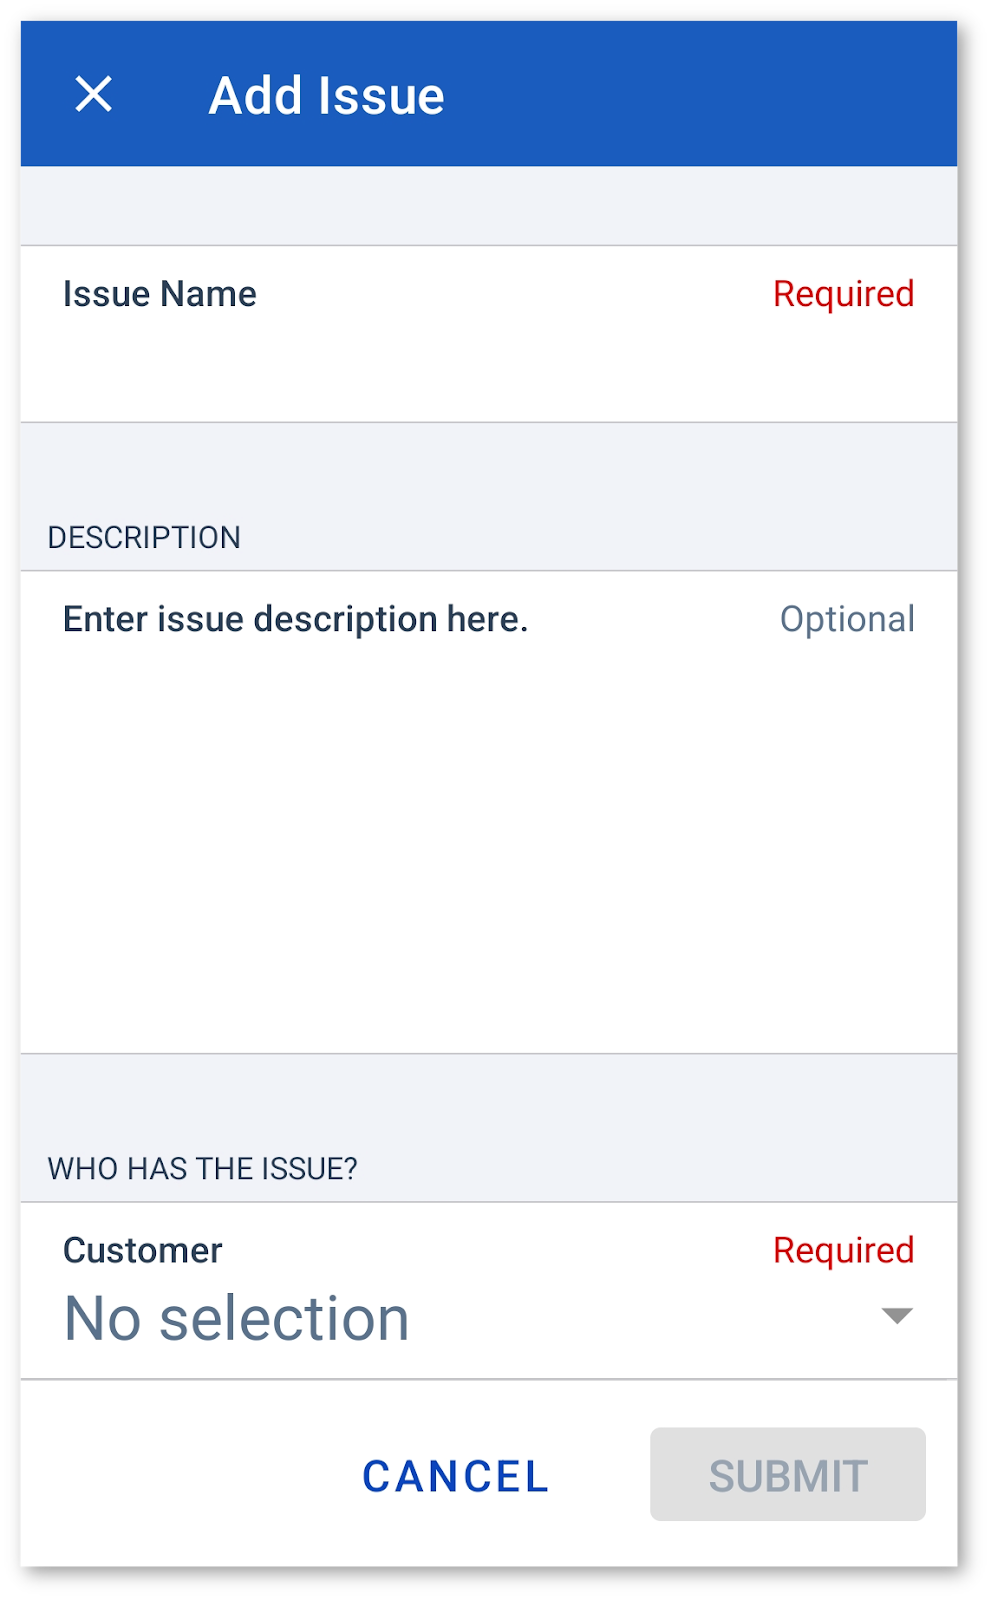
Add Issue
Tap the [Add Issue] button to add a new issue.
Complete all required fields:
- Issue Name
- Description (Optional)
- Customer
- Division
- Contact
- Branch
- Date Opened
- Type (Optional)
- Reason (Optional)
- Priority
- Status
- Source
Tap the [Submit] button to save the issue.