In This Article
Introduction
The following article will detail a method for clearing outstanding balances from Customer accounts in Financials (Classic). Specifically, this fix allows you to clear a debit/credit pair with equal and opposite values (for example, $1285.36 and $-1285.36).
This process involves using the Customer Account Inquiry function to confirm that the Customer has a suitable pair of payments to be cleaned up. Next, the Customer Payments function will be used to debit one payment and credit the other, thus clearing the payments without otherwise affecting the Customer’s account.
Clear Outstanding Balances
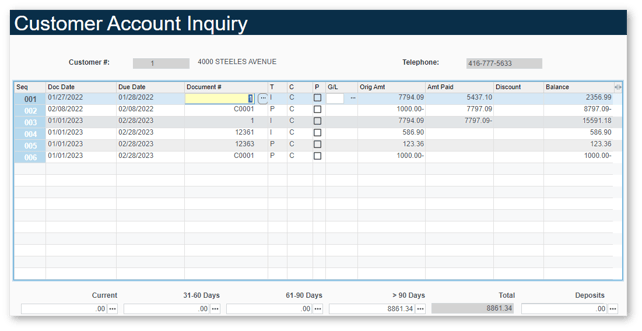
- Log in to Service, Rental, and Financials (Classic) and navigate to Accounts Receivable → Customer Account Inquiry.
- Enter the Customer Number of the Customer you’d like to review and press Enter, then click “Accept” to view the details of their Customer Account.
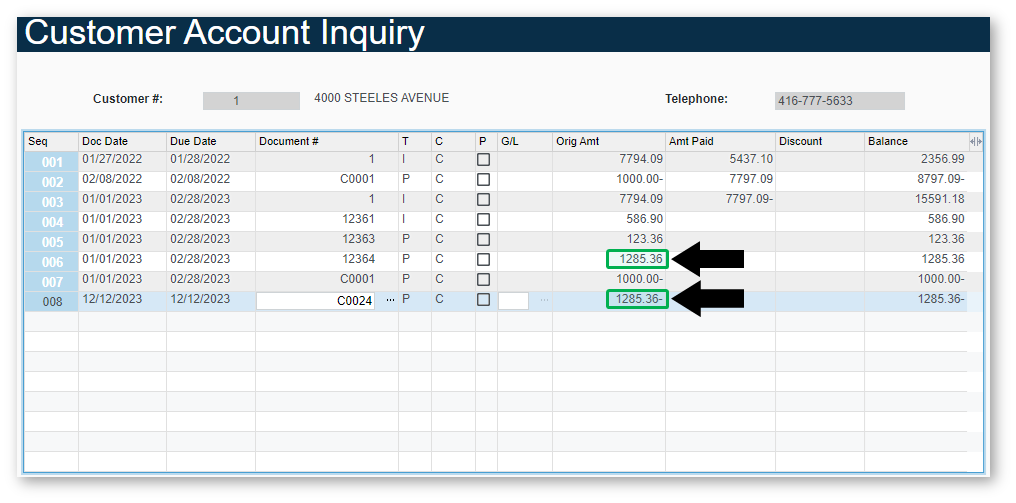
- Look in the “Orig Amt” column for a pair of positive and negative payments for the same amount. By crediting one of these payments and debiting the other, both payments can be resolved and removed from the Customer Account Inquiry report.
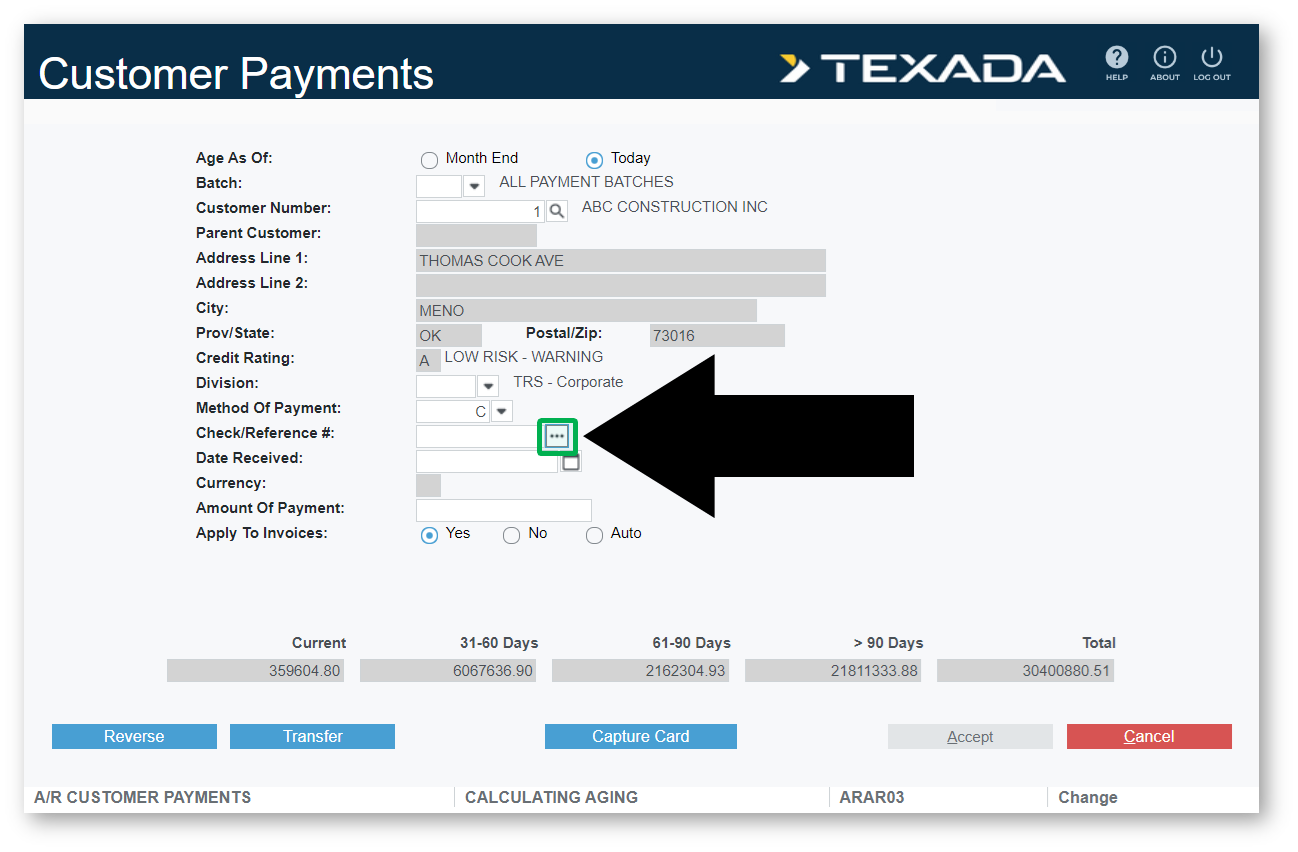
- Navigate to Accounts Receivable → Payments → Customer Payments.
- Enter the Customer Number of the Customer you’d like to manage and press Enter until you reach the Method of Payment field. Select a Method of Payment (“Corrections” is recommended if available for the Customer, but other methods are also acceptable), then click the three dots
next to the Check/Reference # field to open the Payment Search window.
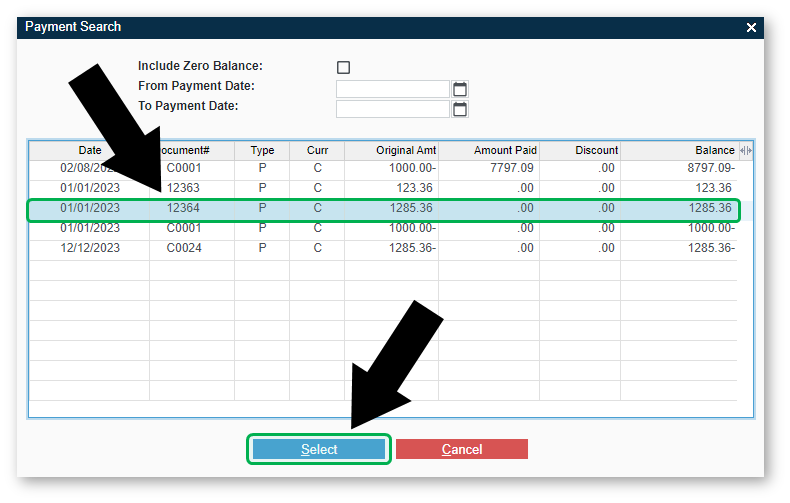
- In the Payment Search window, press Enter three times to view Customer documents that have outstanding balances (positive or negative). Locate one of the documents you found using the Customer Account Inquiry function in step 3 and click on its row to highlight it. Click “Select” to select it and return to the Customer Payments screen.
- Back on the Customer Payments screen, the Check / Reference # and Date Received fields will be automatically populated using information from the document you selected. Press Enter until you advance to the next screen.
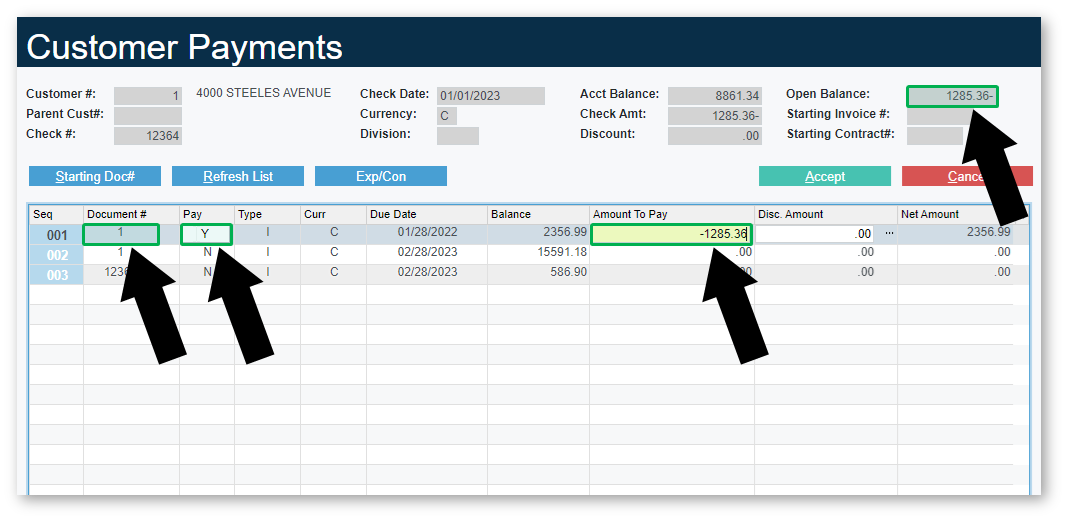
- You will now see a list of documents for the Customer to which a payment can be applied. Pick any of the documents on this screen and make a note of its Document # - you will need to apply both a debit and credit to the same document. Note that this will not affect the actual document, as the debit and credit will cancel each other out.
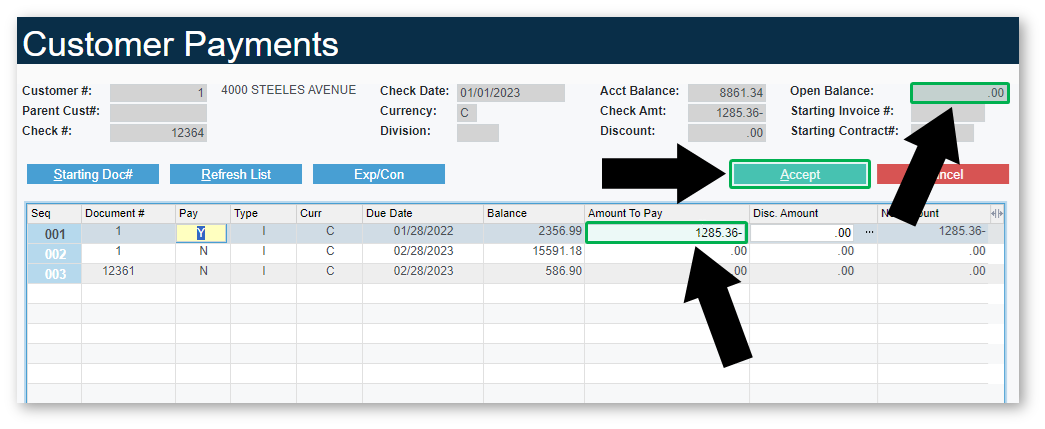
Click on the Pay column for the selected document and enter “Y”, then press Enter. Click on the Amount To Pay column for that document and enter the amount recorded in the Open Balance field in the top-right corner of the window, then press Enter. - Confirm that the amount shown in the Open Balance field is now .00, then click “Accept”.
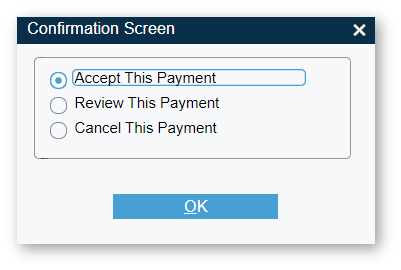
- When the Confirmation Screen window pops up, select “Accept This Payment”, then click “OK”. You will be returned to the Customer Payments screen.
- We will now repeat steps 5-10 with the second outstanding item.
From the Customer Payments screen, Enter the Customer Number of the Customer you’d like to manage and press Enter until you reach the Method of Payment field. Select a Method of Payment, then click the three dots - In the Payment Search window, press Enter three times to view Customer documents that have outstanding balances. This time, locate the second outstanding item whose Original Amt value is the exact opposite of the item you selected in step 6. Click on its row to highlight it, then click “Select” to select it and return to the Customer Payments screen.
- Back on the Customer Payments screen, press Enter until you advance to the next screen.
- You will now see a list of documents for the Customer to which a payment can be applied. Pick the same document that you selected in step 8. Click on the Pay column for this document and enter “Y”, then press Enter. Click on the Amount To Pay column for that document and enter the amount recorded in the Open Balance field in the top-right corner of the window, then press Enter. This value should be the exact opposite of the value you entered in step 8.
Confirm that the amount shown in the Open Balance field is now .00, then click “Accept”.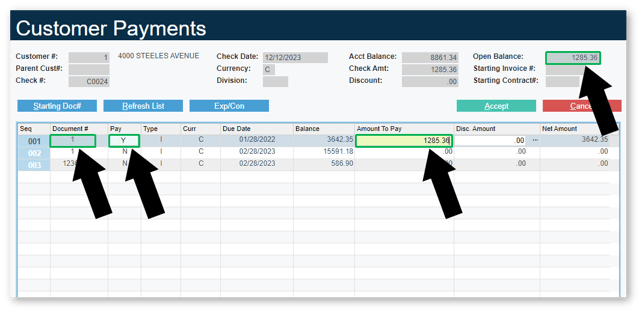
- When the Confirmation Screen window pops up, select “Accept This Payment”, then click “OK”. You will be returned to the Customer Payments screen.
- Exit the Customer Payments screen and return to Accounts Receivable → Customer Account Inquiry. Enter the Customer Number of the Customer you’d like to review and press Enter, then click “Accept” to view the details of their Customer Account. You should now be able to verify that the outstanding balances no longer appear in the report.