.png?width=365&height=50&name=Texada%20Logo%20(Black).png)
Quick Reference
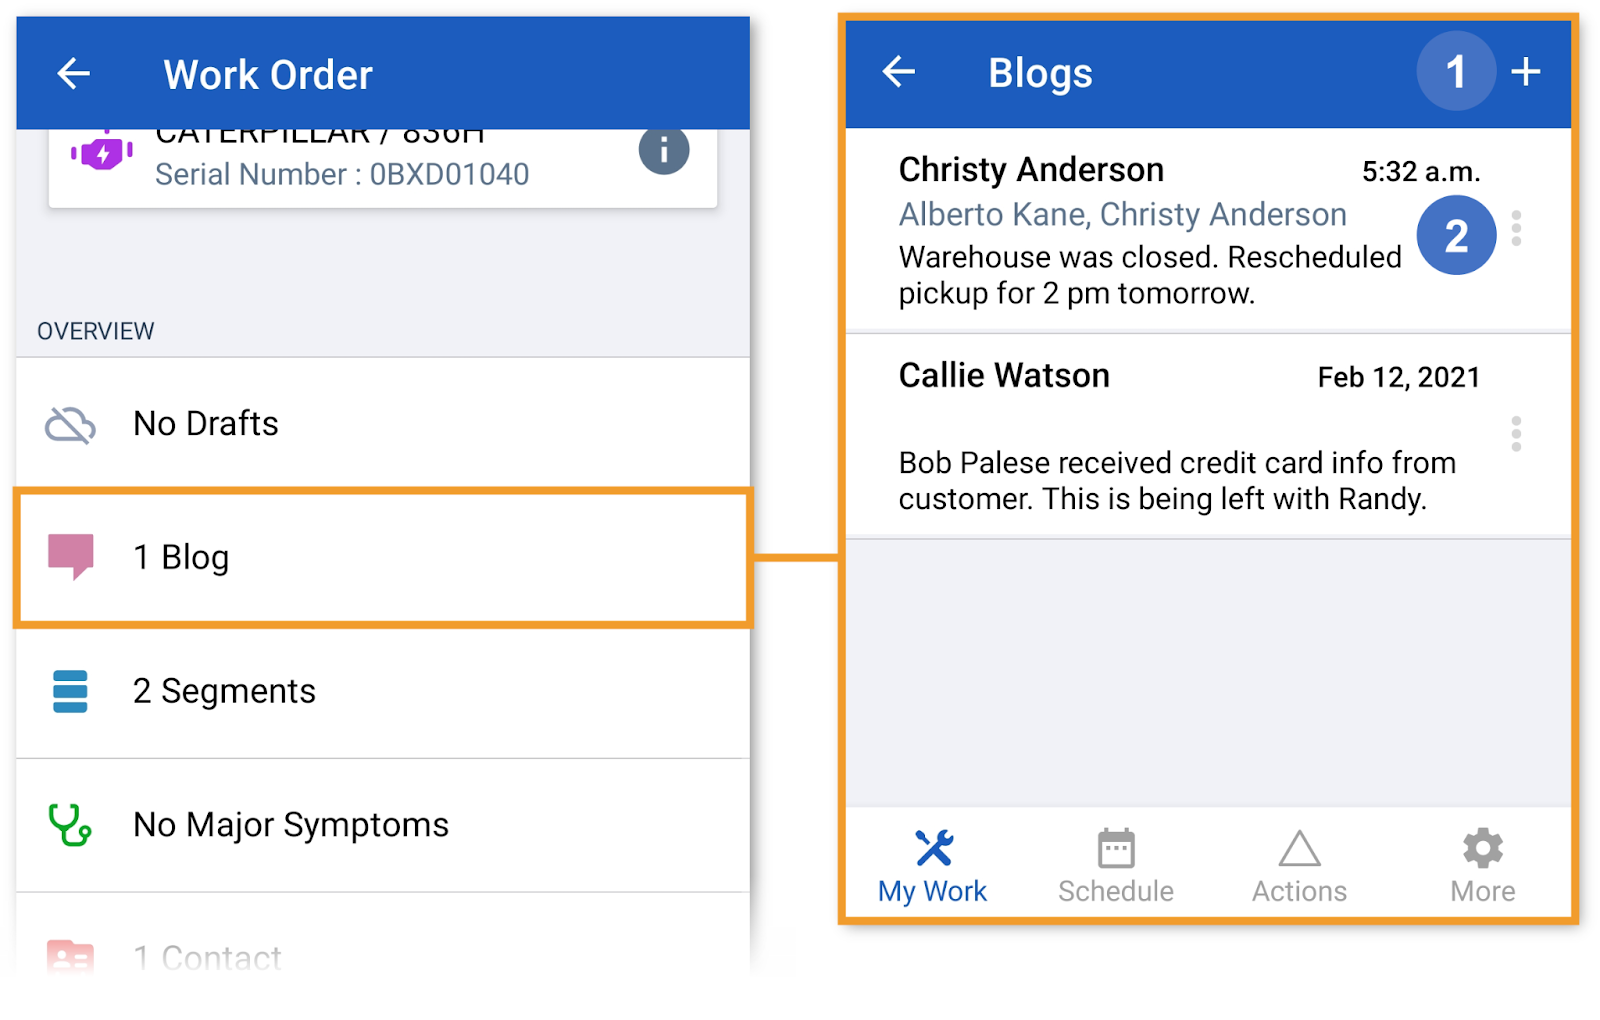
- Work Order blogs provide a way for CloudLink users to communicate internally on a specific Work Order. To reach the Blogs screen, navigate to the details page of the Work Order you’d like to edit, then tap “Blogs” under the “Overview” section.
- Tap the plus icon
 in the top-right corner of the Blogs screen to create a new blog. Tap on an existing blog, then tap “Edit” to edit it.
 - While editing a blog, tap the “Send To” field to open a list of users and select which users should receive it.
Introduction
Work Order blogs provide a way for CloudLink users to communicate internally on a specific Work Order.
To view and manage blogs for a Work Order, navigate to its details page, then tap “Blogs” under the “Overview” section.
Blogs
- Add Blog
Tap to create a new blog. See “Edit Blog” for more information. - Blog
Tap on an existing blog to see additional options:- Edit: Edit the contents of the blog or the user(s) to which it is sent. See “Edit Blog” for more information.
- Delete: This will permanently delete the blog from the Work Order.
Edit Blog
Tap the plus icon ![]() in the top-right corner of the Blogs screen to create a new blog. Tap on an existing blog, then tap “Edit” to edit it.
in the top-right corner of the Blogs screen to create a new blog. Tap on an existing blog, then tap “Edit” to edit it.
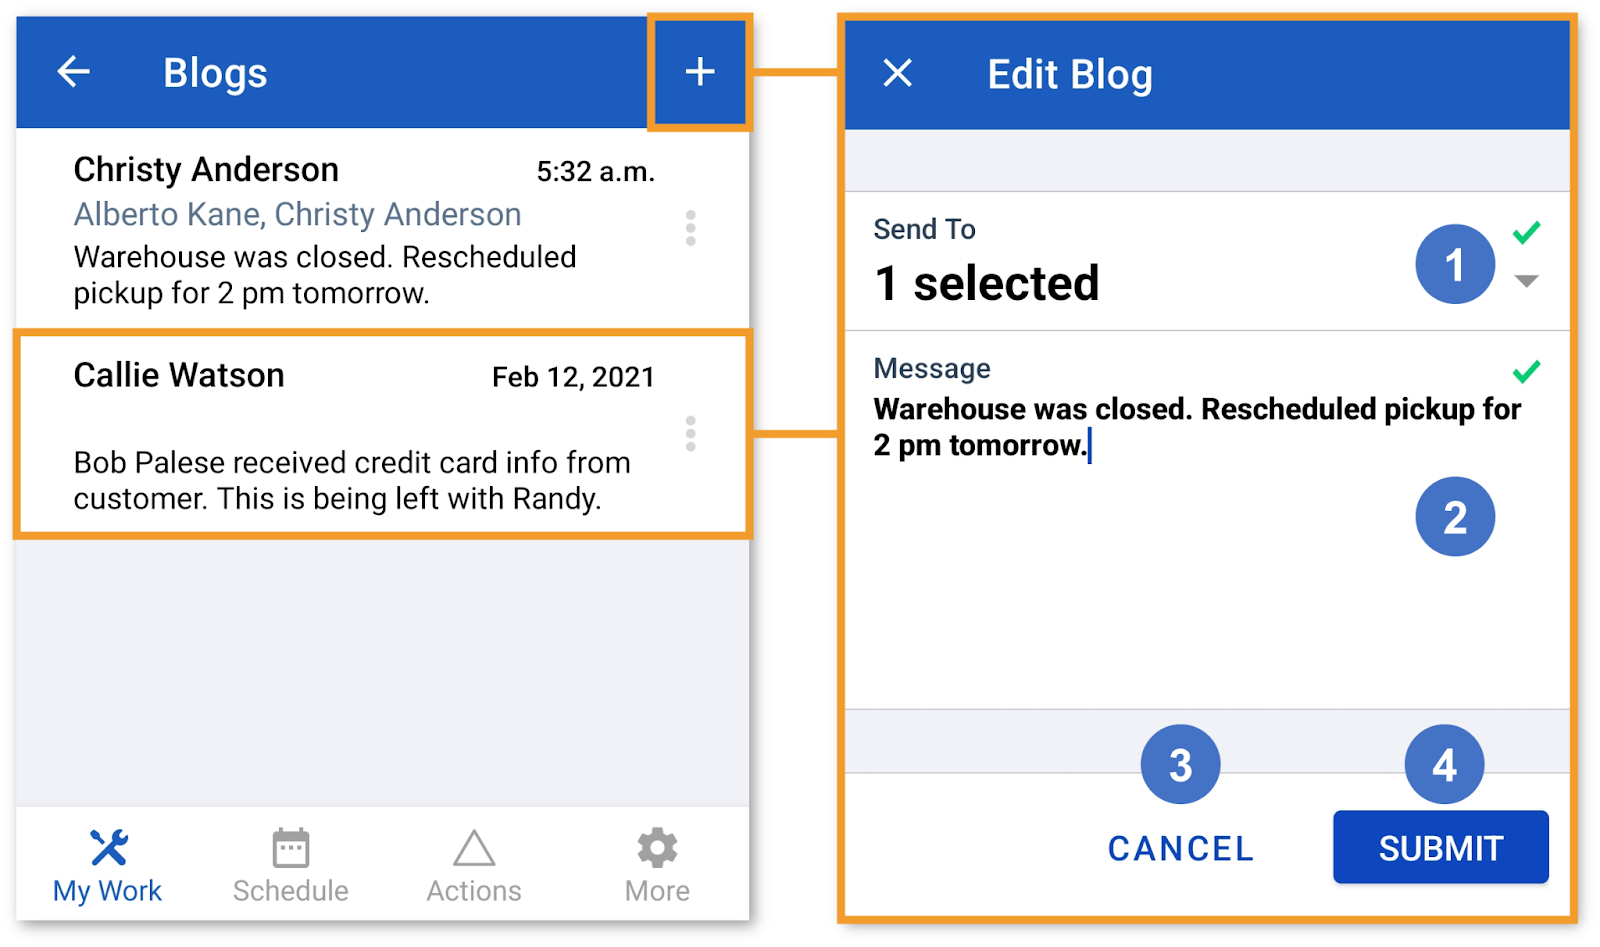
- Send To
The user or users to which the blog will be sent. Tap to open a list of users, then select as many recipients as desired. Tap the search iconin the top-right corner of the screen to search for a specific user. Once you are finished, tap the back arrow
to return to the Edit Blog screen.
- Message
The contents of the blog. Tap to edit. - Cancel Button
Tap to return to the Blogs screen without saving your changes. - Submit Button
Tap to save your changes and return to the Blogs screen.