
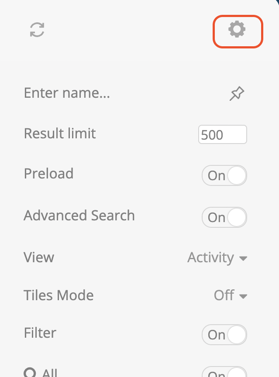
Click the gear icon at the top right of the page to configure the search settings that determine how your search looks and functions.
In Settings, these options are generally left on:
- Filter
- Search All
- Add
- Actions (Dynamic status)
- Refresh
Always start by naming your search. Then, you can configure it to meet your needs. Here’s a quick review of each option.
Name Your Search
To save your search, enter a name in the right-hand sidebar, and click save.

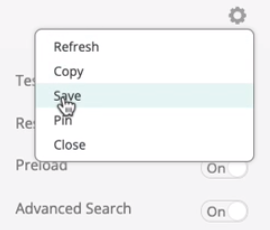
Remember, if you want easy access to this search all the time, you can click the pin icon. This pins it to the tab bar at the top of the page.
Saved searches display the full name as well as the icon in the tab.
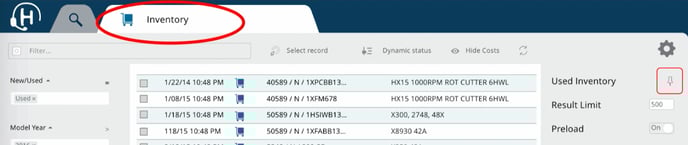
Result Limit
- The default limit is 500.
- You can set that number higher or lower, but the higher the number, the longer it will take to load. We recommend keeping the result limit below 5,000.

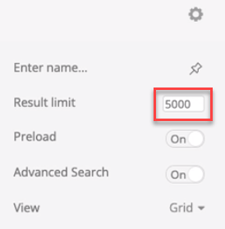
Preload
- On: The saved search will preload when you start Handle.
- Off: The saved search will only populate when you open it. You will need to click the refresh button to update the search when you open it
Advanced Search
- On: The advanced search filter on the left of the page remains visible.
- Off: The advanced search filter disappears and isn’t visible when you share the search with others.
View
Hover over View, and you’ll see a dropdown with six options.
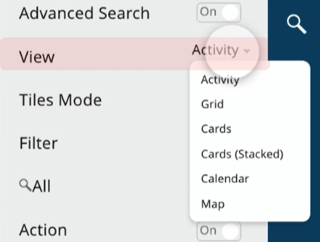
1. Activity (default View)
Organizes the search based on the most recent action.
2. Grid (Most Popular View)
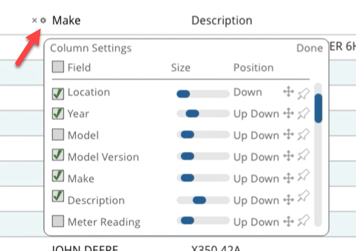
Gives you control over how to view and organize your search. In this view, if you hover over any category title, you’ll see an X icon and a gear icon.
X icon: Removes that category from View
Gear icon: Lets you customize the column settings (categories) that are displayed in the grid and how much space they have, arrange their order, and pin them to the search.
Columns are predetermined by the data points or fields that are inside of the record.
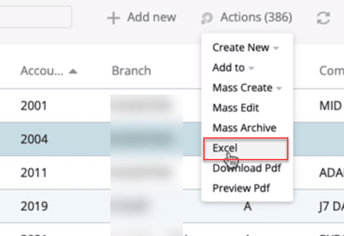
Actions: Hovering over “Actions” will open a dropdown menu of options available depending on permissions for that user.
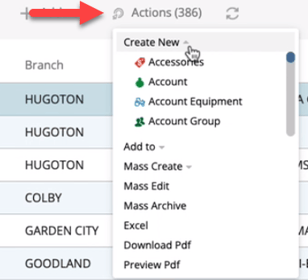
Grid view is the only view that includes the action for exporting data to an Excel spreadsheet.
Quick Entry icon: When you hover over the name or description of any item or near the checkbox, a popup opens, displaying the entire description field and allowing you to add notes. (This is not available for inventory items.)

In the Quick Entry box, you can:
- +Add New: Add new related activity by selecting from the dropdown menu
- Open in Agent: Allows you to edit without leaving the screen
- Open New Tab: Makes the comment full-screen
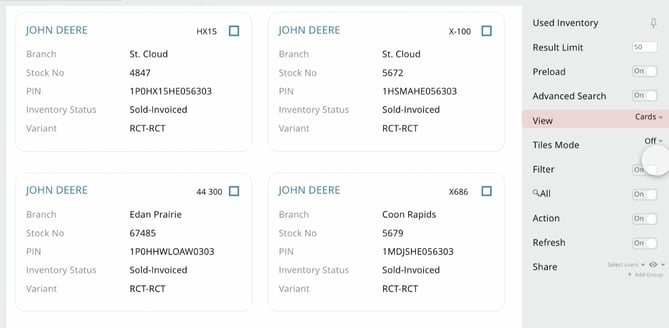
3. Cards
This allows you to view records as cards rather than a list.
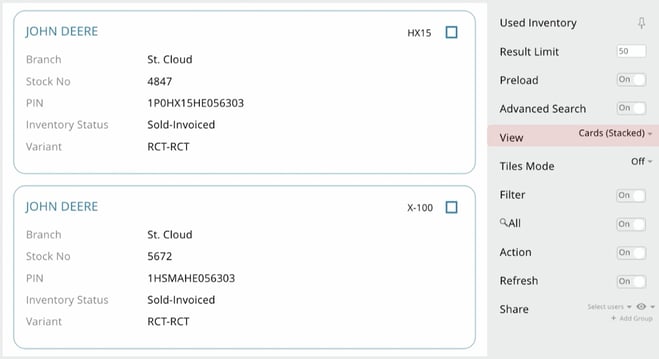
4. Cards (stacked)
This view is best for mobile device view because the cards are arranged in a single column.
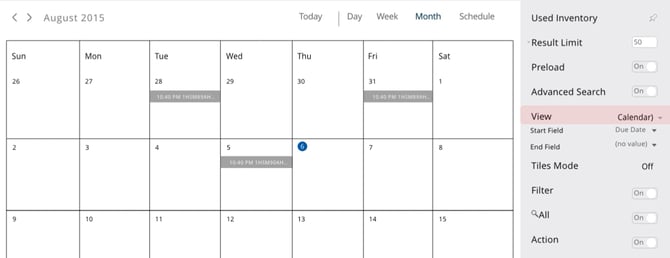
5. Calendar
This view is helpful for viewing tasks or sales calls and can be customized to show date ranges, last payment dates, due dates, contact dates, etc.
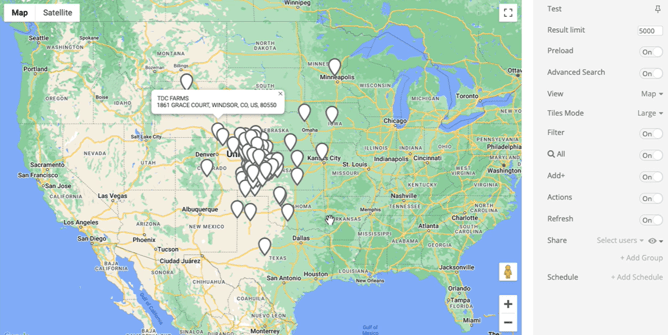
6. Map
So long as Handle has an address or GPS coordinates associated with the account.
Tiles
Tiles are windows into the Handle database that allow for quick and easy visibility. The default for tiles is to show a count of items that fit the search or filter criteria.
In settings, you can configure the way tiles appear.

- Small: Makes it easier to view more tiles at once but has limited editing functionality.
- Large: Gives you more editing functionality.
Share
The Share option (at the bottom of Settings) lets you choose who you want to share the search with and select permissions for them.
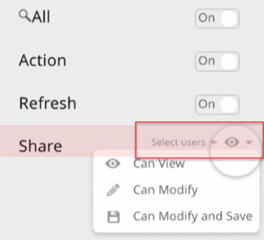
- Click “Select Users” to choose the people or groups you want to share the search with.
- Click the eye icon to allow these people to view only, modify the list, or modify and save.