Once a user is created, you can modify the user account as needed. In this section, you’ll find instructions for the most common modifications dealers need to make.
Make a User an Administrator
Each Dealer has at least one Admin to maintain their users. Additional users can be granted Admin access through the following process.
Currently, users cannot edit this permission — only Handle Support. Contact Texada support with a list of users you want to grant admin access to. Here’s how Handle will enable the permission:
- Access the Dealer’s Admin menu while signed in as an Admin.
- Go to the user who needs this permission.
- Go to the ‘Security’ Tab.
- Toggle the ‘Admin’ checkbox.
Update the Email Address on an Existing User (Account vs. LoginID)
If you update the email address on an existing user, this new email address will become the user’s Handle 2.0 username.
Updating an email address does not update the LoginID value. If this needs to be updated, contact Handle support.
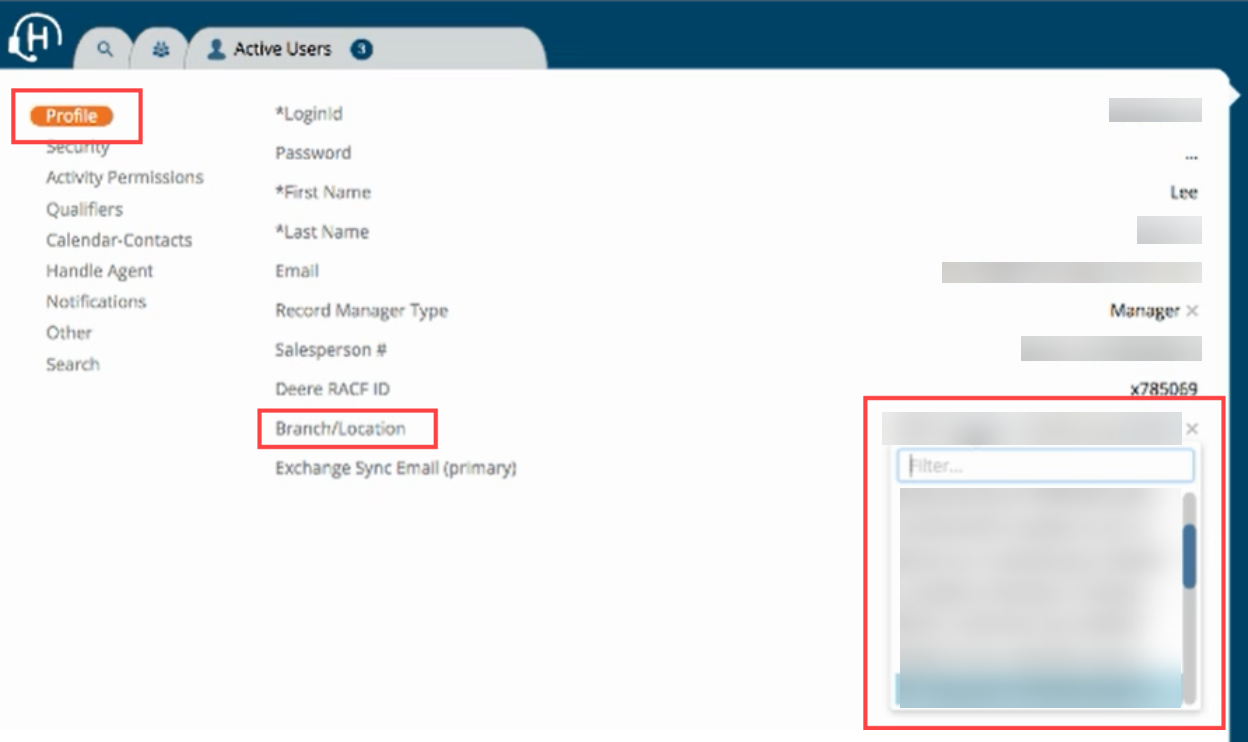
Assign/Change a User’s Branch/Location
To assign or change a user’s branch or location, you must be logged into the Admin view, not the CRM view.
- Search for the user and select their file.
- Go to the Profile tab in the sidebar.
- Here, you can see the branch/location they’ve been assigned to.
- Click the location to open a dropdown listing all branches/locations.
- Begin typing in the appropriate location or scroll through the options.
- Select the branch/location you want to assign to that user.
- Save.
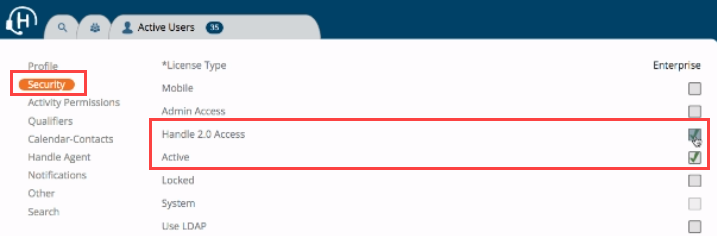
Deactivate, Reactivate, or Delete Users
To deactivate a user, you must be in the Admin view, not the CRM view. If your saved search is only set to include active users, adjust it to include inactive users as well.

Deactivate or Reactivate a User
- Locate the user.
- Go to the Active User tab.
- In the filter search box, type the first and last name of the user you want to deactivate.
- When the user appears in the search results, click on it to open their file.
- Select “Security” in the sidebar.
- Deactivate or reactivate:
- To deactivate, uncheck “Handle 2.0 Access” and “Active.”
- To activate, check “Handle 2.0 Access” and “Active.”
- Save
Deleting vs. Deactivating Users
For data integrity, there is no option to delete user accounts within Handle. But you can deactivate a user using the steps above.
When the user is marked inactive, they will be removed from salesperson/owner search options and will no longer have access to Handle.
Find Accounts Where the Record Manager Is an Inactive User
As mentioned above, if one of your record managers has been deactivated, they are no longer searchable in an Active User search. To find the accounts that had been assigned to them, you have two options: temporarily re-enable them, or search and filter to find those accounts.
Solution 1: Temporarily re-enable the user
- Go to the admin menu and pull up the account of the inactive user.
- Temporarily re-enable the account as an enterprise user.
- Search the user you just re-enabled in the account search and make the needed changes.
- Deactivate the user in question.
Solution 2: Search & filter
- Create an account search.
- In the advance search select record manager. Set the parameters to != and select all of the users on the list.
- This will provide a list of all accounts that have no assigned record manager or belong to inactive users.
- Use the search bar to filter further by searching for the name of the inactive user.
- Select the records in question and use the mass edit feature to complete the changes.
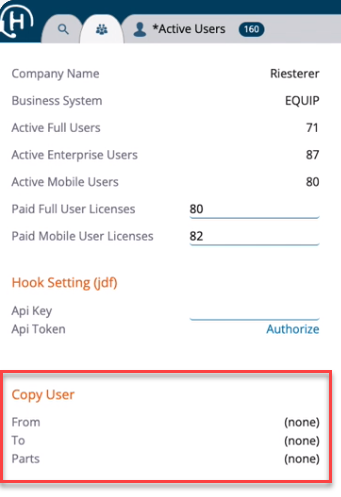
Copy the User Configuration from One Handle User to Another
While searches will still need to be shared and pinned, a new user setup can be streamlined by copying the base permissions from one user to another. Be aware, Security and Profile settings aren’t transferable since they are highly customizable for each user.
You must be in “Admin” rather than the “CRM” to perform this function, and the new user must have already been created.
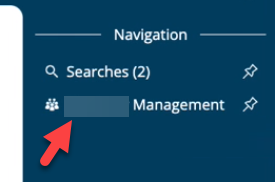
- Go to the primary management page by clicking “Management” at the top of the right-hand sidebar. From here, you can use the “Copy User” function.
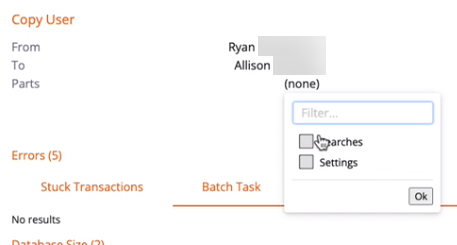
- Click (none) to open a dropdown with the names of users.
- From: Select the user with the permissions you want to copy.
- To: Select the user you want to apply those permissions to.
- Parts: Check whether you want to copy Searches or Settings.
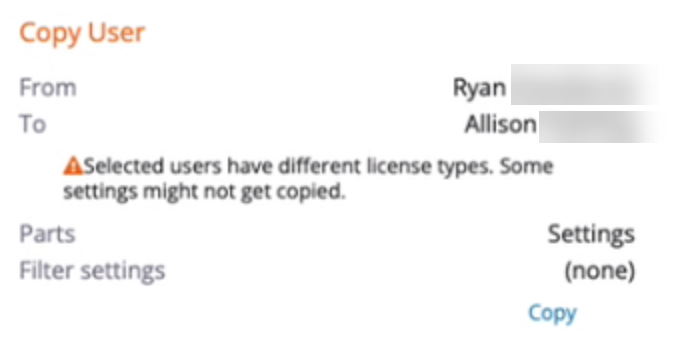
- If you see an error message that the users have different license types, it means that one user is a full user while the other is an enterprise user. Because of this, not all settings can be applied to the new user.
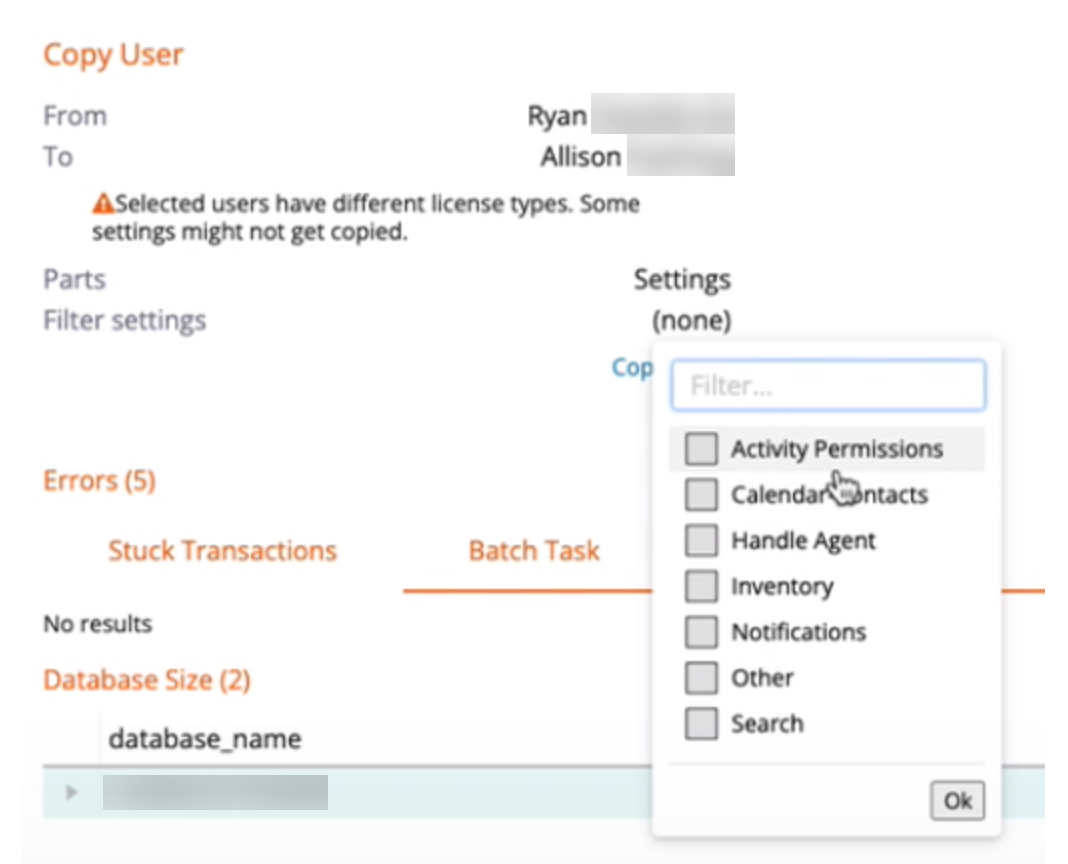
To resolve this issue, you must filter the settings that can be copied. Click (none) beside “Filter settings.” Then select the specific features you want to copy. - Click “Copy,” and the system will copy your specified permissions and settings from the first user to the other.
Update or Change Default User Settings
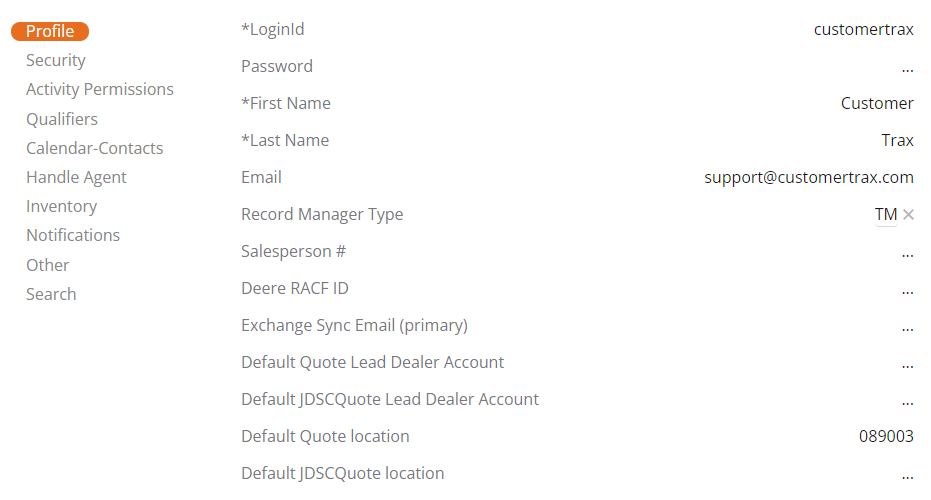
Handle CRM has a default user called CustomerTrax that is used to set default user settings. All newly created users will be given the same permissions as this user.

To streamline the creation of new users, modify the user CustomerTrax to have the minimum permissions you want to be shared by all users.
Only Handle Account Managers have the ability to make these changes. To update the defaults for all users, please contact Handle directly with the changes you want to make to your default settings.