Common Problems and Questions
Do I always have to open an item in a new tab, or in the Agent in order to see more details and add actions?
Handle’s Solution
With the Quick Entry function you can see the full details field, add actions, and launch the Agent without leaving the screen you are on.
Using Quick Entry
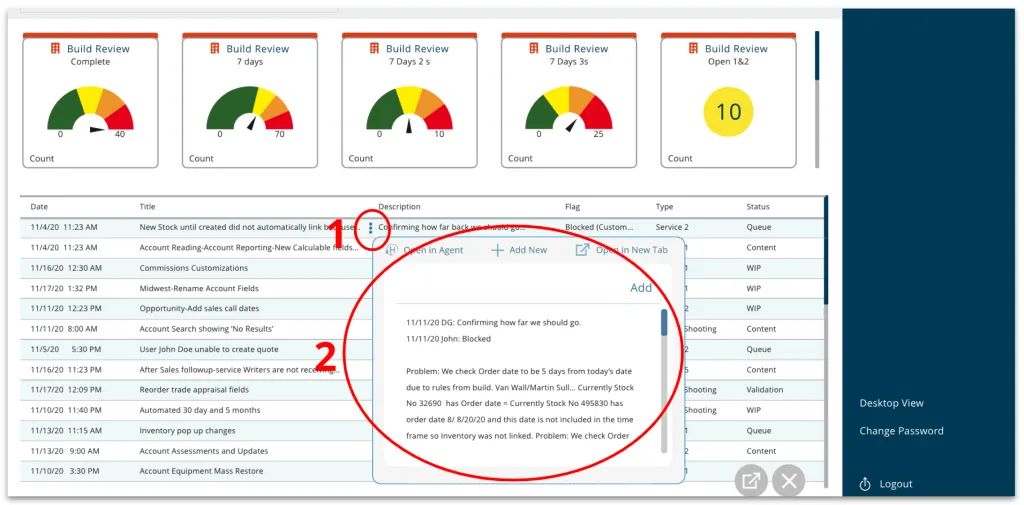
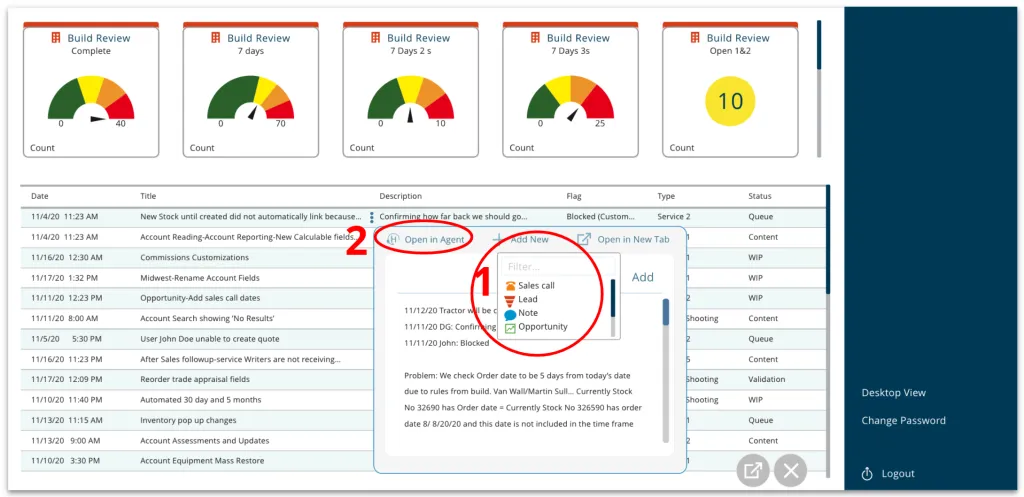
Next to the title or description of any item in Handle, you will find the Quick Entry Tool (1). Hovering over the three dot icon, opens the Quick Entry window (2).
Here you can see and scroll through the entire description field.
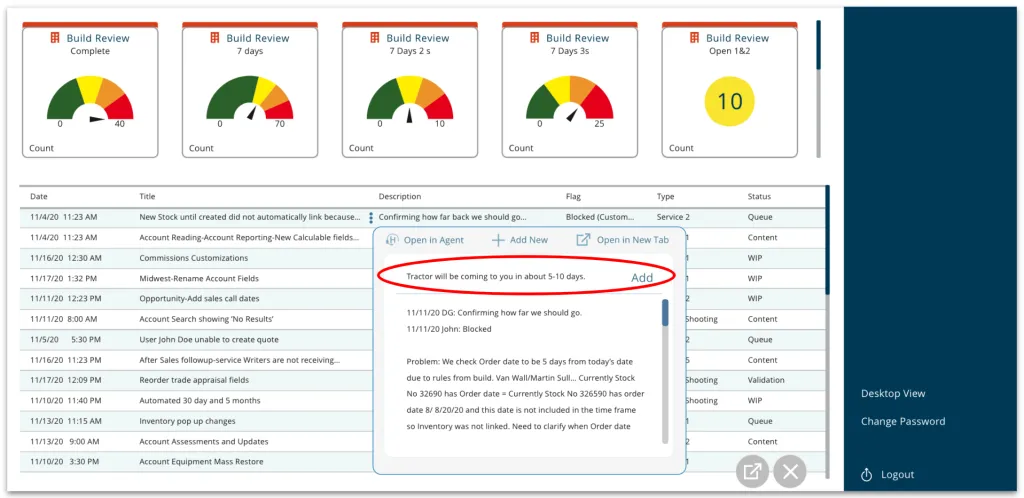
Adding to the Description
You can quickly add a note to the item.
Adding a New Action to the Item
To add a new action, like a sales call, note, opportunity… click on Add New (1), and select from the menu of options.
You can also open the Agent right from the Quick Entry window (2).
The Agent
When you open the Agent from the Quick Entry window, it will automatically load the item you’ve been looking at.