
To use OAuth authentication, an application must have an application ID issued by Azure Active Directory. You need to register a new application as a public client with Azure Active Directory. Then provide us with the newly created application’s:
- Application ID
- Tenant ID
- Client Secret
Steps for using the Microsoft Azure portal to prepare for Handle Exchange sync
1) Go to the Microsoft Azure portal
Open a browser and navigate to the Microsoft Azure portal https://aad.portal.azure.com and login using Microsoft Account.
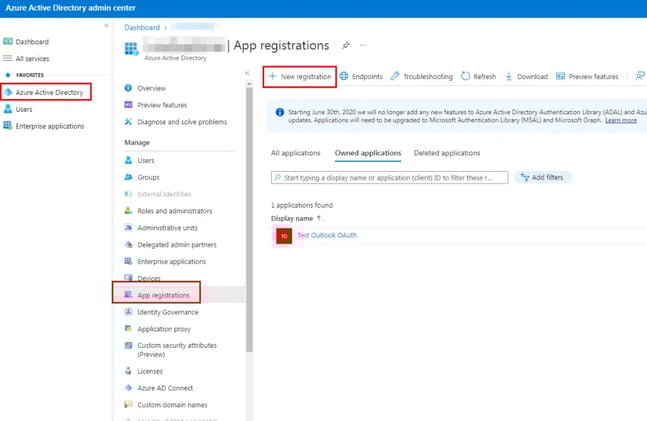
2) Navigate to create a new app registrations
Select Azure Active Directory in the left-hand navigation, then select App registrations under Manage.
Select New registration.
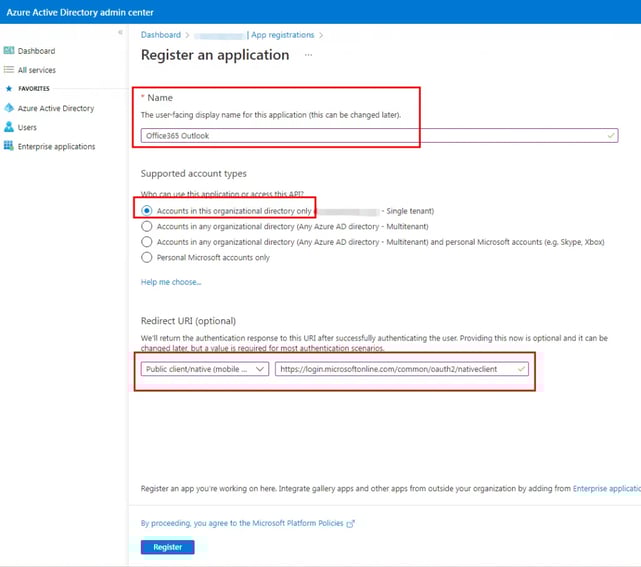
3) Register an application” page, set the values as follows.
On the “Register an application” page, set the values as follows:
- Set Name to a friendly name for your app.
- Set Supported account types to the choice that makes sense for your scenario.
- For Redirect URI, change the dropdown to Public client (mobile & desktop) and set the value to https://login.microsoftonline.com/common/oauth2/nativeclient
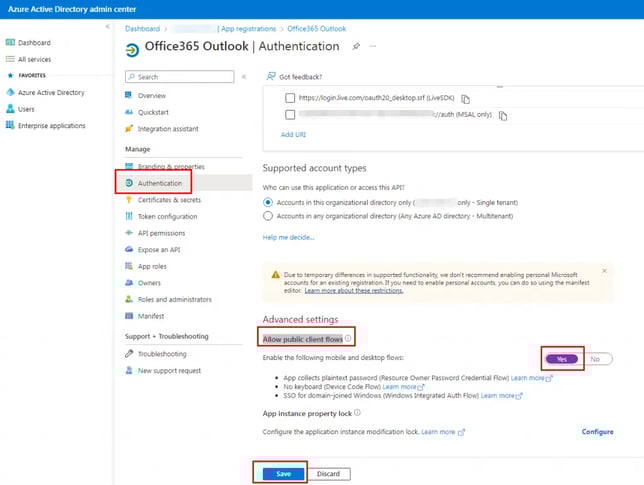
4) Configure for public client flows
After registration, select Authentication in the left-hand navigation under Manage and set Yes for Allow public client flows and Save configuration.
5) Update the Manifest
Select Manifest in the left-hand navigation under Manage. Locate the requiredResourceAccess property in the manifest, and add the following inside the square brackets [ ]:
{
    "resourceAppId": "00000002-0000-0ff1-ce00-000000000000",
    "resourceAccess": [
        {
            "id": "dc890d15-9560-4a4c-9b7f-a736ec74ec40",
            "type": "Role"
        }
    ]
},
Select Save.

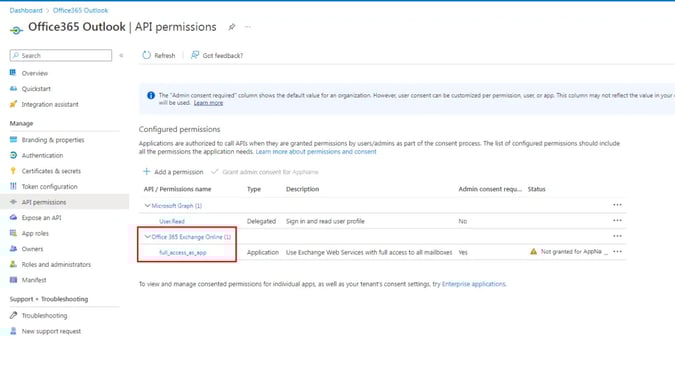
6) Confirm permissions
Select API permissions under Manage. Confirm that the full_access_as_app permission is listed. Select Grant admin consent for org and accept the consent dialog.
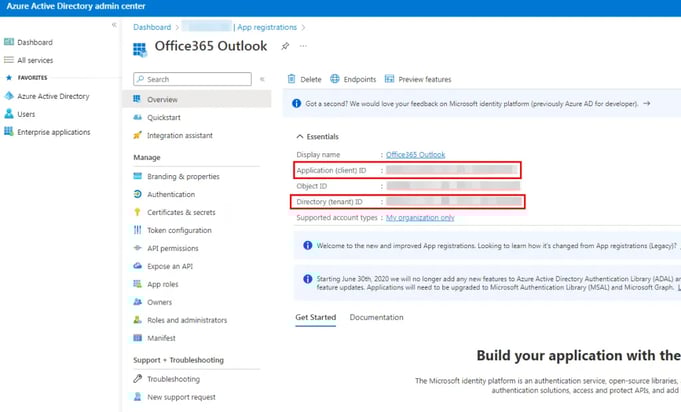
7) Select Overview and copy Application ID and Tenant ID to use them in Exchange sync.
Select Overview and copy Application ID and Tenant ID to use them in Exchange sync.
8) Select Certificates & Secrets in the left-hand navigation under Manage
Select New client secret, enter a short description and select Add.
Copy the Value of the newly added Client Secret and save it, you will need it later.
9) Approve the application
Possibly, Admin approval will be required to use the application.
To approve the application, navigate to https://login.microsoftonline.com/
10) To enable OAuth authentication for individual users in Handle:
The following instructions are for setting up Handle/Exchange syncing for one user at a time. If you need to set up many users at once, contact Texada support and we can adjust to multiple users settings for you.
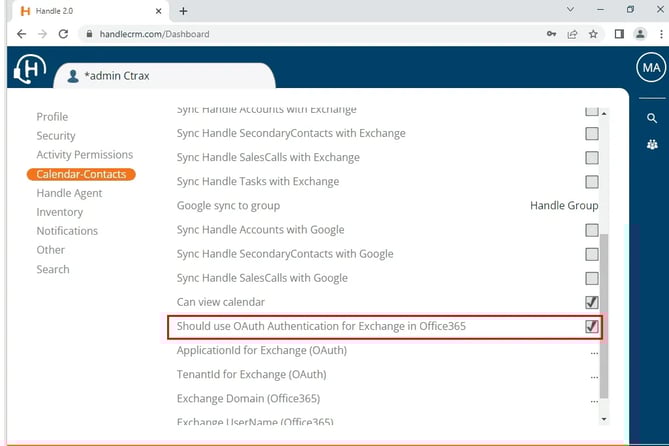
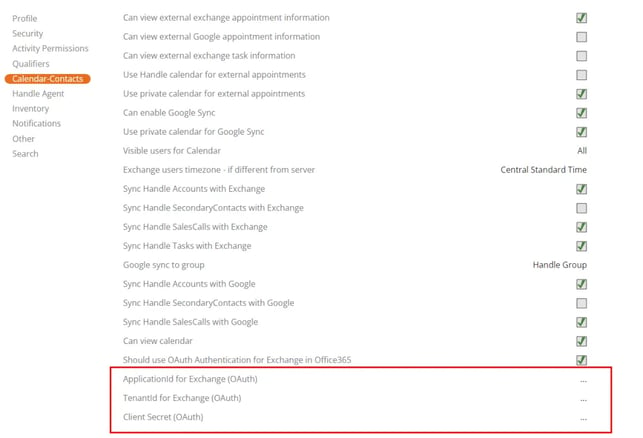
In order to enable OAuth authentication with Office365 Outlook for a specific user in Handle, have a Handle admin user log in to https://handlecrm.com/Dashboard, open Admin Tools and go to Calendar-Contacts.
Then:
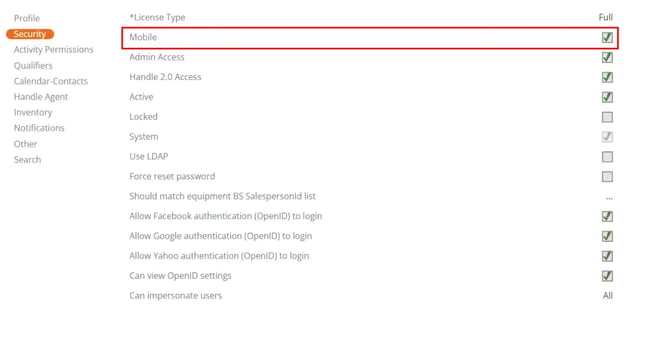
10.1) In Security, ensure Mobile access is checked
10.2) In Calendar-Contacts, check the checkbox ‘Should use OAuth Authentication for Exchange in Office365’
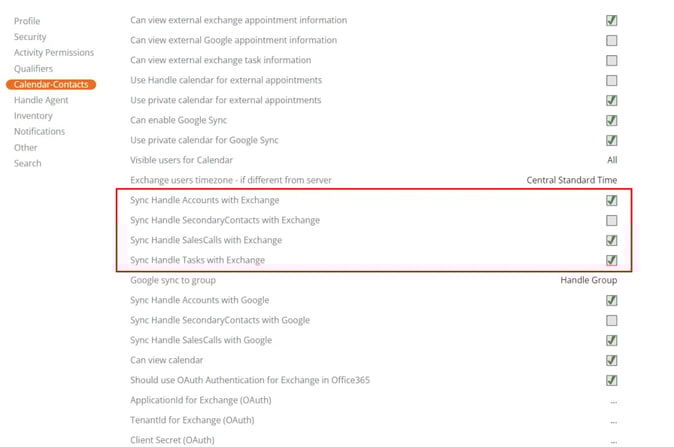
10.3) Also in Calendar-Contacts, ensure “Sync Handle…with Exchange” is checked for the items you want synced
10.4) Insert the Application ID, Tenant ID and Client Secret key
11) User self-authentication
After authentication is enabled for users in Handle, users will need to do a one time authentication of the connection using their Microsoft login inside the Handle app.
Can we enable OAuth authentication for all users in Handle at once?
We have deprecated this connection method to ensure enhanced security for our users.
Contact Texada support with any questions.