
Handle’s updated mobile app makes it easy to access the features you use most, making it faster and easier to use.
- More intuitive navigation that just makes sense
- Easier access to search functionality to keep up with all your sales calls, leads, and comments
- Updated Google Maps integration for more efficient time in the field
- Configurable views specific for smartphones and tablets
- Allows you to access all of your desktop functionality, if and when you need it
Focus: a Better User Experience
The Handle App has been helping users access their data and files for quite some time. And though people have enjoyed being able to access all of Handle’s features from a mobile device, the user experience wasn’t great. (Cramming a complex CRM into a handheld device isn’t as easy as it seems!)
This update was designed to simplify the app while still giving you access to everything you need. We did that by allowing you to prioritize the items you use most — so you can access them with just a few clicks — and quickly find the data you need only on rare occasions.
One of our primary goals was to make it easy to know where you are in the app at all times. We accomplished that with simple “In & out” navigation. Just back out of any screen to return to the previous menu or home page.
The Simplified Home Screen
When you open the app, the first screen you see is the simplified home screen.
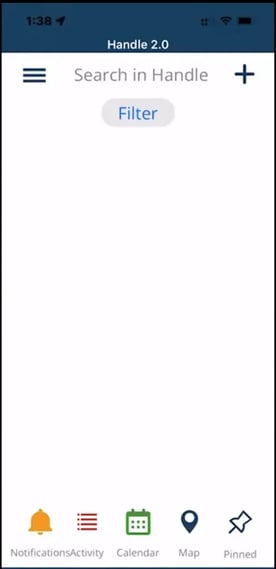
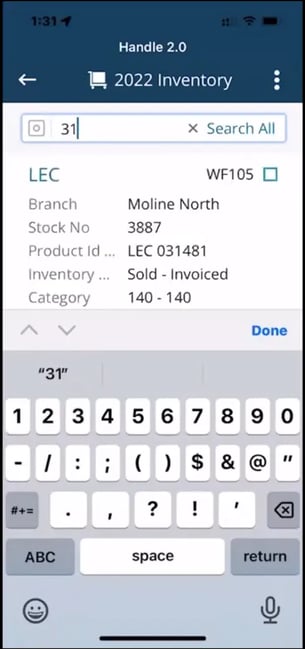
From the top of the home page, you can search for any type of data: a customer or contact, keyword, stock number, account name, etc. This allows you to quickly find all of your key information.
The search results show you all the files and communications linked to the keyword you entered, and then perform the same actions you would on the desktop app.
To search:
- Type in a customer’s first or last name, an account or inventory number, or whatever else you want to search for
- You’ll begin seeing search results as you type
- Scroll through the search results to find the record you’re looking for
- Select it to open it and view data, create a note, start a call, etc.
Within the app, you have a simple, streamlined interface. 90% of the app’s functionality is in the main body of the screen. Data is nested, so you see only the data you need to see — to dig into the details associated with any record, you only need to click on it. Then, for additional functionality, use the buttons at the bottom of the screen.
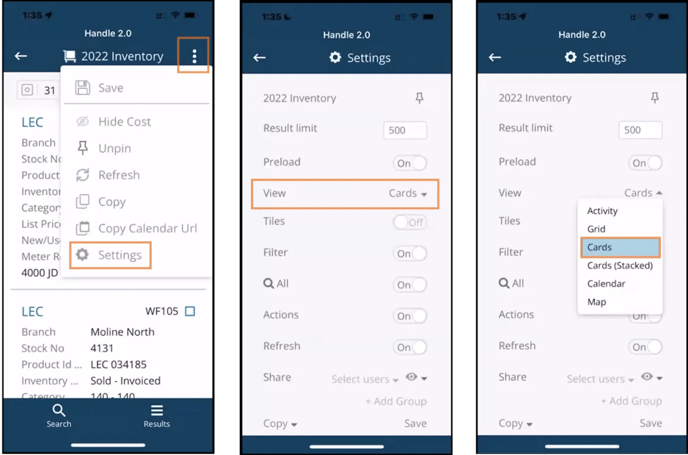
Change or Set Views for Mobile
Most users want to see different data on their mobile and desktop applications, and they want a streamlined viewing experience.
We’ve made it easy to change the way you view information, based on what’s important to you. For instance, most people prefer a card view on the mobile app and a grid on the desktop.
When you’re looking at any screen, you can quickly change the view by opening the Settings tag.
- Click the three dots on the upper right-hand corner of the screen
- Select Settings
- Open the View settings
- Choose Card (or whatever your preference is)
Quickly-Access Buttons on the Home Page
At the bottom of the home page are quick-access buttons that help you navigate to the features most people want on a mobile device.

Notifications: In the lower left-hand corner of the screen, you can see a quick-access button for your notifications. Click it to see any notifications you’ve received from anyone in the organization.
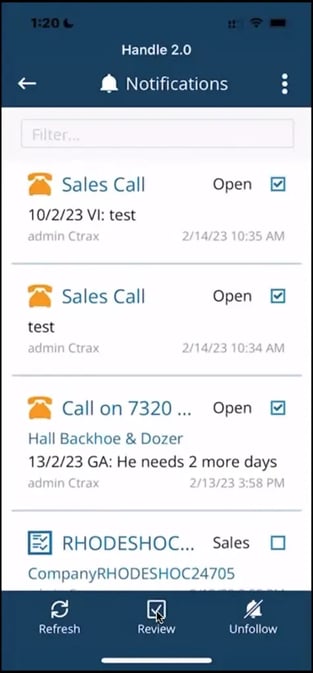
Notifications are synchronized with your desktop app, so you have the same notifications and automations available on your computer. Here, you can:
- Select items
- Review them
- Check them off
- Mark them reviewed
Once you’ve marked a notification as reviewed, it will be removed from your list.
To see new notifications, refresh the app. And if you want to notify someone when a new notification arrives, you can set that up on the app.
You can also mass-review your notifications and unfollow any notifications that are outdated or don’t apply to you or your clients.
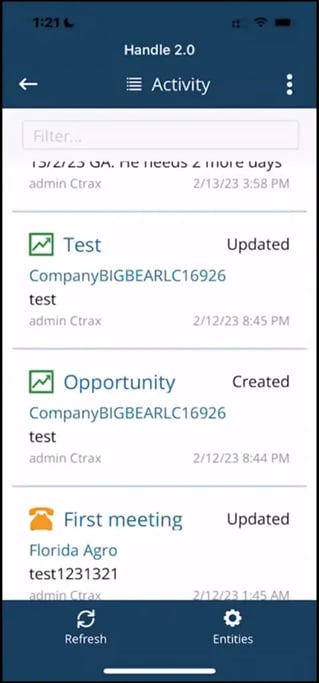
Activity: The activity area lets you see at a glance all your customer activity. This includes opportunities, purchases, and any other activity with your assigned clients.
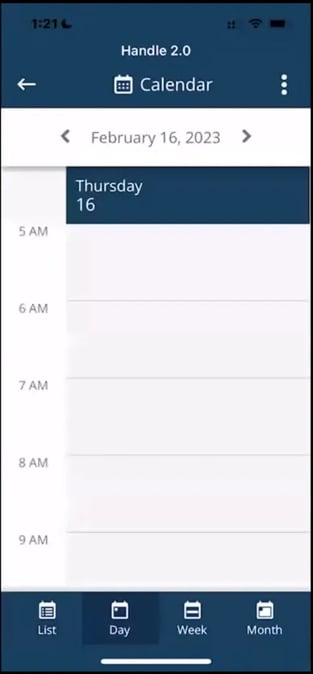
Calendar: You can set up three calendar views: daily, weekly, or monthly. Just as you would on your desktop application, select a time slot to schedule a call.
Map: The Map feature maps your accounts automatically, including Handle’s dynamic statuses — the color-coded icons and account statuses that your organization has set up.
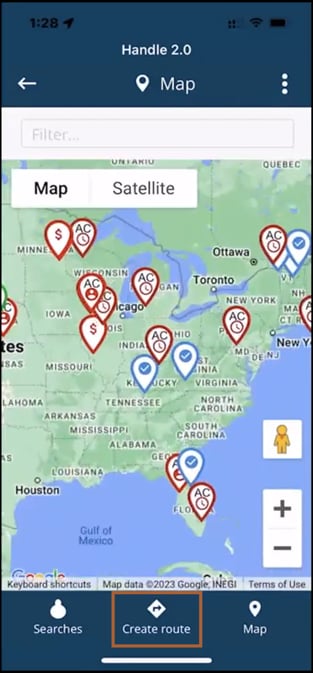
Handle’s map view shows you your location while mapping your assigned accounts. And routing is built into the app. Select the Create Route button at the bottom of the screen, and the system will automatically generate the most efficient routes to the account(s) you’ve selected.
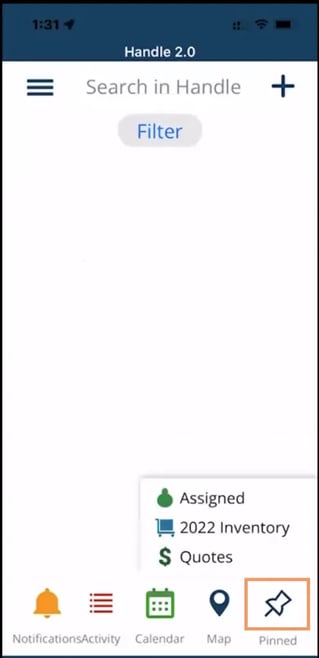
Pinned: The Pinned button allows you to “favorite” the searches or tabs you use most. You can pin tasks, calls, customer lists, and more. Just pin the screen you want to access again. Then, when you click the icon in the lower left-hand corner of the screen, you’ll see a popup with your pinned items.
How to Pin a Search
To pin a search, you first need to open it. If you’ve already closed the search results, you can find it again by opening the hamburger menu and selecting Searches.
Then, to create the pin:
- Click on the three dots at the top right corner of the screen.
- Select Pin.
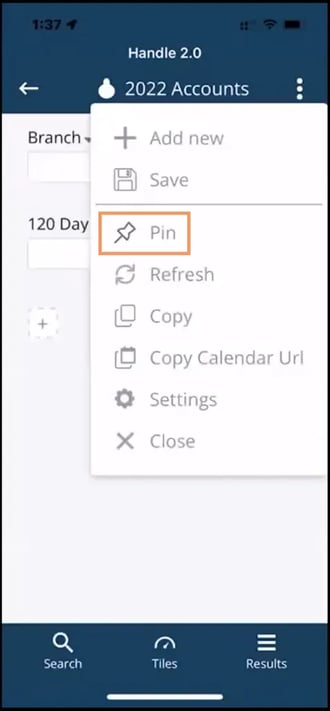
Now, when you go back to your home page and click Pinned, your search will show up in your list of pinned items.
Load Sales Calls, Files, and More
You can create anything from the home page by clicking the Plus button at the top of the screen.
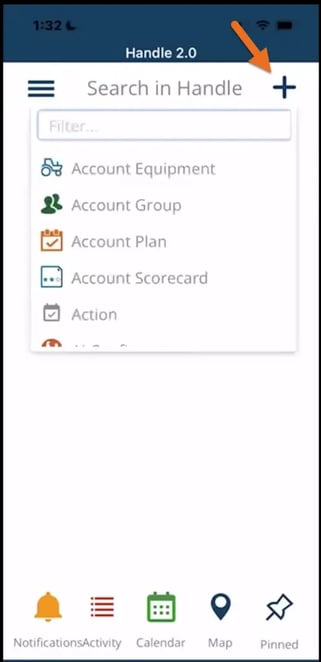
Use the search field to quickly find the type of information you want to add. For instance, you can type “sales call” and select it. Then, you’ll be taken to a screen with the appropriate fields for you to enter your new information.
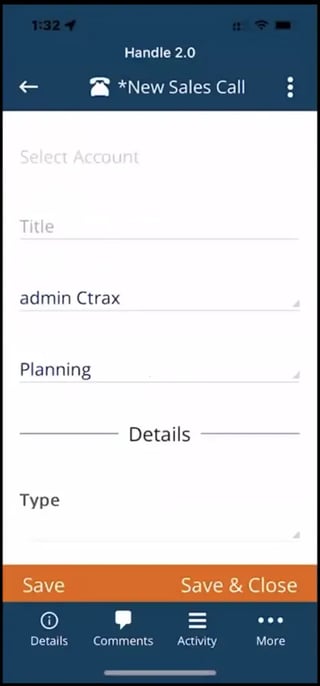
Add Details: Click on any field, and when you begin typing, available options will appear, similar to a search field. Select the correct information, click Save, and the information is available for you to access on both the desktop and mobile applications.
Add Comments: Click the Comments icon at the bottom of the screen, and type @ and the person’s name. With this feature, you can send team members emails or add a note. The system will time-stamp the comment, and it will be available on your desktop as well as your mobile device.
View Related Activity: Click the Activity icon at the bottom of the screen, and you’ll see a list of any activity linked to that item. For example, if you’re looking at a quote, you’ll see the associated notes and calls.
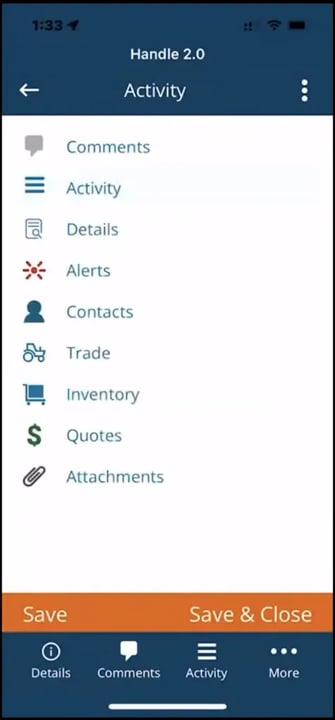
See More: Click More, and you’ll see any other data related to the record, depending on the templates your organization has set up.
All of the screens in the app are determined by your organization’s template. If you need them to be changed, let us know, and we’ll help you make the necessary changes.
Advanced Features
The hamburger menu in the upper left corner of the home page gives you all of the app’s advanced features.
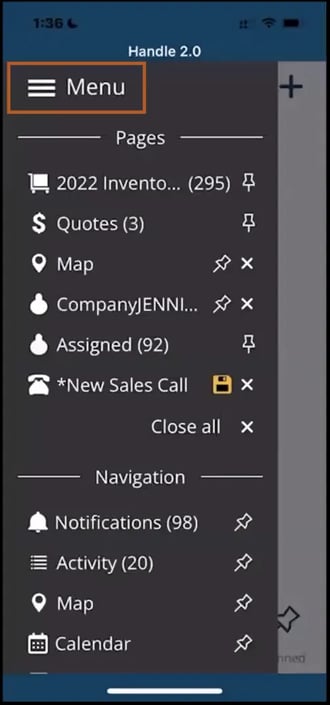
This gives you a list of anything you’ve recently opened as well as navigation options, features, and screens you don’t use every day. This is also where you can log out, switch connections, or access Help.
From here, you can click the pin icon to pin any item you want to keep.
Look for the Announcement in the App
The app is awaiting approval. As soon as it’s ready, you’ll see the announcement in Handle. Then, to get started:
- Go to the App Store on your mobile device
- Search for and download the Handle App
- Log into the app using your usual Handle login credentials
When you open the app, you’ll see the home page, and you can get started right away pinning the searches and data you use most often.
If your default view is difficult to use on your device, go into settings to change the view to Card.
Some mobile views are set up by your administrator, and we can help configure those and set up Cards as your organization’s default. We can then push these views out to everyone’s mobile devices.
If you have any questions, reach out to Texada support.