
Quick Reference
- The Class / Group Settings page in the GateWay Administration Panel allows you to select which SRM Classes and Groups are displayed on your eCommerce website. To reach this page, select Inventory → Class / Group Settings in the left navigation menu.
- Click the down arrow
next to a Class to view the Groups within that Class.
- Check the “Displayed” checkbox next to a Class or Group to display it on your eCommerce website. Uncheck this box to hide the Class or Group. This will supersede any permissions set via the Product Access screen.
Introduction
The Class / Group Settings page in the GateWay Administration Panel allows you to select which SRM Classes and Groups are displayed on your eCommerce website. To reach this page, select Inventory → Class / Group Settings in the left navigation menu.
The display settings selected on the Class / Group Settings page will supersede any user-level permissions set via the Product Access screen. For example, if Group BL40 is hidden via the Class / Group Settings page, it will not be visible to any users anywhere on your eCommerce website, even those users with BL40 enabled via the Product Access screen.
Class / Group Settings
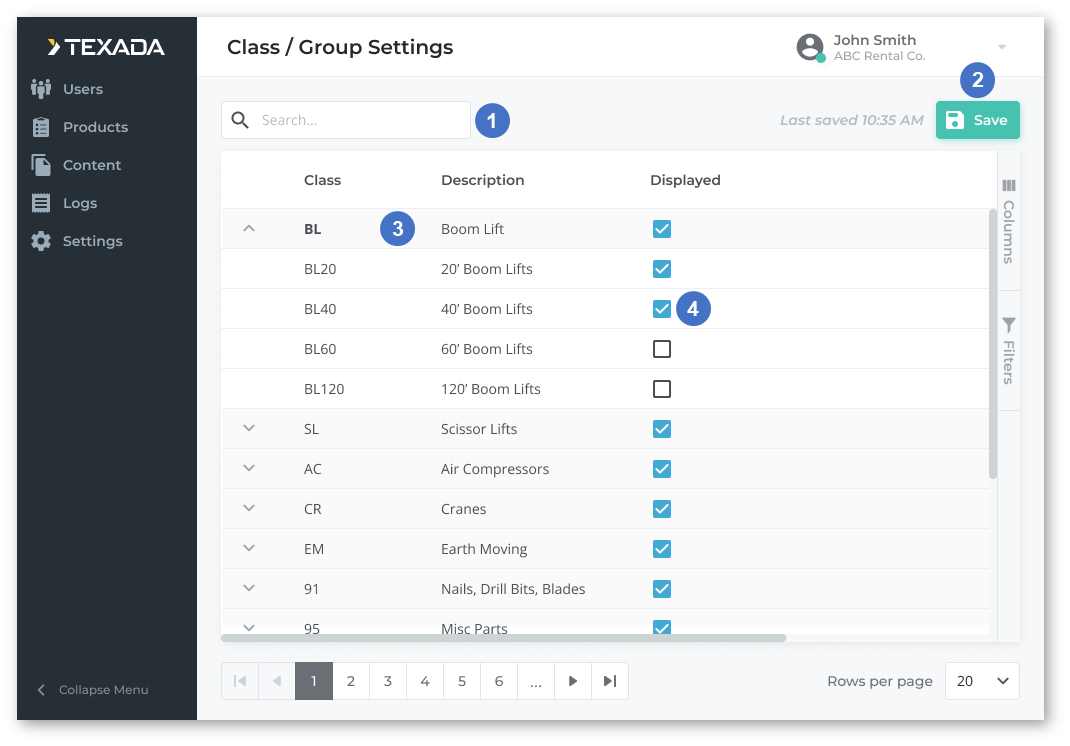
- Search Bar
Begin typing into the search bar to filter the list of Classes and Groups by the text entered. This will search by Class / Group number and Description. - Save Button
Click to save your changes. - Class / Group
SRM Classes are listed here. Click the down arrow - Displayed Checkbox
Check the box next to a Class or Group to display that Class or Group on your eCommerce website. Uncheck this box to hide that Class or Group. By default, Groups will inherit the display setting of their parent Class. This can be overwritten by expanding the Class and selecting a display option at the Group level.