.png?width=365&height=50&name=Texada%20Logo%20(Black).png)
Quick Reference
- A category is a group of products that appear together on your organization’s eCommerce website. Categories are managed via the Category List page, located at Inventory → Categories.
- Click the “Create Category” button
in the top-right corner of the Category List screen to create a new category. Click the pencil icon
next to an existing category to edit it.
- Use the Rent / Buy buttons to select whether the category will appear under the Rent or Buy sections of your website.
- Select a category from the “Select parent category” drop-down to make the current category the subcategory of the selected category. Subcategories will appear under their parent in your website’s menus.
- Use the “Marketing Code” drop-down to assign a marketing code to the category. Check the “Apply to all subcategories” checkbox to apply the code to all subcategories of the current category.
- Use the “Images” panel to upload a featured image for the category. Drag and drop an image into the upload area to replace the current image; alternatively, click the upload area to open your machine’s file browser and select an image.
- Use the “Attributes” panel to assign attributes to the category. Click the “Add Attribute” button to add a new attribute.
Introduction
A category is a group of products that appear together on your organization’s eCommerce website. Categories are a concept specific to Texada GateWay and are not to be confused with Classes or Groups in Texada SRM.
Each category has a type (Rent or Buy) which determines where it will appear on your website. If a category is assigned to a parent category, it will appear under its parent in your website’s menus.
Categories are managed via the Category List page. To reach this page, select Inventory → Categories in the left navigation menu.
Category List
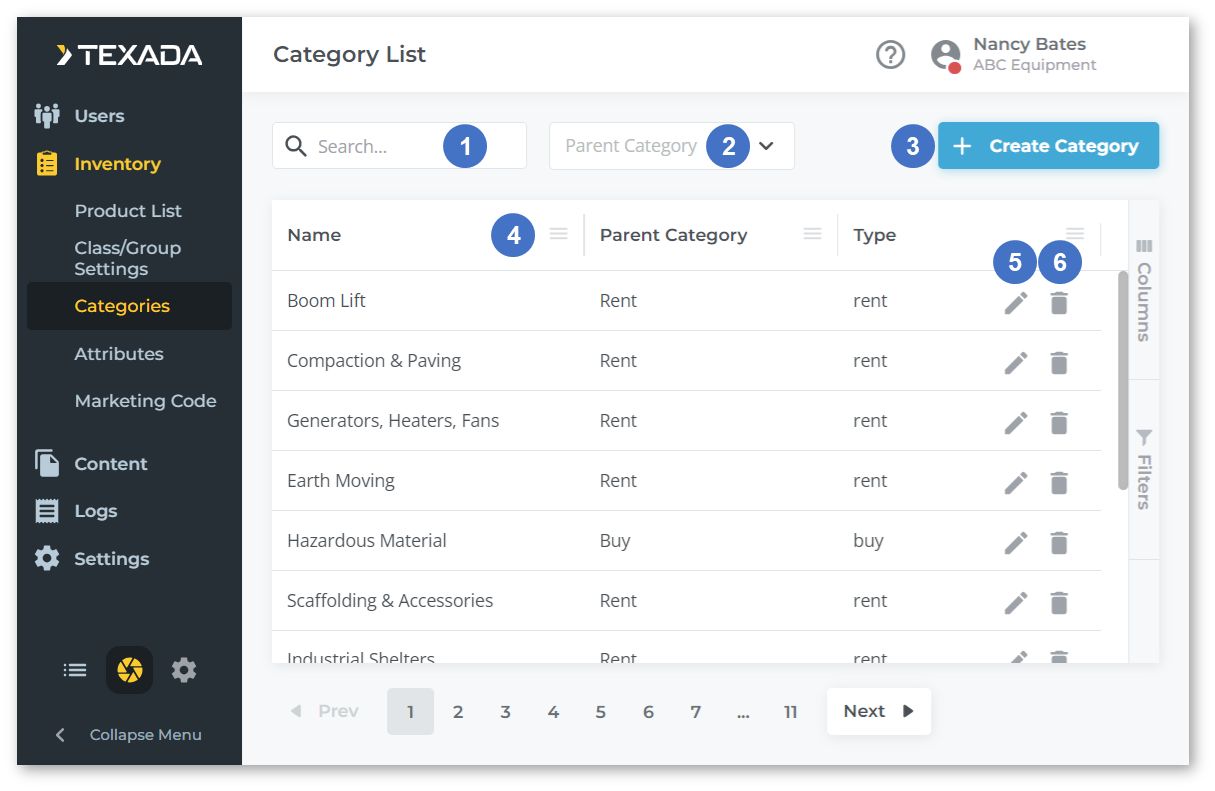
- Search Bar
Begin typing into the search bar to filter the list of categories by the text entered. This will search by category name. - Parent Category Filter
Select a parent category from the drop-down to only display categories belonging to that parent. - Create Category Button
Click to create a new category. See “Create / Edit Category” for more information. - Categories
Categories are listed here. The appearance of this table can be modified; see “Working with Tables” for more information. - Edit Category
Click the pencil icon - Delete Category
Click the bin iconnext to a category to delete it.
Create / Edit Category
Click the “Create Category” button in the top-right corner of the Category List screen to create a new category. Click the pencil icon
next to an existing category to edit it. This will open the Create / Edit Category screen.
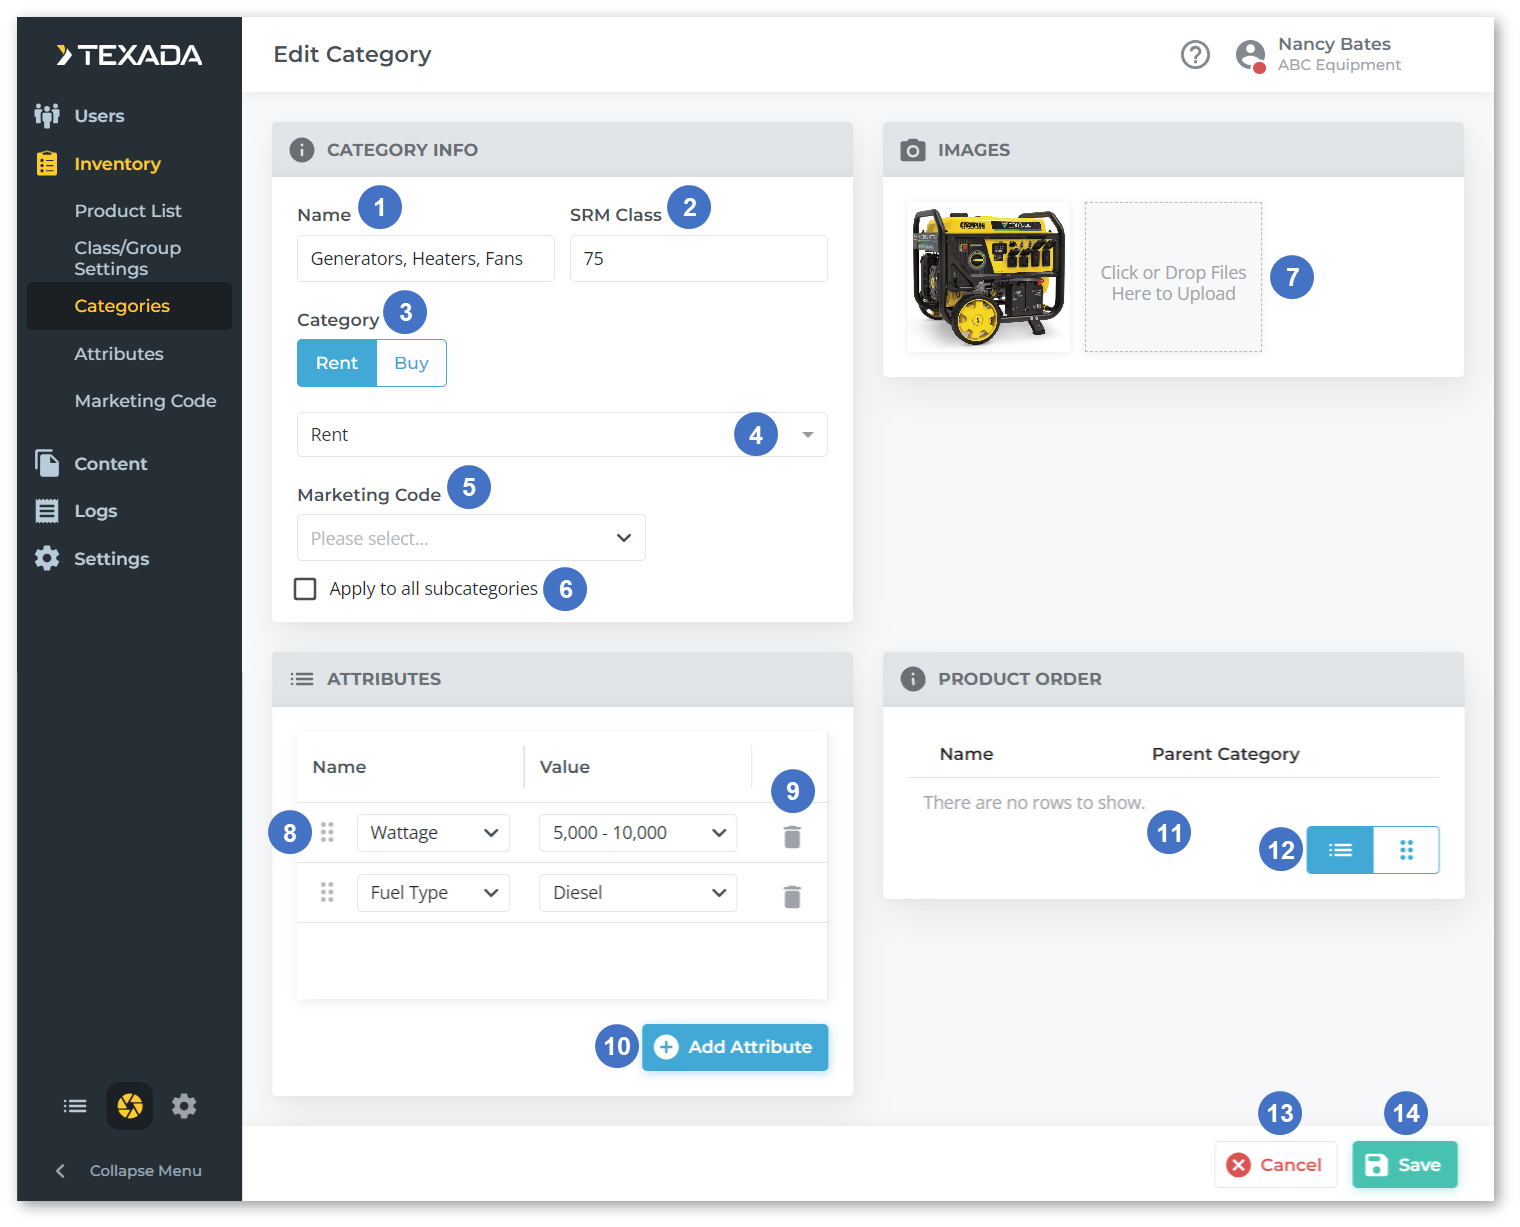
- Name
The category’s name. This is the name that will appear in your website’s menus. - SRM CLass
The Texada SRM Product Class with which this category is associated. - Category Type
Select whether the category is a Rent category or a Buy category. This determines whether the category (and its subcategories) appear under the Rent or Buy sections of your website. - Parent Category
Select a parent category under which this category will appear on the website. If you do not want to assign a parent category, select “Rent” or “Buy”. - Marketing Code
Select a marketing code from the drop-down to assign it to the category. The contents of the marketing code will be displayed on the website when viewing this category. - Apply to All Subcategories Checkbox
Check this box to assign the marketing code selected above (5) to all of this category’s subcategories. - Images
The featured image representing this category on your website is displayed here. Hover over the image and click the expand iconto open it full-size, or click the X icon
to delete it. Drag and drop an image into the upload area to upload it as the new image for this category. Alternatively, you can click the upload area to open your machine’s file browser and select an image.
- Attributes
Attributes assigned to this category are listed here. Use the drop-down under “Name” to select an attribute, then use the drop-down under “Value” to select the category’s value for that attribute. Click and drag the six dotsto the left of an attribute to change the order of the attributes.
- Delete Attribute
Click the bin icon - Add Attribute Button
Click to add a new attribute to the category. - Products
Products belonging to this category are listed here in the order they will appear on your website. - List View / Grid View Toggle
Use these buttons to toggle the product list between list view and grid view. - Cancel Button
Click to cancel your changes. - Save Button
Click to save your changes.