
Quick Reference
- An attribute is a characteristic of a product that informs potential renters or buyers of how the product performs and which jobs it is suitable for. Attributes are managed via the Attributes page of the GateWay Administration Panel, located at Inventory → Attributes.
- Click the “Create New Attribute” button
in the top-right corner of the Attributes page to create a new attribute. Click the pencil icon
next to an existing attribute to edit it.
- Use the “Attribute Type” selector to determine whether the attribute applies to products or categories.
- Edit and rearrange values for the attribute using the Values panel. Click the “Add Value” button
to add a new value to the attribute.
Introduction
An attribute is a characteristic of a product that informs potential renters or buyers of how the product performs and which jobs it is suitable for - examples include fuel type, maximum digging depth for earthmoving equipment, and platform height for aerial equipment. Each attribute has multiple possible values - for example, the ‘fuel type’ attribute might have possible values of ‘electric’, ‘gasoline’, and ‘diesel’.
In Texada GateWay, attributes are managed via the Attributes page of the GateWay Administration Panel, and can be assigned to Products or Categories via the Edit Product page and the Create / Edit Category page, respectively.
The following article will provide an overview of the Attributes page. To reach this page, select Inventory → Attributes in the left navigation menu.
Attributes
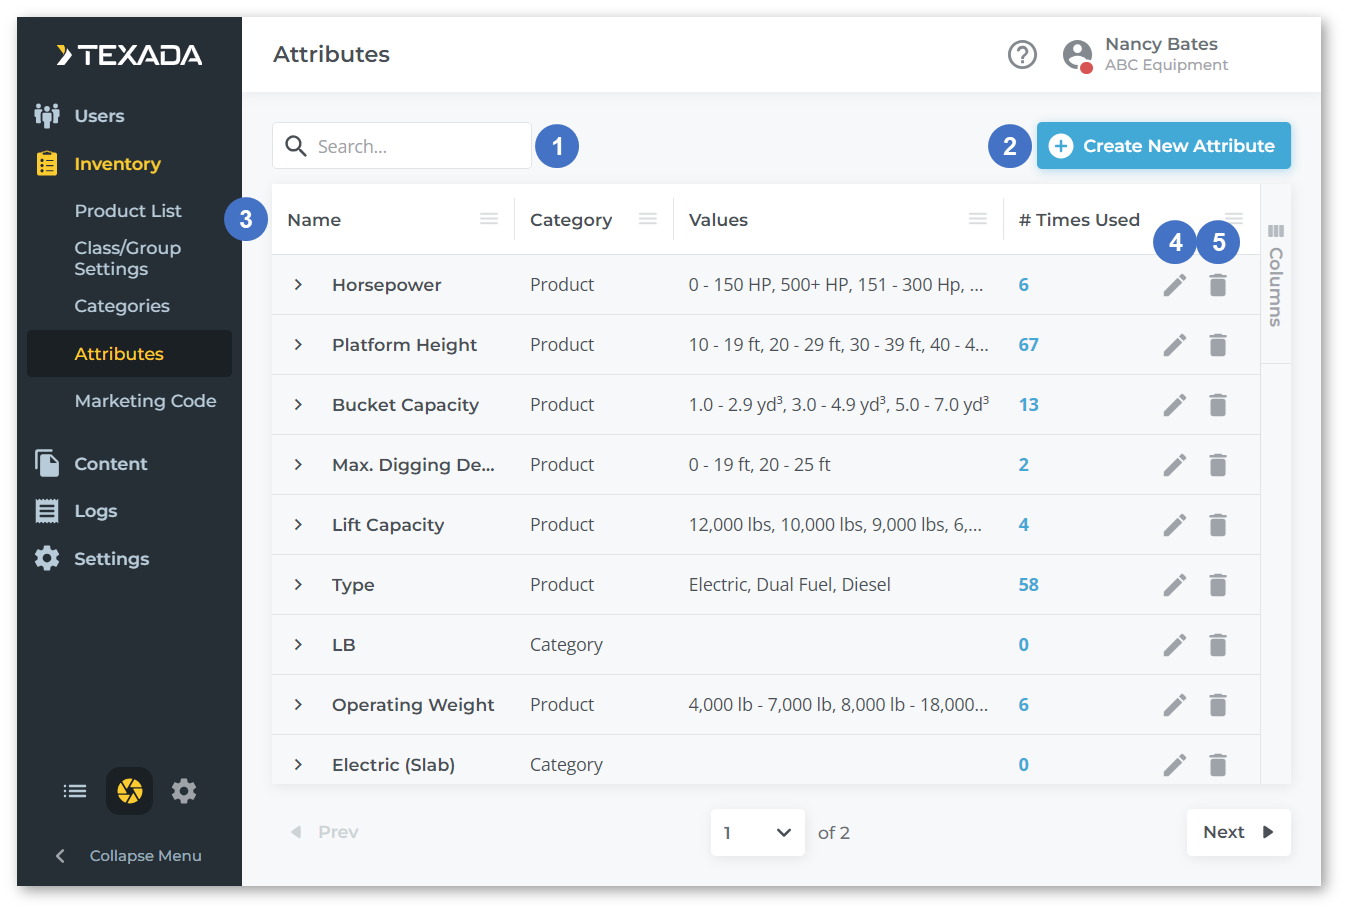
- Search Bar
Begin typing into the search bar to filter the list of attributes by the text entered. - Create New Attribute Button
Click to create a new attribute. See “Create / Edit Attribute” for more information. - Attributes Table
Attributes are listed in this table. Click the right arrownext to an attribute to expand it and view its possible values. The appearance of this table can be modified; see “Working with Tables” for more information.
- Edit Attribute
Click the pencil icon - Delete Attribute
Click the bin iconnext to an attribute to delete it.
Create / Edit Attribute
Click the “Create New Attribute” button in the top-right corner of the Attributes page to create a new attribute. Click the pencil icon
next to an existing attribute to edit it. This will open the Create / Edit Attribute screen.
If you are viewing an existing attribute, you will need to click the “Edit” button in the bottom-right corner of the screen before you can modify the attribute.
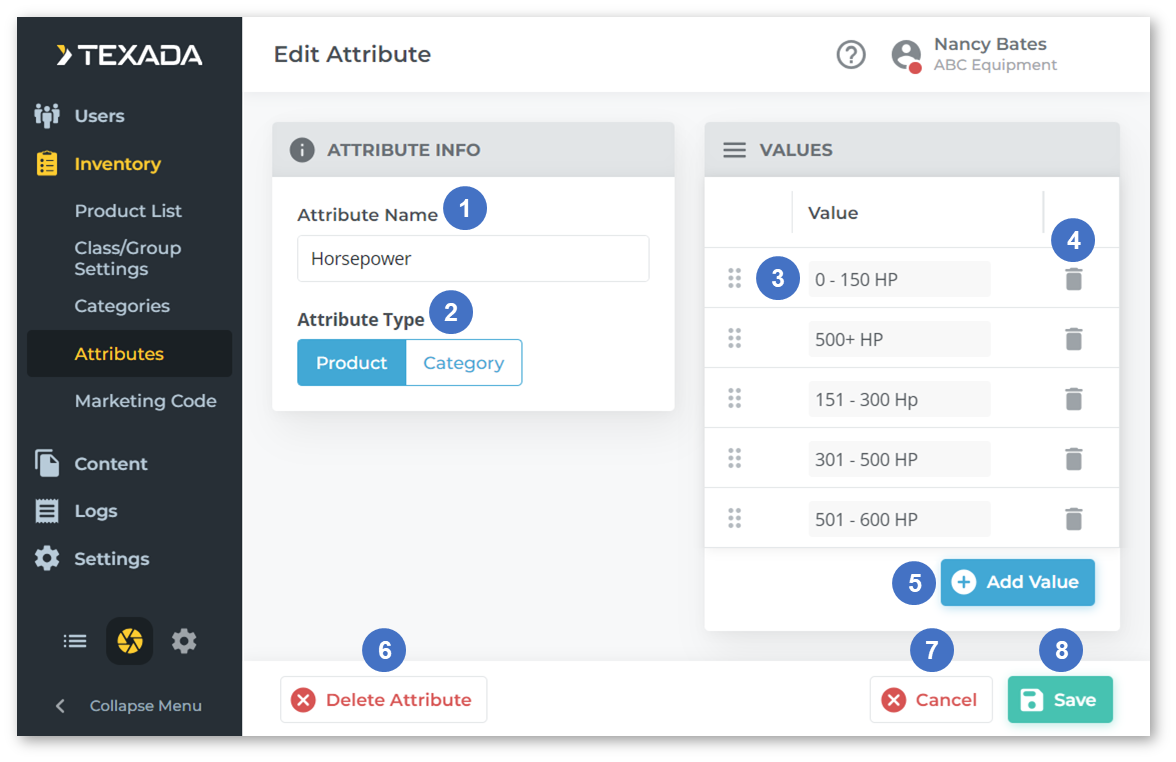
- Attribute Name
The attribute’s name. - Attribute Type
Select whether this attribute applies to products or categories. - Value
Each of the attribute’s possible values are listed under the Values panel. Click and drag the six dotsnext to an attribute to change the order of the attributes. Edit a value’s text to rename it.
- Delete Value
Click the bin icon - Add Value Button
Click to add a new blank value to the attribute. Attributes can have as many values as necessary. - Delete Attribute
Click to delete the attribute and all of its values. - Cancel Button
Click to cancel your changes. - Save Button
Click to save your changes.