
Quick Reference
- Modals are message windows that appear when visitors first access your eCommerce website. To manage modals for your website, navigate to Content → Modals in the left menu.
- Click the Create Modal button
in the bottom-right corner of the Modals page to create a new modal.
- Click the pencil icon
next to an existing modal to edit it.
- Click the bin icon
next to an existing modal to delete it.
Introduction
Modals are message windows that appear when visitors first access your eCommerce website. They can be used to spread news, promote special deals or new products, or prompt the user to sign up for a mailing list.
The Modals page in the GateWay Administration Panel allows you to manage the modals that appear on your eCommerce website. To access this page, navigate to Content → Modals in the left menu.
Modals Page

- Modals Table
Contains the list of modals that have been created for your website. The appearance of this table can be modified in a number of ways; see “Working with Tables” for more information. - Modal
Each current and historic modal appears as a row in the Modals table.- Click the frame icon
in the bottom-right corner of the modal image preview to view it in full-size.
- Click the pencil icon
- Click the bin icon
- Click the frame icon
- Create Modal Button
Click to create a new modal. See “Create / Edit Modal” for more information.
Create / Edit Modal
Click the pencil icon next to a modal to edit it. Click the Create Modal button
in the bottom-right corner of the Modals page to create a new modal. This will open the Create / Edit Modal window.
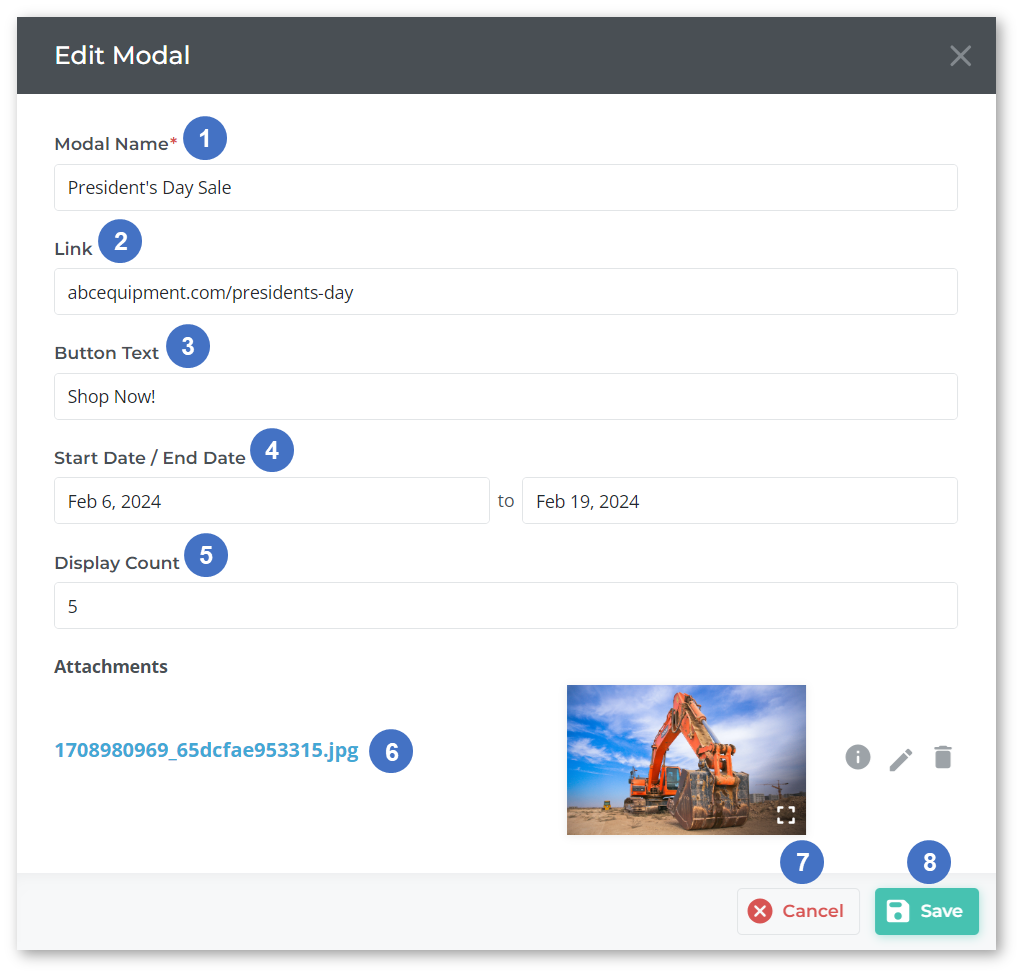
- Modal Name
The modal’s name. - Link
The URL to which the user will be sent when clicking the call-to-action button at the bottom of the modal. - Button Text
The text of the call-to-action button at the bottom of the modal. - Start Date / End Date
The dates between which this modal will appear on your eCommerce website. Using these dates, modals can be scheduled to appear at a set time in the future. - Display Count
The number of times this modal will appear for each user. Once a modal has been displayed the designated number of times, it will no longer appear for that user. - Attachment
The modal’s featured image.- If no attachment exists, click the Add Image button
to upload an image.
- Click the pencil icon
- Click the bin icon
- If no attachment exists, click the Add Image button
- Cancel Button
Click to close the Create / Edit Modal window without saving your changes. - Save Button
Click to save your changes and close the Create / Edit Modal window.