
Quick Reference
- The Division Configuration page in the GateWay Administration Panel allows you to manage your company’s Divisions. To reach this page, navigate to Settings → Divisions in the left menu.
- Click the “Sync with SRM” button in the top-right corner of the page to fetch the latest Division information from Texada SRM.
- Click the pencil icon
next to a Division to edit its details, including its address information, opening hours, and the email addresses to which notification emails will be sent.
Introduction
The Division Configuration page in the GateWay Administration Panel allows you to manage your company’s Divisions, including their contact and address information, their opening hours, and the email addresses to which notification emails will be sent.
To reach this page, navigate to Settings → Divisions in the left menu.
Division Configuration Page
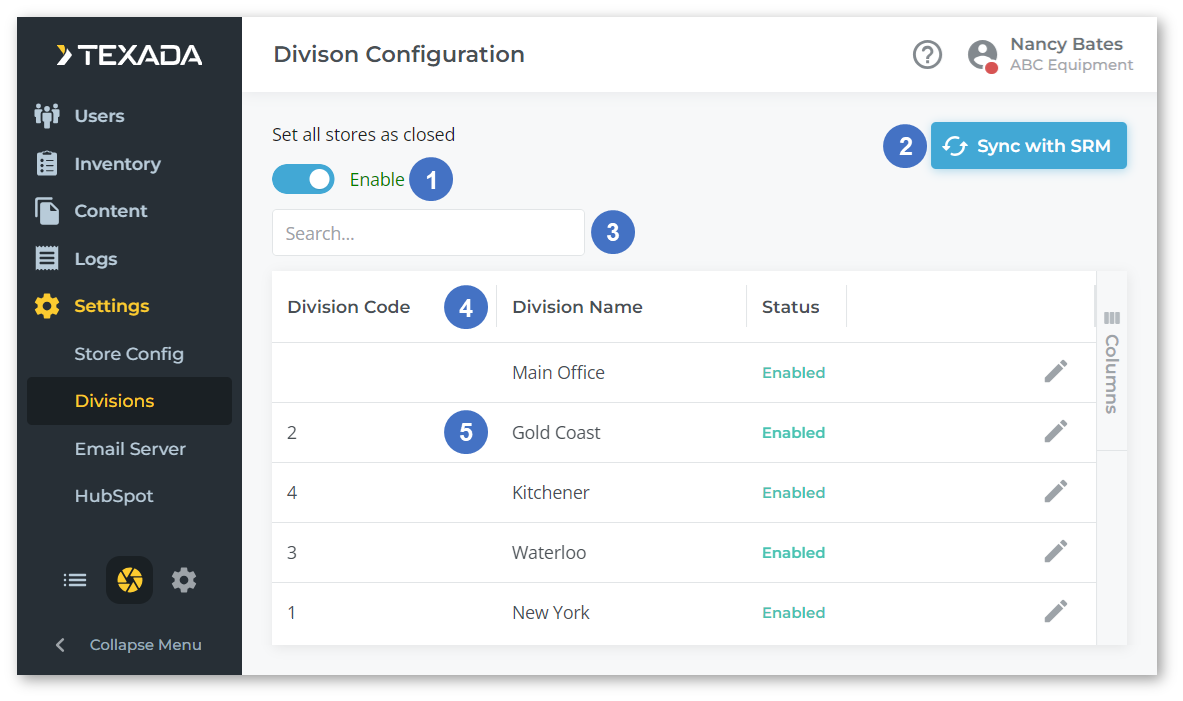
- Set all stores as closed Toggle
Enable this toggle to set all stores (Divisions) as closed. - Sync with SRM Button
Click to retrieve the latest Division information from Texada SRM. - Search Bar
Begin typing into the search bar to filter the list of Divisions by Division Name. - Divisions Table
This table contains a list of Divisions currently in your system. The appearance of this table can be modified in a number of ways; see “Working With Tables” for more information. - Division
Click the pencil icon
Edit Division
Click the pencil icon next to a Division in the Divisions table to open the Edit Division window. This window allows you to view and modify the Division’s details.
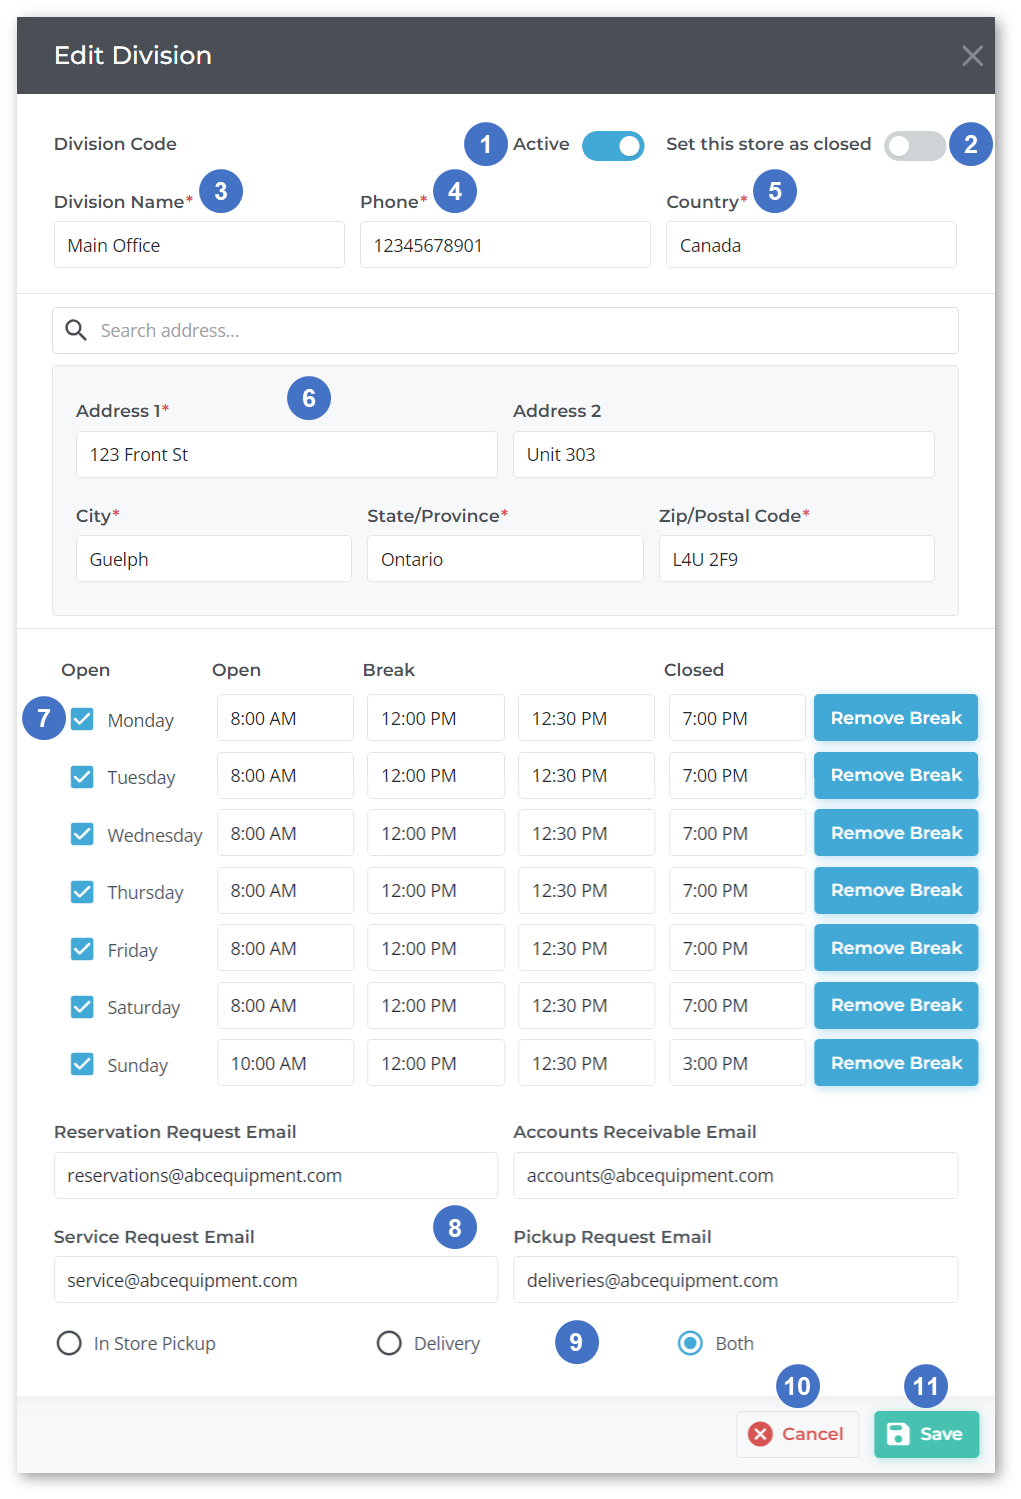
- Active Toggle
Enable this toggle to activate the Division; disable this toggle to deactivate it. Deactivated Divisions will not appear on your eCommerce website, and Products from these Divisions will not be viewable or purchasable. - Set This Store As Closed Toggle
Enable this toggle to set this store as closed. Closed stores will be marked as such when viewed by customers on your eCommerce site. - Division Name
The Division’s name. - Phone
The Division’s phone number. - Country
The country in which the Division is located. - Address Information
The Division’s street address. To auto-populate this information, begin typing into the address search bar, then select an address from the drop-down list. You can also manually enter address information. - Hours
The Division’s store hours.- Check the checkbox next to a day of the week to indicate that the store is open that day.
- Use the Open and Closed fields to select opening and closing times for each day of the week.
- Click the “Add Break” button to the right of a weekday to add a period between the opening and closing hours during which the store is closed - for example, a lunch break from 12PM to 1PM. Click the “Remove Break” button next a weekday that currently includes a break to remove it.
- System Email Addresses
The email addresses to which system emails for this Division will be sent. Note that the same email address can be entered in multiple locations.- Reservation Request Email: Reservation requests will be sent to this address.
- Accounts Receivable Email: Accounting messages will be sent to this address.
- Service Request Email: Service requests will be sent to this address.
- Pickup Request Email: Equipment pickup requests will be sent to this address.
- In Store Pickup / Delivery / Both Toggle
Indicate whether this store offers in-store pickup, equipment delivery, or both. - Cancel Button
Click to close the Edit Division window without saving your changes. - Save Button
Click to save your changes and close the Edit Division window.