
Quick Reference
- A Product substitution involves swapping one Product on a Contract with another at the time of fulfillment.
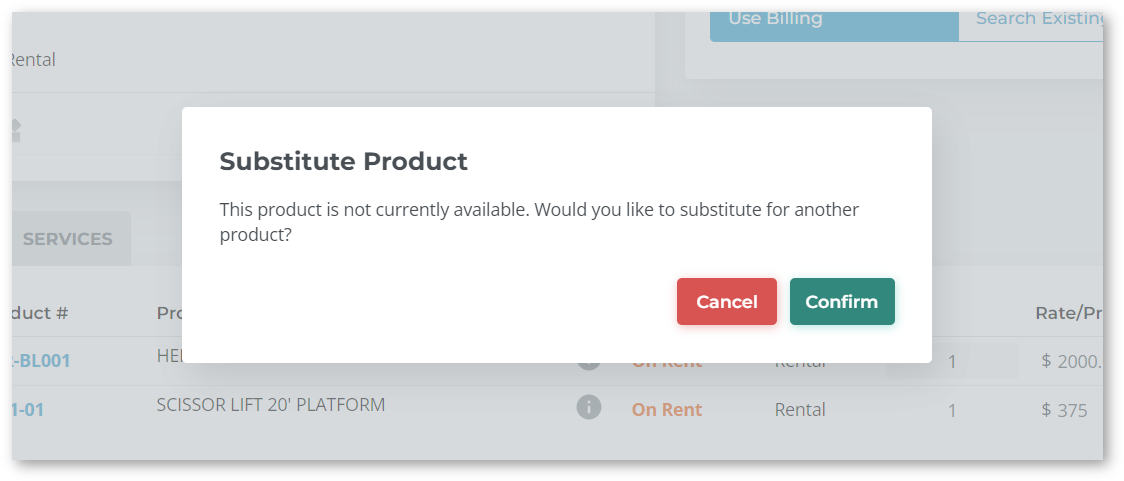
- Whenever you are creating a Contract in Texada Web and attempt to add an unavailable Product, you will automatically be prompted to perform a substitution. Click “Confirm” to open the Product Substitution window and enter the information for your substitution.
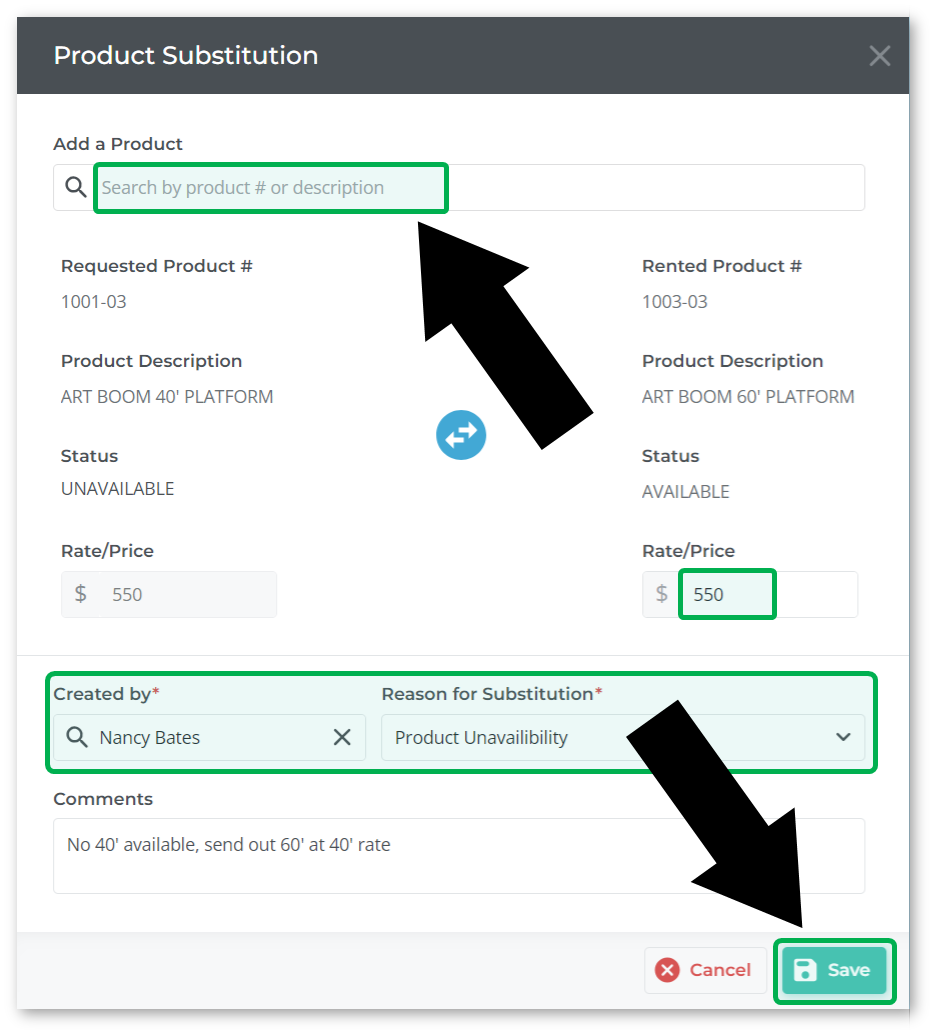
- Use the “Add a Product” drop-down to search the list of Products and select a replacement Product to add to the Contract.
- Use the Rate/Price field to modify the rental rate for the replacement Product.
- Use the “Created by” and “Reason for Substitution” drop-downs to select a User responsible for the substitutions and a reason for the substitution, respectively.
- Once you are finished, click “Save” to add the replacement Product to the Contract.
Introduction
A Product substitution involves swapping one Product on a Contract with another. Substitutions are similar to exchanges, but unlike exchanges, substitutions take place at the time of fulfillment. They are often used to provide superior equipment to customers at reduced rates in cases where the original machine was unavailable; for example, a customer who wants to rent a 40’ boom lift might be given a 60’ lift at the 40’ rate when no 40’ lifts are available. Substitutions allow you to deliver replacement Products to your customers while maintaining records of which substitutions were performed and why.
Perform a Substitution
Whenever you are creating a Contract in Texada Web and attempt to add an unavailable Product, you will automatically be prompted to perform a substitution. To complete a substitution in Texada Web:
- Open Texada Web and navigate to the Create Contract page (Contracts → Create Contract in the left navigation menu).
- Scroll down to the Products tab and begin typing into the search bar to search the list of Products. Once you have located the Product you want to add to the Contract, click on it to select it.
- If the selected Product is unavailable, the Substitute Product window will automatically open, prompting you to perform a substitution. Click “Confirm” to open the Product Substitution window.
- Use the “Add a Product” search bar at the top of the Product Substitution window to select a replacement Product. Fill out the other information for your substitution, including a rental rate for the new Product, the User who created the substitution, and a reason for the substitution. See “Product Substitution” for more information on the contents of the Product Substitution window.
Once you are finished, click “Save” to add the substituted Product to the Contract.
Product Substitution
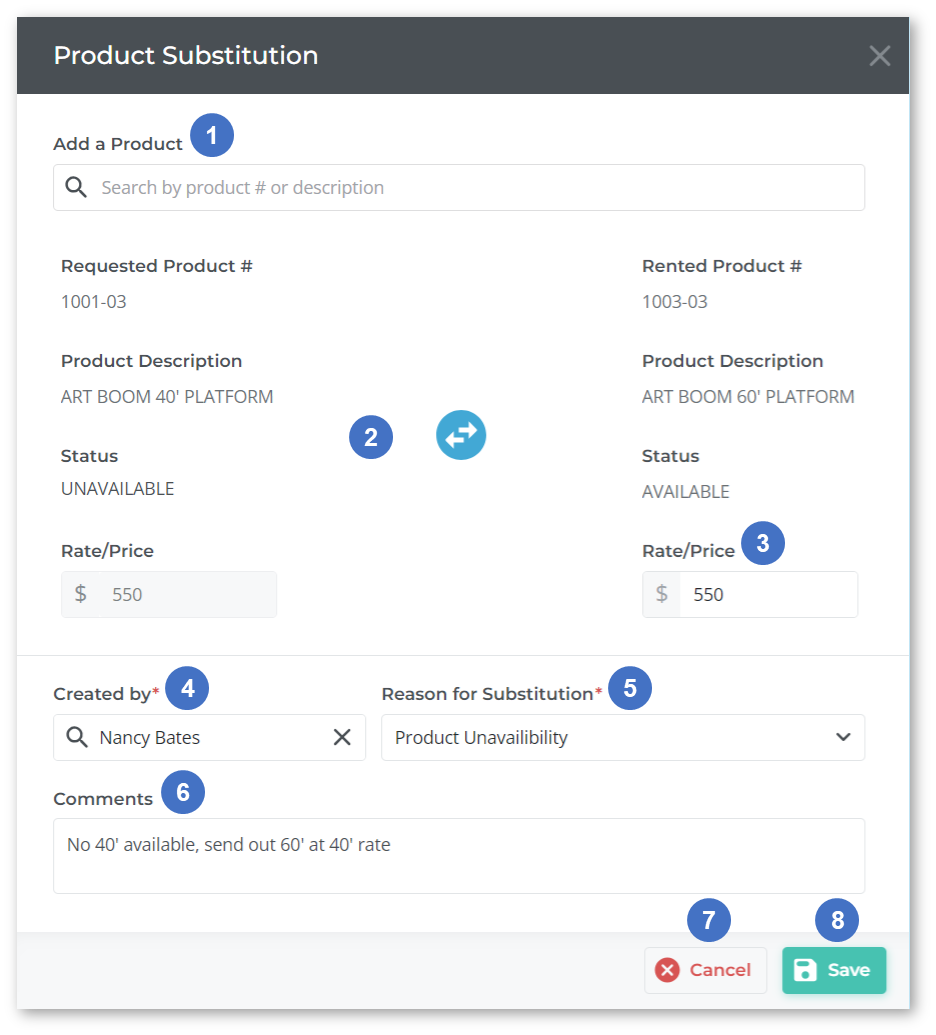
- Add a Product
Begin typing into the search bar to search the list of Products, then click on a Product to select it as the replacement Product for the substitution. - Requested / Rented Product Information
Compares the Product number, description, current status, and rental rate of the requested Product (left) and the replacement Product (right). - Rate/Price
The rental rate of the replacement Product. This can be edited to provide the Customer with a discounted rate for the substitution. - Created By
The User who submitted the substitution. - Reason for Substitution
Click on the drop-down to select a reason for the substitution. The list of substitution reasons is managed in Texada SRM, at System Maintenance → Configure System Settings → Operations → Substitution Reasons. - Comments
Any additional comments about the substitution. - Cancel Button
Click to cancel the substitution. - Save Button
Click to finalize the substitution and add the substituted Product to the Contract.