
Quick Reference
- Product exchanges allow you to quickly swap a Product on an existing Contract with another Product. To perform a Product exchange in Texada Web:
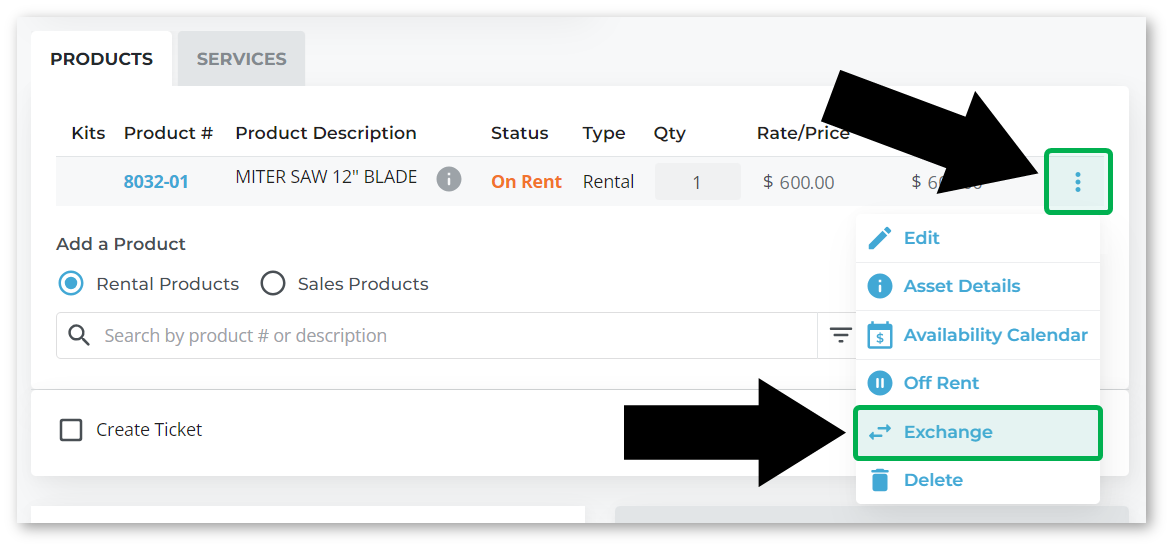
- Open the Contract you’d like to edit and scroll down to the Products tab.
- Click the three vertical dots
next to the Product you’d like to exchange, then select “Exchange”.
- Fill out the details of the exchange and click “Save”.
- Check the Create Exchange Tickets checkbox to automatically generate a pair of Tickets for the exchange: a Pickup Ticket to pick up the original Product and a Delivery Ticket to deliver the new Product.
Introduction
Product exchanges allow you to quickly swap a Product on an existing Contract with another Product. The following article will detail the process of completing a Product exchange in Texada Web.
Exchange a Product
To perform a Product exchange in Texada Web:
- Open the Contract you’d like to edit and scroll down to the Products tab.
- Click the three vertical dots
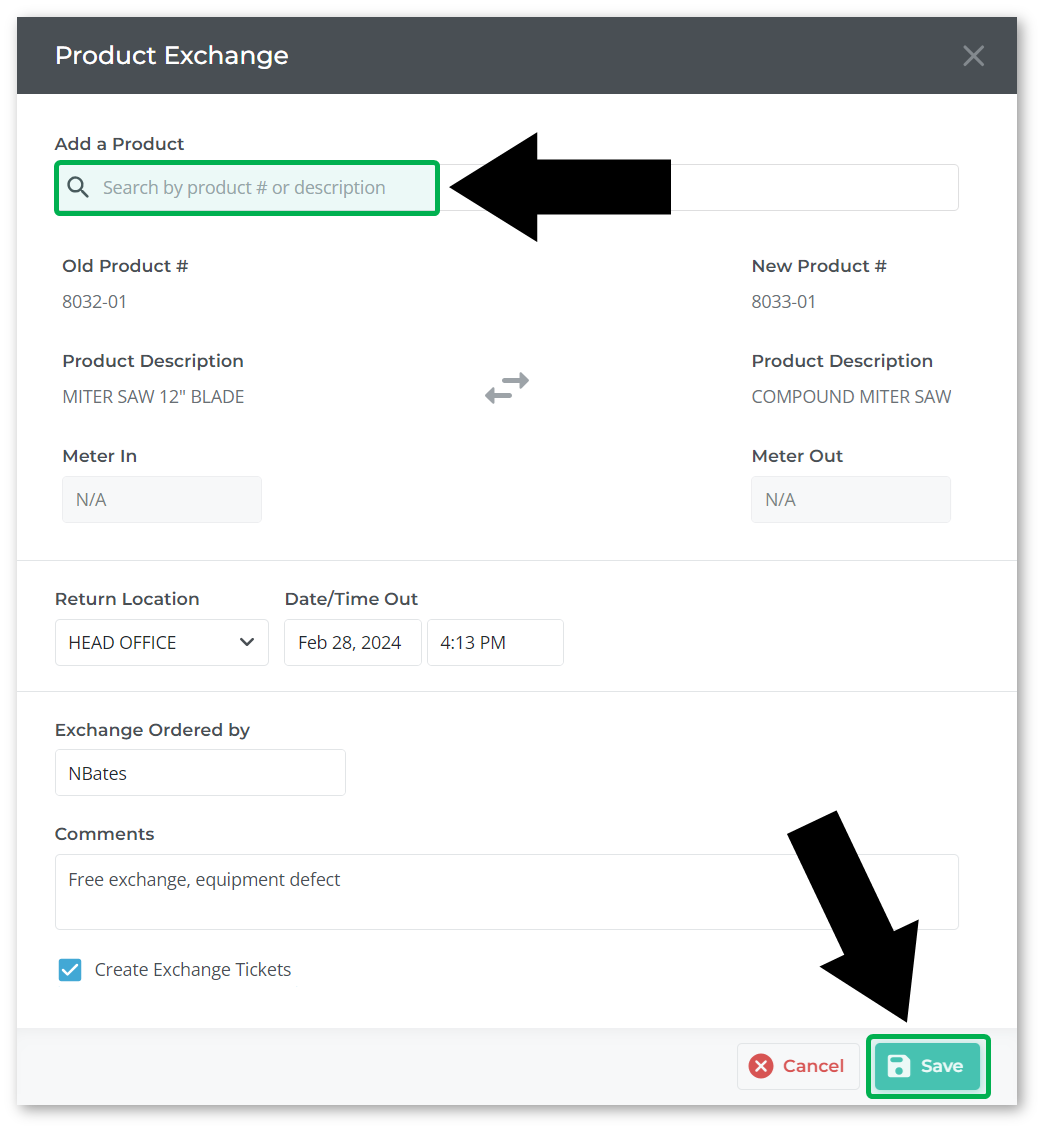
- Use the search bar at the top of the Product Exchange window to select the Product that will be replacing the original Product. Fill out the other information for the exchange, then click “Save” to save your changes.
For a breakdown of the contents of the Product Exchange window, see “Product Exchange Window”.
Product Exchange Window
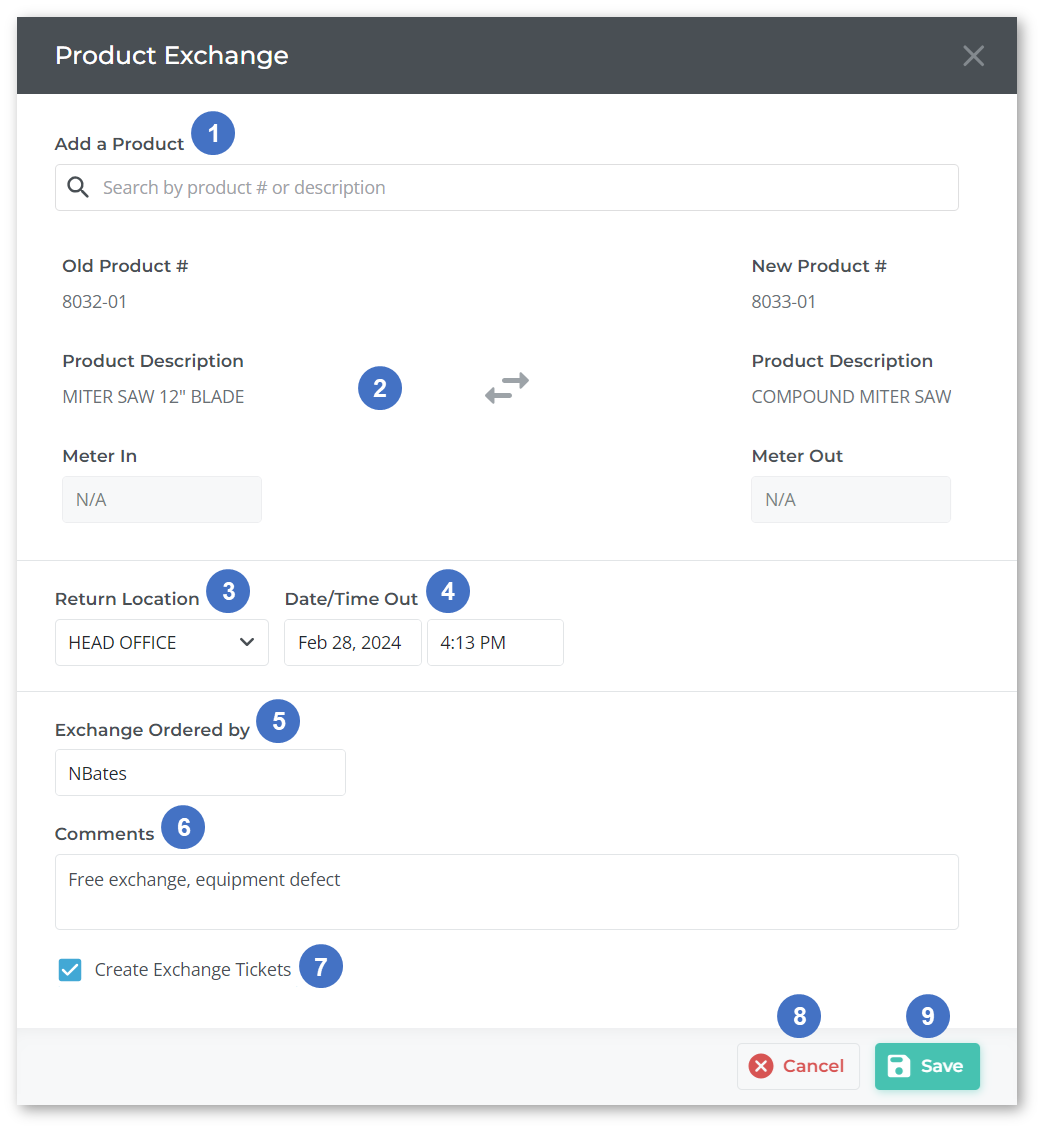
- Add a Product
Use this to select the new Product with which the original Product will be exchanged. Begin typing into the search bar to search the list of Products, then click on a Product to select it. - Old Product vs. New Product
A comparison of the Product numbers, descriptions, and meter readings of the original Product (left) and the new Product (right). - Return Location
The location to which the original Product will be returned. - Date / Time Out
The date and time for which the exchange is scheduled. Must be after the Contract’s start date. - Exchange Ordered by
The name of the person who ordered the exchange. - Comments
Any additional comments about the exchange. - Create Exchange Tickets Checkbox
Check this box to automatically generate a pair of Tickets for the exchange: a Pickup Ticket to pick up the original Product and a Delivery Ticket to deliver the new Product. The Tickets will be generated with the following characteristics:- Tickets will be scheduled for the Date / Time Out selected above (4).
- The destination of the Pickup Ticket will be set to the Return Location selected above (3).
- The Ticket number of the generated Tickets will end in an “X” (e.g. #1615-412X) to signify that they are exchange Tickets.
- Cancel Button
Click to cancel the exchange. - Save Button
Click to save your changes and affect the exchange. If the “Create Exchange Tickets” checkbox was checked, Tickets will be generated at this time.