
Quick Reference
- Custom fields allow you to customize your documents in Rental Management (Next), capturing information not normally included in standard documents. To reach the Custom Fields page, navigate to the User Menu (click on your name in the top-right corner of the screen) → Settings → Company Settings → Custom Fields.
- Click the Add New button
at the top of the Custom Fields screen to create a new custom field. Click the pencil icon
next to an existing custom field to edit it.
- Five types of custom field are currently supported:
- Text: Accepts a string of unformatted text.
- Number: Accepts a number. Options allow you to select a maximum number of digits and decimal places.
- Dropdown: Allows the user to select a single option from a drop-down list. Supports up to 20 different options.
- Multiselect: Allows the user to select multiple options from a list. Supports up to 20 different options.
- Currency: A specialized number field that accepts an amount of currency.
Introduction
Using the Custom Fields page in Rental Management (Next), you can create and manage custom fields for use with documents. This tool gives you the flexibility to capture information not normally included in standard documents.
Custom fields are currently supported for Counter Documents and Work Orders:
- Counter Documents: Custom fields for counter documents will appear on the Create / Edit Contract page, as well as the Create / Edit Reservation page.
- Work Orders: Custom fields for Work Orders will appear on the Create / Edit Work Order page for both Work Orders and Work Order Estimates.
To reach the Custom Fields page, navigate to the User Menu (click on your name in the top-right corner of the screen) → Settings → Company Settings → Custom Fields.
Custom Fields Page

- Add New Button
Click to add a new custom field. See “Create / Edit Custom Field” for more information. - Custom Fields Table
Contains the list of custom fields that currently exist for your system. The appearance of this table can be modified; see “Working with Tables” for more information. - Custom Field
Each custom field is represented by a row in the Custom Fields table.- Click and drag the six dots
to the left of a custom field’s row to rearrange the order of the custom fields. This will change the order in which the fields appear on documents.
- Click the pencil icon
- Click the bin icon
next to a custom field to delete it.
- Click and drag the six dots
Create / Edit Custom Field
Click the Add New button at the top of the Custom Fields screen to create a new custom field. Click the pencil icon
next to an existing custom field to edit it. This will open the Custom Field window, where you can edit the details of the field.
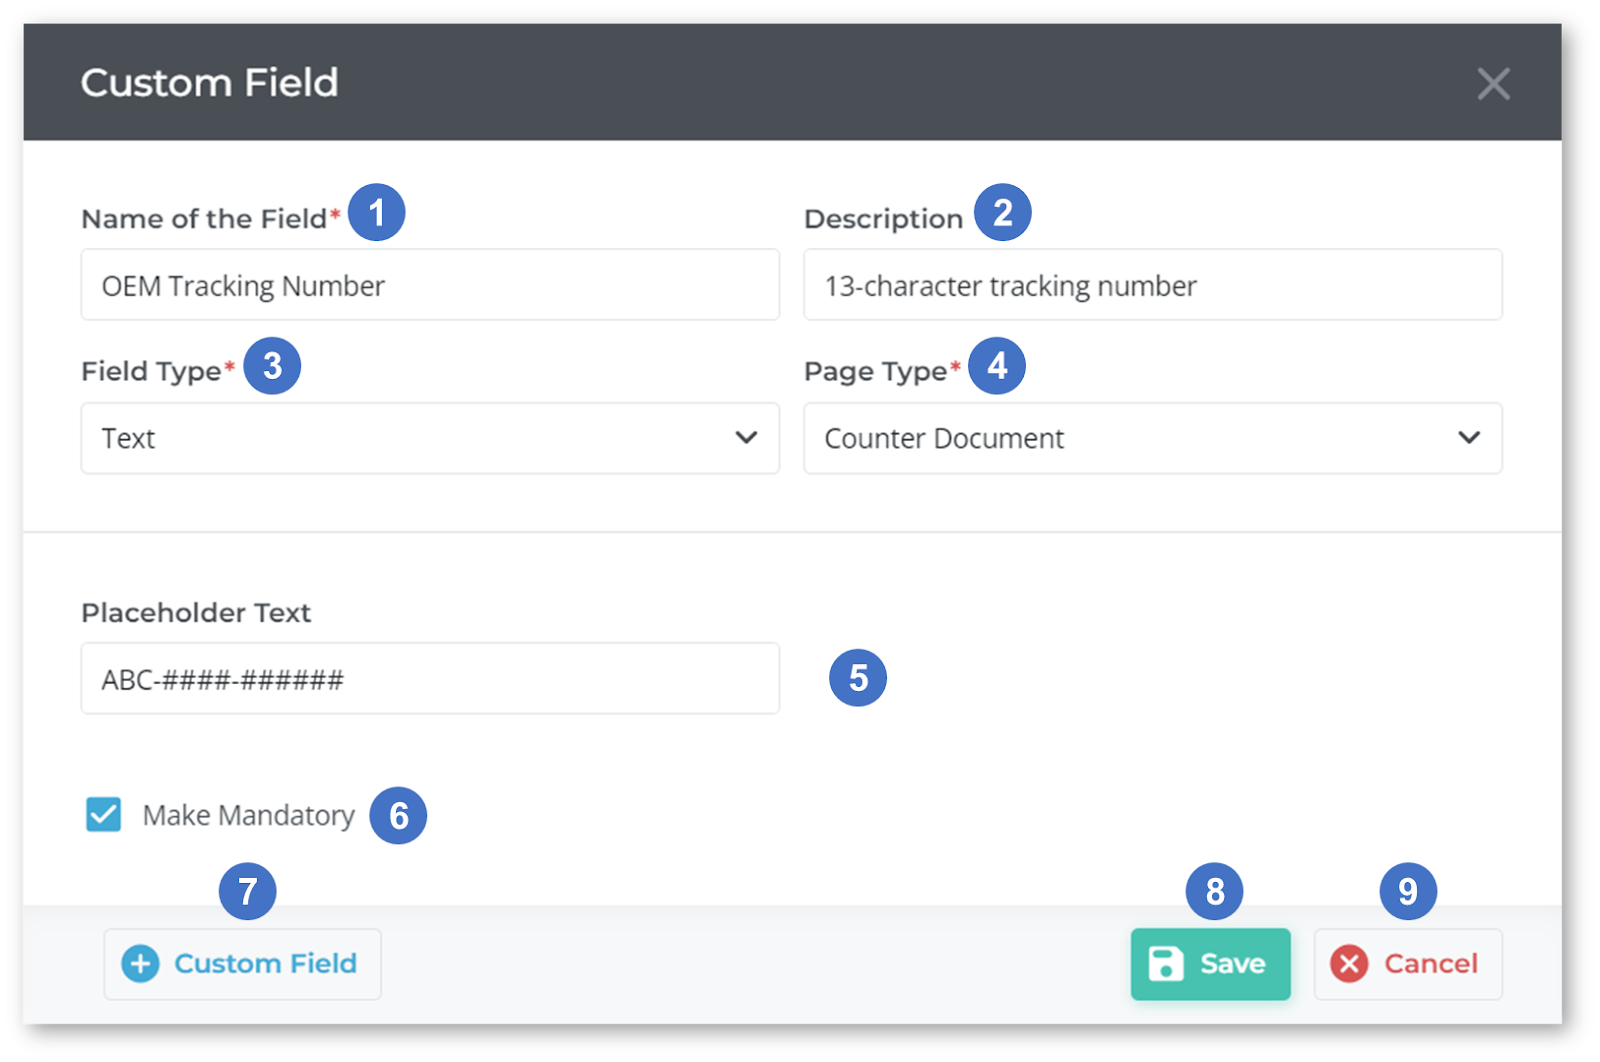
- Name of the Field
The field’s name. This will also appear on documents as the field’s label. - Description
The field’s internal description. This will appear as a tooltip when a user hovers over the custom field iconnext to this field. Use this description to provide context or instructions on how the field should be filled out.
- Field Type
The field’s input type. Five input types are currently supported:- Text: Accepts a string of unformatted text.
- Number: Accepts a number. Options allow you to select a maximum number of digits and decimal places.
- Dropdown: Allows the user to select a single option from a drop-down list. Supports up to 20 different options.
- Multiselect: Allows the user to select multiple options from a list. Supports up to 20 different options.
- Currency: A specialized number field that accepts an amount of currency.
- Page Type
The type of document on which the custom field will appear. Two options are currently supported:- Counter Document: The custom field will appear when creating or editing Contracts and Reservations.
- Work Order: The custom field will appear when creating or editing Work Orders and Work Order Estimates.
- Field Settings
Additional options for customizing the field. The options available in this section are determined by the field’s type (3).- Placeholder Text: Text fields only. The text that will appear in the field when empty.
- Number of Digits: Number and currency fields only. The maximum number of digits allowed to the left of the decimal point.
- Number of Decimals: Number fields only. The maximum number of digits allowed to the right of the decimal point.
- Number of Options: Dropdown and multiselect fields only. The total number of options available to select from. Incrementing or decrementing this number will cause an Option field to be added or removed.
- Option: Dropdown and multiselect fields only. An option the user can select from the list. Click the bin icon
to delete the option and reduce the Number of Options by 1.
- Make Mandatory Checkbox
Check this box to make this field mandatory when creating a Contract. - + Custom Field Button
Click to save the current custom field and immediately create an additional field. - Save Button
Click to save your changes. - Cancel Button
Click to cancel your changes without saving.