.png?width=365&height=50&name=Texada%20Logo%20(Black).png)
Quick Reference
- To create a new branch in Texada ServiceLink:
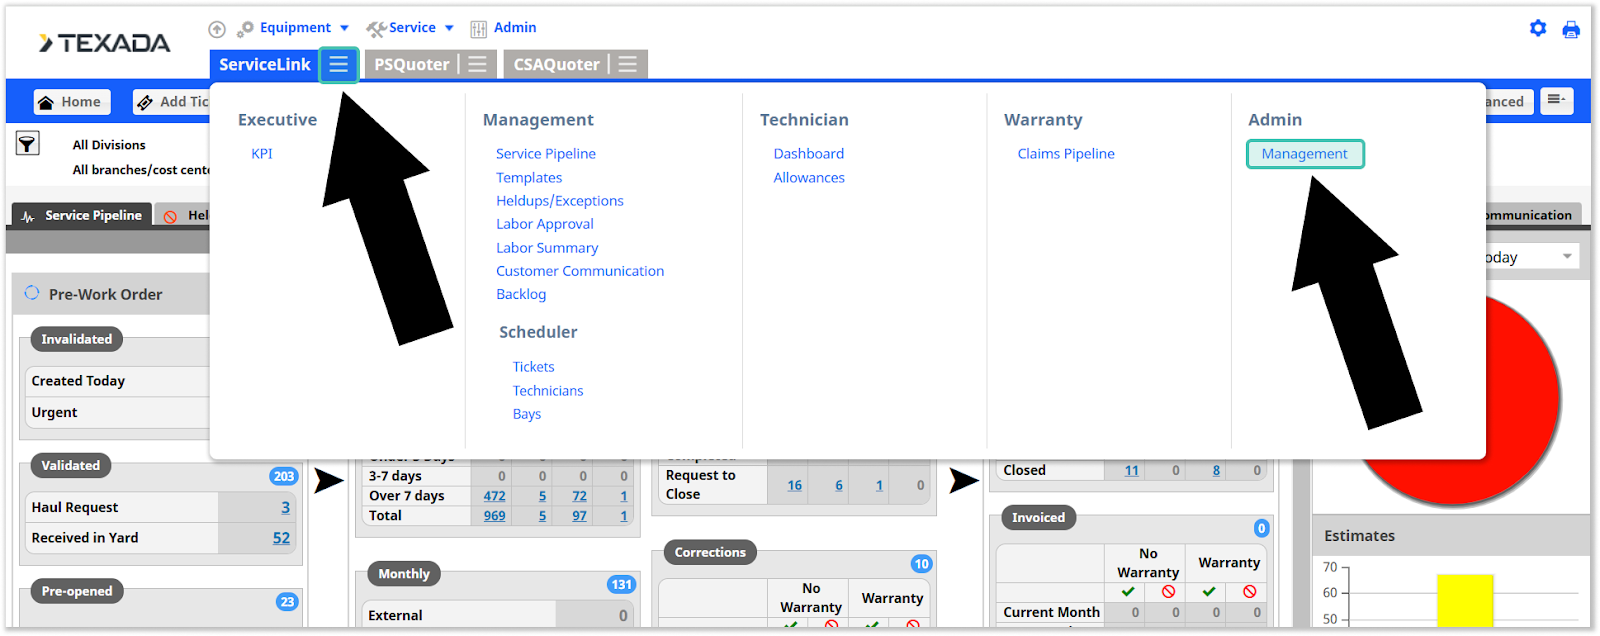
- Log in to Texada ServiceLink and click the hamburger icon
next to “ServiceLink” in the top menu, then select Management → Branches and Cost Centers → New Branch.
- Fill out the information for your new branch, then click “Save”
.
- Log in to Texada ServiceLink and click the hamburger icon
Introduction
The following article describes how to create a new branch in Texada ServiceLink.
Add a New Store
- Log in to Texada ServiceLink. Click the hamburger icon
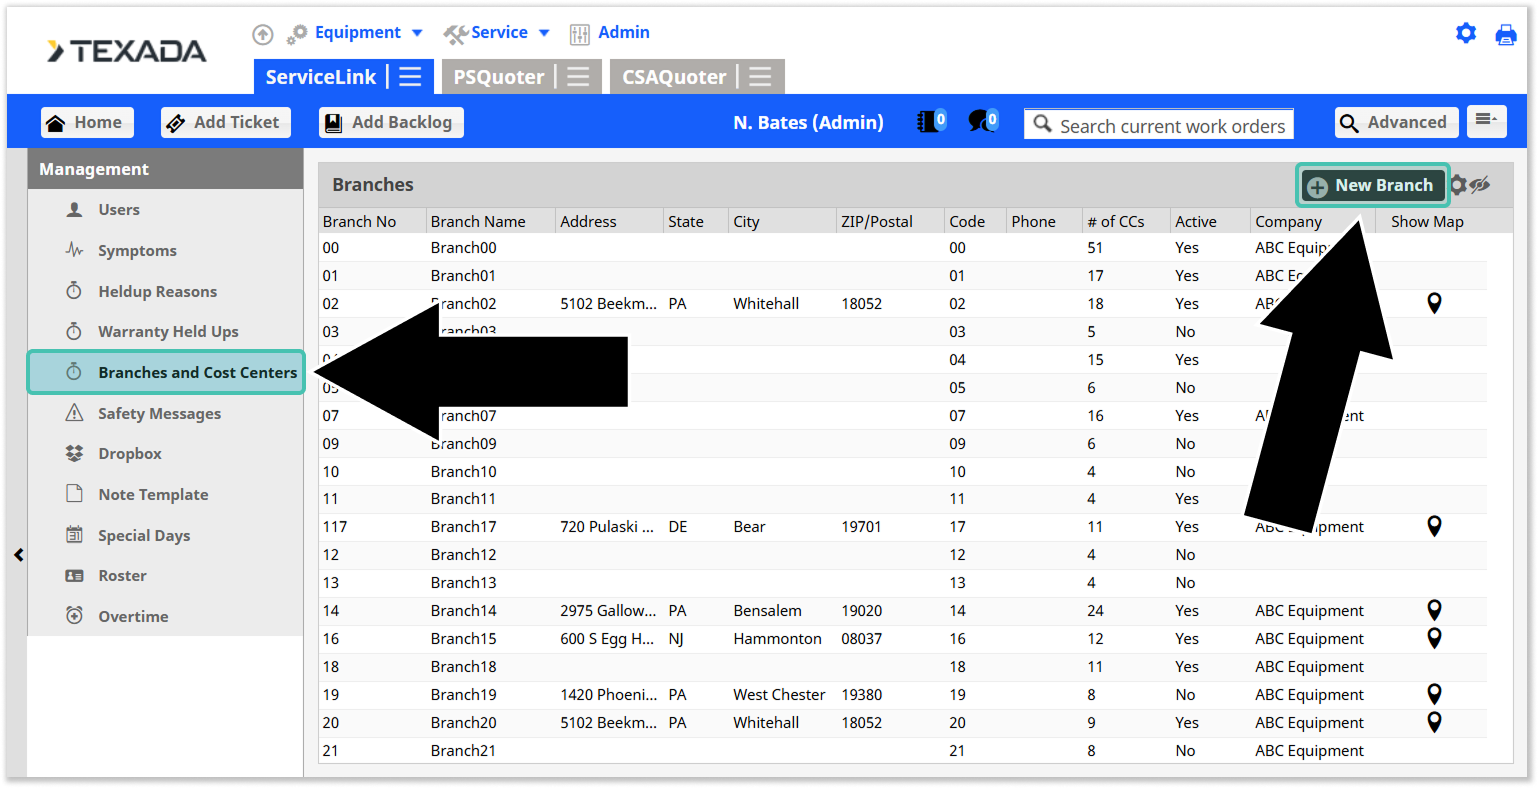
- Select “Branches and Cost Centers” from the left navigation menu, then click the “New Branch” button
in the top-right corner of the screen.
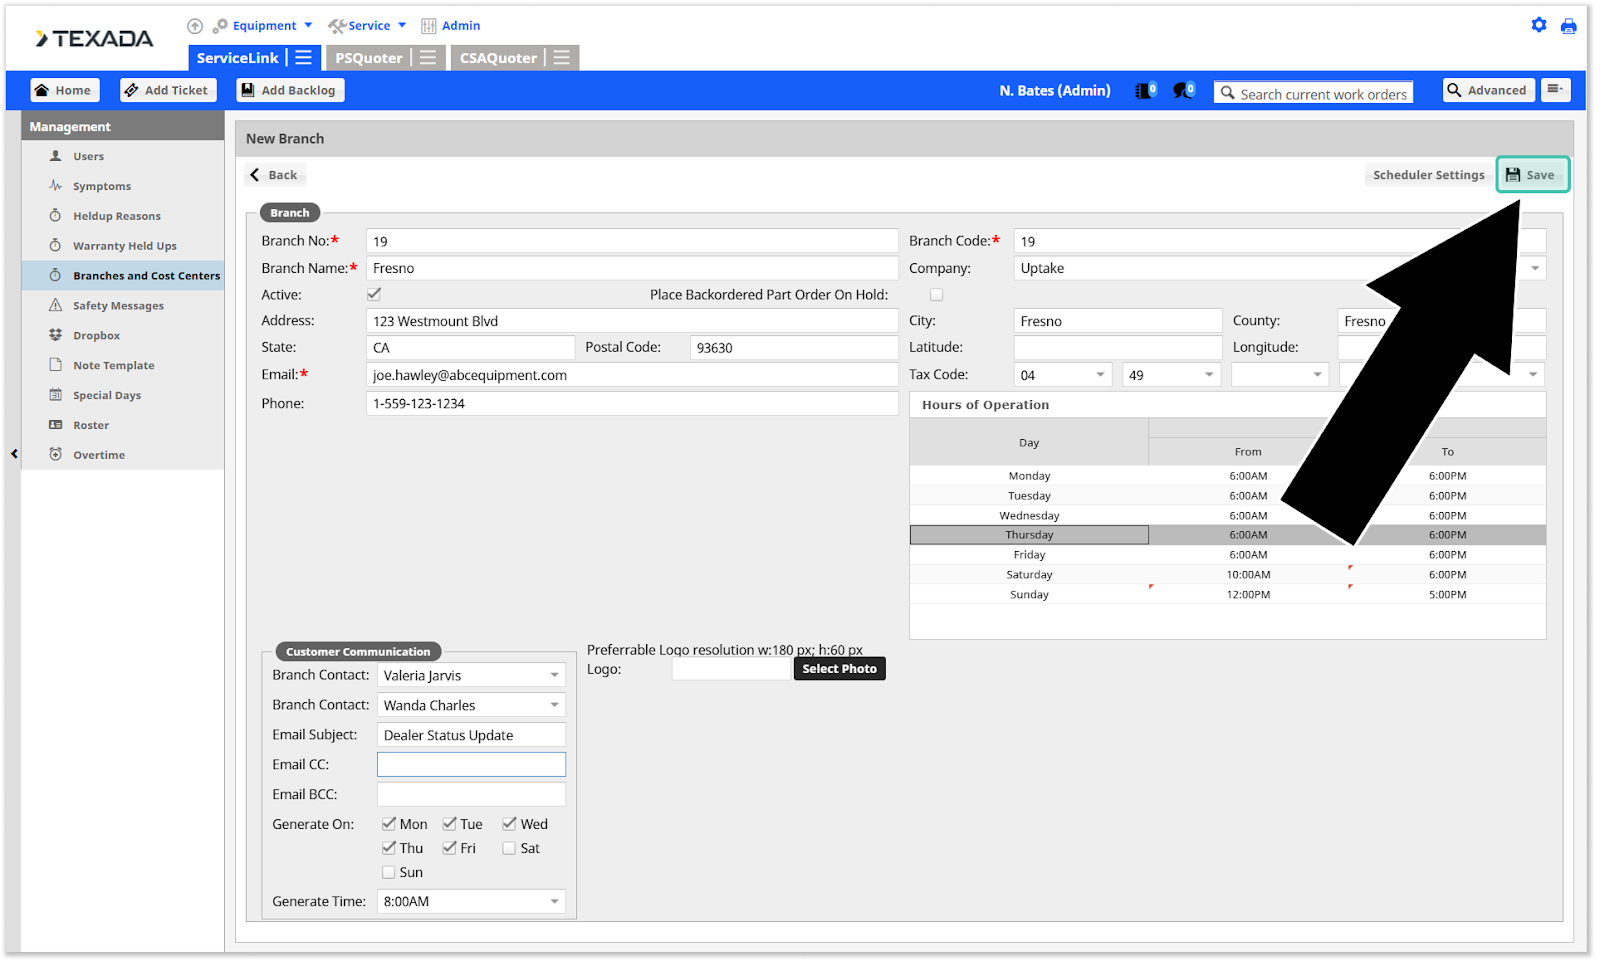
- Fill out the information for the new branch, including at minimum a Branch No, Branch Code, Branch Name, and primary Email address. Note that each branch must have a unique Branch No.
Once you are finished, click the “Save” button