Close a Work Order in Texada Web
Describes how to close an internal or customer-related work order in Texada Web.
Type
How to
Audience
Texada Web Counter
Products
Texada Web, Texada Mobile
In This Article
- Close a standard or customer work order
- Close an internal work order
Context
Close a work order when the work order is completed and ready to be invoiced to a customer or charged internally.
You can only close work orders that are in the completed status.
The invoice posting type controls the workflow you follow to close a work order:
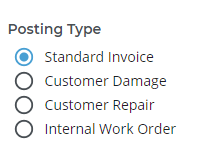
Standard Invoice, Customer Damage, and Customer Repair result in the creation of a work order payment request. For cash customers, the payment must be made before the work order is closed. For on-account customers, this step can be skipped. Internal Work Orders do not result in the creation of a work order payment request and can simply be closed.
Note: See: “About Work Order Posting Types in Texada Web and Texada Mobile” for more information on each posting type
Before You Begin
Required: Internet connection; valid Texada Web login credentials and access permissions; existing work order in completed status; existing repair code; existing charge code; and existing payment type
Optional: Mobile device with an Internet connection
Steps
Close a standard or customer work order
- In the Texada Web menu bar, navigate to Work Order
The list of existing work orders opens.png?width=624&name=Screenshot%20(99).png)
- Click the work order you need to close
The work order details page opens in the main area.png?width=624&name=Screenshot%20(95).png)
- In the footer, click Invoice
The Invoice pop-up opens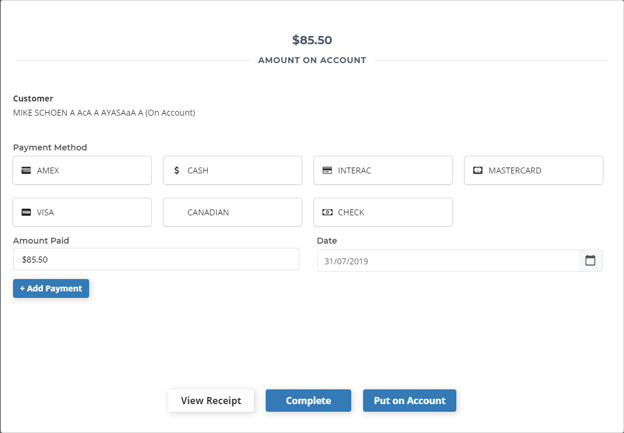
- Complete the invoice process
The work order is closed
Notes: - See: “Pay a Work Order Invoice in Texada Web” for more information on how to complete the invoice process
- See: “About Work Order Posting Types in Texada Web” for more information about how the different types of work order invoices are posted in SRM
Close an internal work order
- In the Texada Web menu bar, navigate to Work Orders
The list of existing work orders opens.png?width=624&name=Screenshot%20(99).png)
- Click the work order you need to close
The work order details page opens in the main area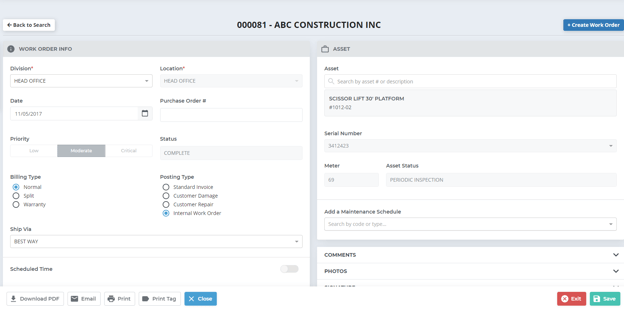
- Click Close
The close pop-up opens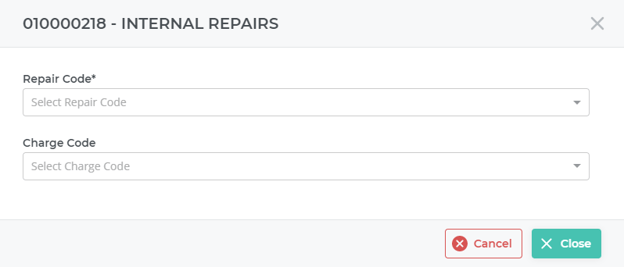
- Use the Repair Code drop-down to select the repair code that applies to the work performed on the equipment
Note: The information in the Repair Code drop-down is created and managed in SRM - Optional: Use the Charge Code drop-down to select a charge code related to the type of work performed on the equipment
Click Close
The work order details page opens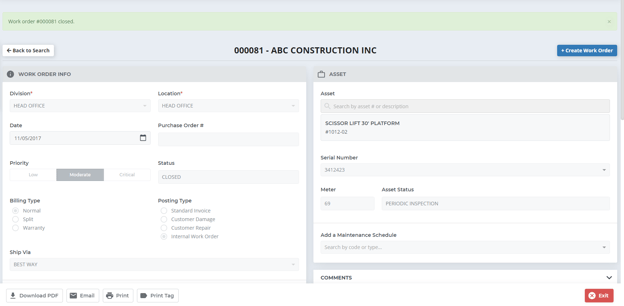
The status of the work order is updated to Closed
Note: See: “About Work Order Posting Types in Texada Web” for more information about how the different types of work order invoices are posted in SRM
.png?width=365&height=50&name=Texada%20Logo%20(Black).png)