.png?width=365&height=50&name=Texada%20Logo%20(Black).png)
In This Article
Introduction
When creating a sales opportunity in Equipment CRM (SalesLink), it is common to want to provide your customers with multiple options for the equipment they want to buy. For example, you might want to provide a full-price option for purchasing a new machine, and a discounted option for purchasing a used machine instead.
The following article will walk you through the process of creating an opportunity with multiple options in Equipment CRM.
Create an Opportunity with Multiple Options
- Create Opportunity
Open Equipment CRM - Sales Rep and create a new opportunity, via either the white plus icon in the top-right corner of the screen, or the blue plus icon
  next to “Opportunities” in the left menu when viewing a customer.
Enter the details for your opportunity, filling out the “Product” section with the information for the first product option you want to provide your customer. Once you are finished, click the “Save” button in the bottom-right corner of the screen.
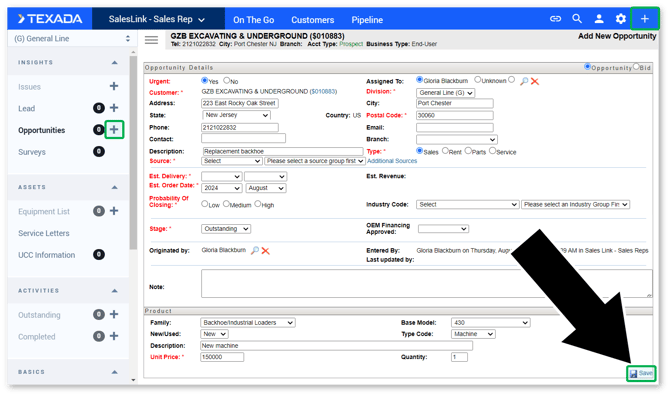
- Create First Quote
Once you’ve saved your new opportunity, scroll down to the “Product Summary” section and click the “Create” button under “Quote”. This will open the Create Quote screen in iQuote.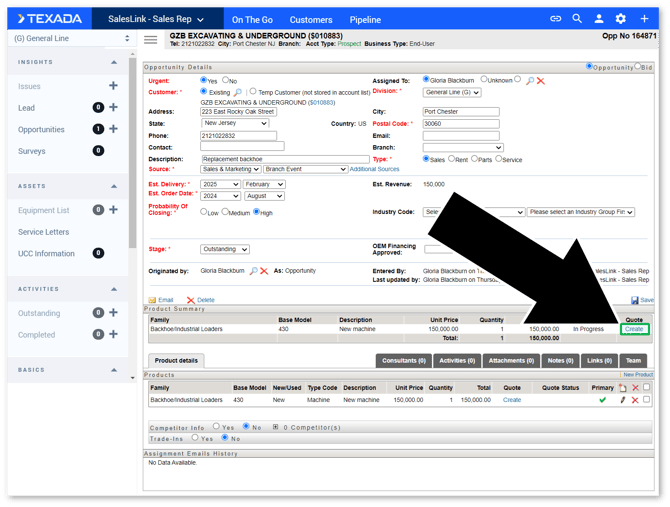
- Complete First Quote
Fill out the details of your quote, then click the “Create Quote” button in the top-right corner of the screen.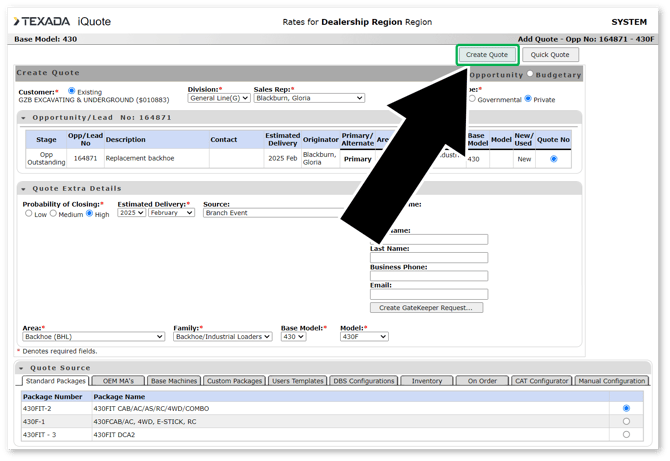
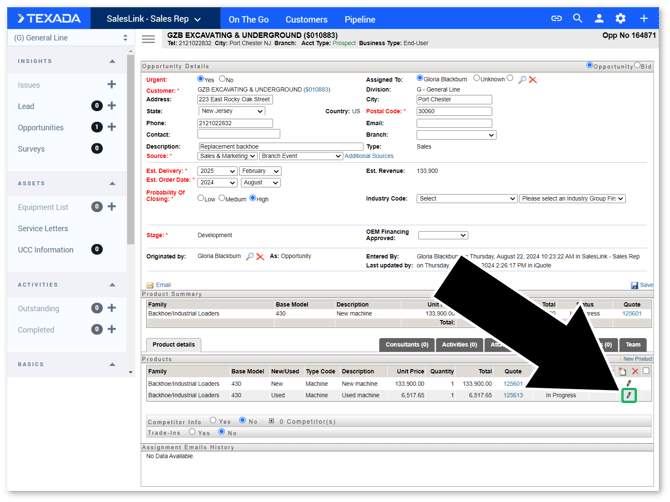
- Create Second Product
Once your first quote has been created, it is time to add a second product to the opportunity. Navigate back to the Opportunity Details screen in Equipment CRM; it should have automatically refreshed. Scroll down to the “Products” section and click the New Product icon near the right side of the screen. This will open the New Product window.
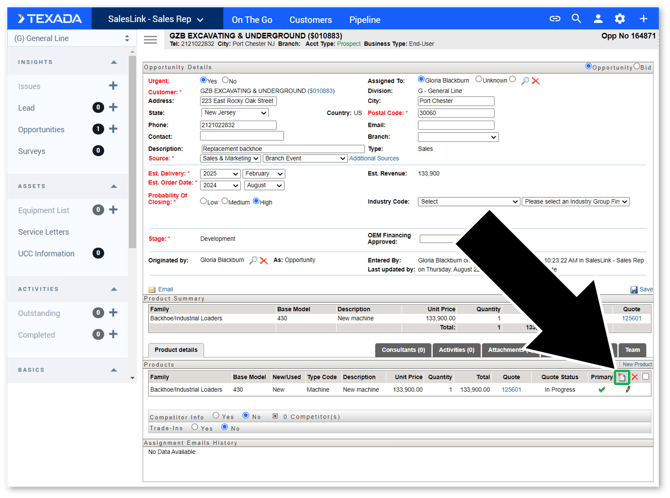
- Complete Second Product
Fill out the details for the second product and click “Add” to add it to the opportunity.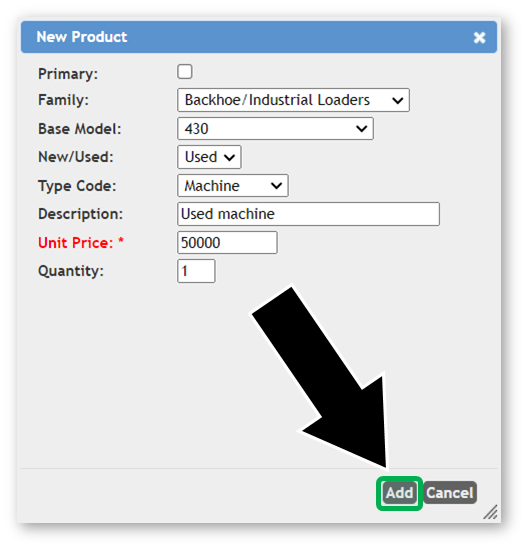
- Create Second Quote
Back on the Opportunity Details screen, scroll down to the “Products” section and click the “Create” button under “Quote” for the second product.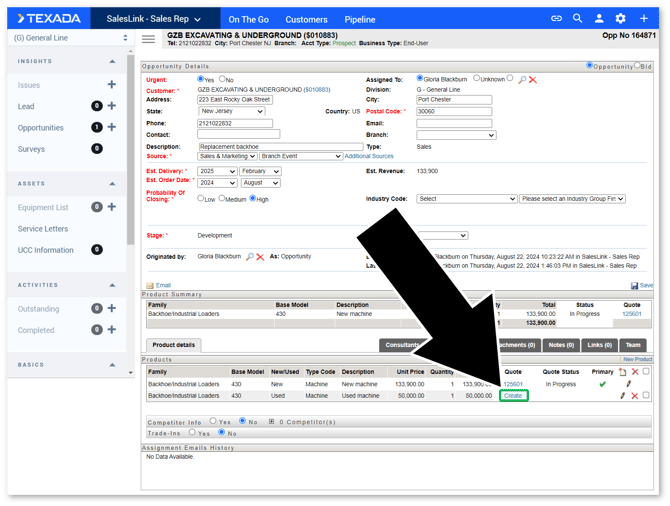
- Complete Second Quote
Fill out the details for your second quote, then click the “Create Quote” button in the top-right corner of the screen.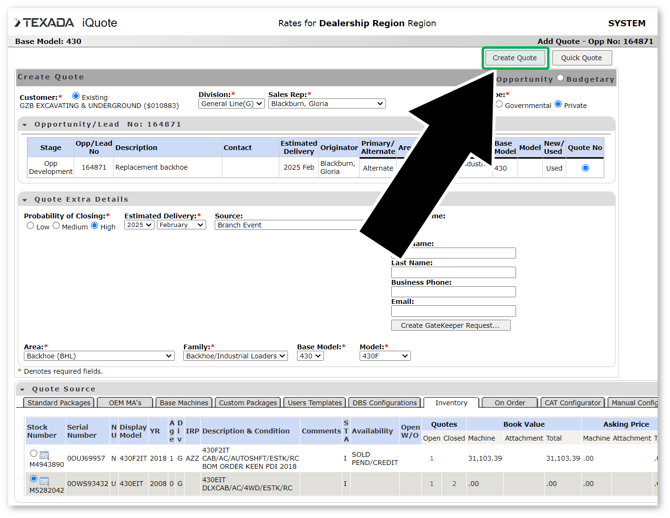
- Create Additional Products
If desired, you can now repeat steps 4-7 to add as many products and quotes to the opportunity as you like. - Review Opportunity
Once all of your products and quotes have been created, navigate back to the Opportunity Details screen in Equipment CRM. You will now see multiple products, each with their own quote, under the “Products” section.
Note that the estimated revenue for the opportunity reflects the amount quoted for the primary product, as indicated by the green check mark under “Primary” in the Products section. To change this, click the pencil icon
  next to the product you would like to be the primary product, then check the “Primary” checkbox.