.png?width=365&height=50&name=Texada%20Logo%20(Black).png)
Introduction
The territory plan feature in SalesLink allows sales representatives to outline, track, and manage their sales strategies within designated territories. This article provides a guide for creating and managing a territory plan in SalesLink - Sales Rep.
Create a New Territory Plan
To create a new territory plan in SalesLink - Sales Rep, follow the steps below.
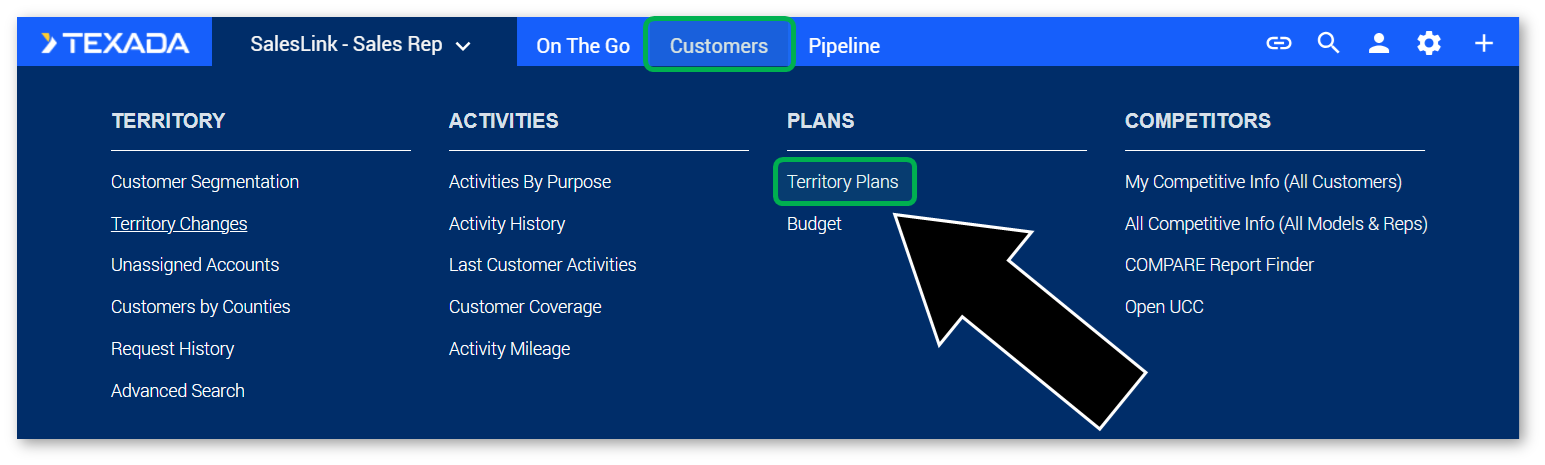
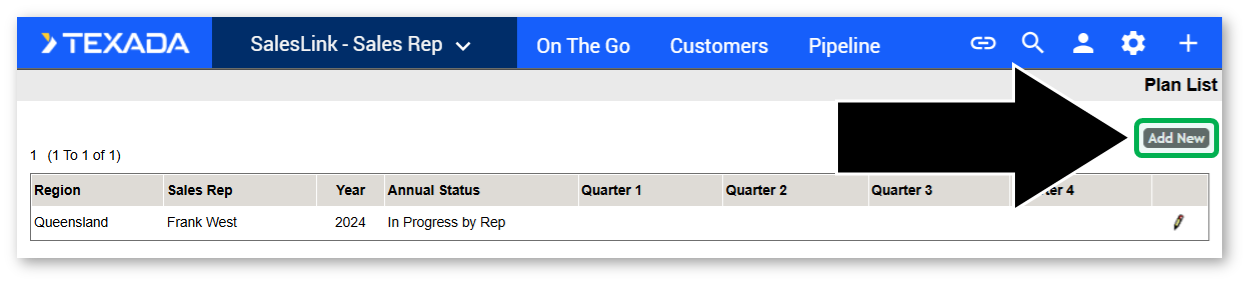
- Navigate to Customers → Territory Plans in the top menu.
- Click on the “Add New” button.
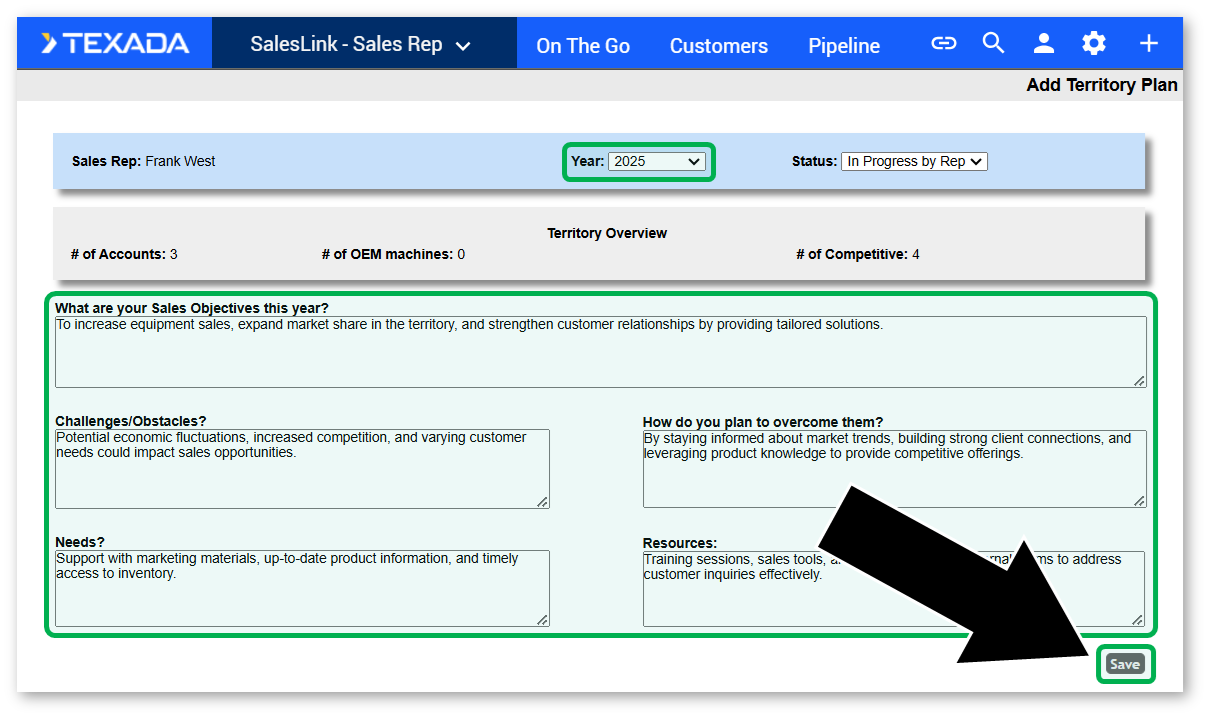
- Fill out the following required information on the Add Territory Plan page, then click the “Save” button. Once the save is complete, you will be redirected to the “Edit Territory Plan” page.
Edit Territory Plan
Once you have created a territory plan, you will have the opportunity to fill out additional information via the Edit Territory Plan page. You can also edit existing territory plans by navigating to Customers → Territory Plans in the top menu, then clicking the pencil icon next to the plan you want to edit.
Territory Overview and Territory Activity
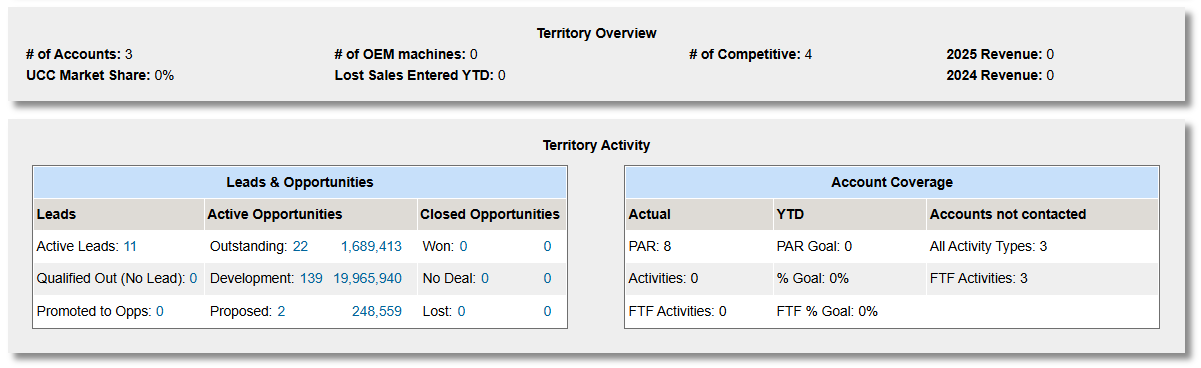
These panels contain basic information about the territory. Click on any of the hyperlinked text in the Territory Activity panel to view lists of Leads and Opportunities.
Performance and Outlook and SalesLink Quality Action Plan
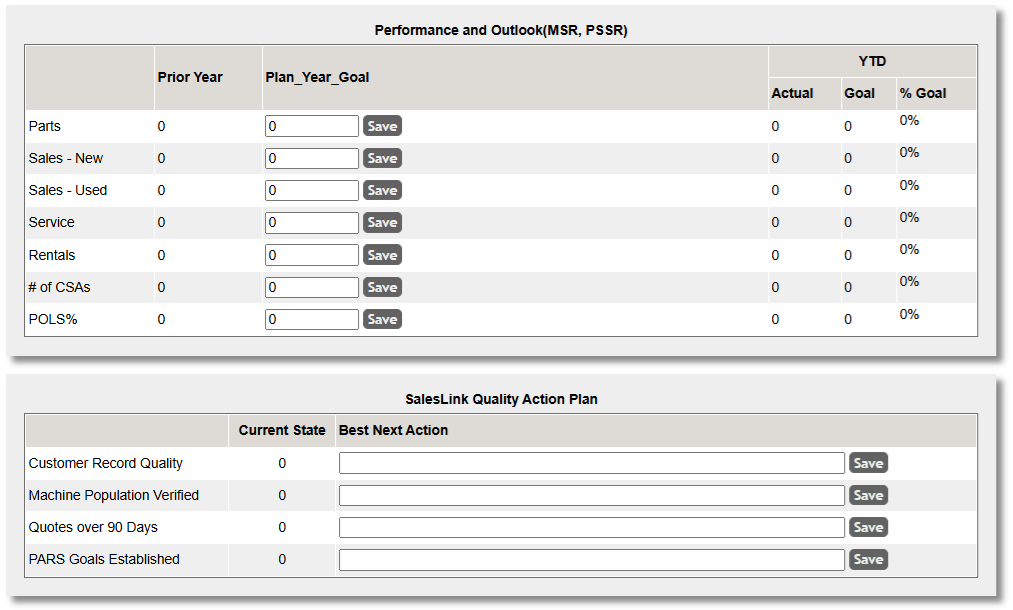
- The MSR’s Plan List contains plans and their status for each quarter and an edit icon.
- After the Manager has changed the status to “Reviewed” by Manager, the MSR can no longer edit the plan.
- The MSR enters a goal for the plan in each Sales Category.
- The Goal is pro-rated based on how much of the current year has progressed.
- YTD actuals for each category are compared against the goal.
|
Metric |
Calculation Explanation |
|
Customer Record Quality |
% of assigned accounts where influencers include all of the following: Physical Location, Contact Name, Contact Phone #, and Email |
|
Machine Population Verified |
% of Cat machines in DBS with a date in the data verified field that is in the last 12 months |
|
Quotes over 90 Days |
Count of quotes over 90 days in PSQ |
|
PAR Goals Established |
(FTF Activities Count / YTD Par Goal) * 100 |
|
Machine Population Verified |
% of CAT machines in libe14/empeqpd0 with a date in the date verified field (dtvrf8) that is in the Range of the last year |
Sales Objectives
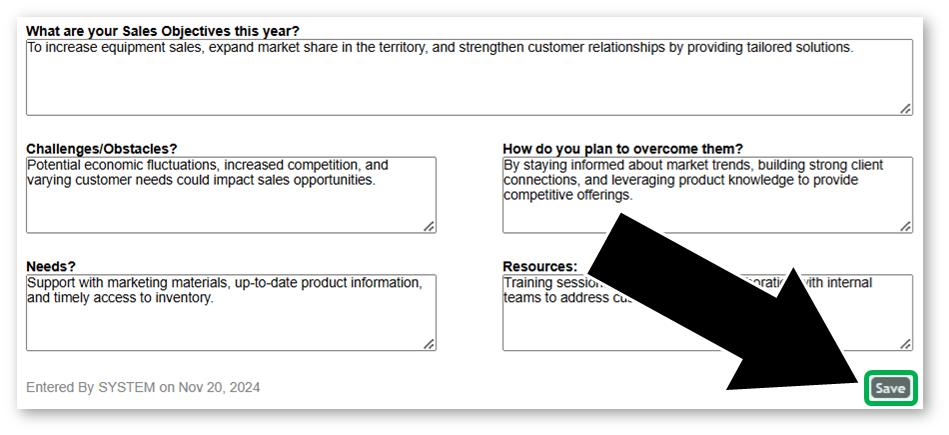
Specific sales objectives are identified along with an area to identify obstacles and plans to overcome them.
Quarterly Statuses
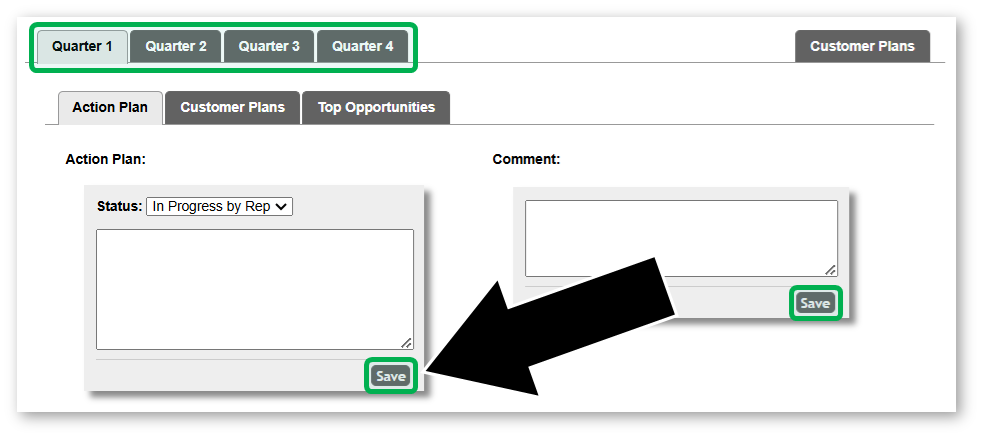

This section allows you to define an action plan for each quarter. Use the “Top Opportunities” tab to view Opportunities for each quarter. Click the save button when you are done filling out each quarterly action plan.