.png?width=365&height=50&name=Texada%20Logo%20(Black).png)
In This Article
Introduction
The Marketing Integrator is a new feature that seamlessly integrates marketing automation platforms (MAPs) such as HubSpot with Texada SalesLink. This integration streamlines lead management and synchronizes sales and marketing efforts, enabling dealerships to enhance their campaign management and improve lead conversion rates.
The following article will explain how to SalesLink, the Marketing Integrator, and your MAP can be used together to automatically transfer data between platforms.
This article makes frequent use of the acronym “MAP” to refer to your marketing automation platform of choice. Texada’s Marketing Integrator is currently compatible with the following MAPs:
- HubSpot
- Salesforce Marketing Cloud
Structure
The Marketing Integrator provides two-way communication between Texada SalesLink and your MAP, enabling the flow of critical data between the two systems:
SalesLink to Marketing Automation Platform
.png?width=688&height=374&name=SalesLink%20to%20Marketing%20Automation%20Platform%20(Figma).png)
The Marketing Integrator allows SalesLink contacts to be enrolled into MAP workflows en masse.
Using the Contacts Enrollment tool, SalesLink contacts can be filtered by campaign and other criteria, then bulk enrolled into a workflow of your choice. SalesLink contacts that don’t already exist in your MAP will be created automatically, meaning you can quickly build out contact lists in your MAP based on existing SalesLink data.
Marketing Automation Platform to SalesLink

The Marketing Integrator can automatically create SalesLink leads from MAP deals.
Using the SalesLink Lead Creation Rules tool, you can establish rules to determine which deals should be brought into SalesLink as leads, and what the properties of the created leads should be. Once the Marketing Integrator is enabled, it will constantly poll your MAP in search of deals that meet your criteria. Matching deals will be reproduced as SalesLink leads with the properties you have specified.
Marketing Integrator
The following section outlines the Marketing Integrator functionality available within Texada WorkFlow. This is where the Contact Enrollment and SalesLink Lead Creation Rules pages can be found.
Contact Enrollment

The Contact Enrollment page allows you to review MAP workflows and enroll new contacts in those workflows. To access this screen, log in to Texada WorkFlow and select Contact Enrollment from the left navigation menu.
For more information, see “Marketing Integrator - Contact Enrollment”.
SalesLink Lead Creation Rules

The SalesLink Lead Creation Rules screen allows you to establish the rules the system uses to create SalesLink leads from MAP deals. To reach this screen, open Marketing Integrator and select SalesLink Lead Creation Rules from the left navigation menu.
For more information, see “Marketing Integrator - SalesLink Lead Creation Rules”.HubSpot
The following section outlines a number of HubSpot features relevant to the Marketing Integrator.
IMPORTANT
In order to integrate HubSpot with SalesLink, your organization must have a paid Sales or Service seat with HubSpot. This is required in order to install the SalesLink integration application from the HubSpot marketplace.
If you are unsure what kind of seat your organization has or want to upgrade, please contact your HubSpot account representative.
Workflows
The Workflows screen in HubSpot allows you to manage marketing workflows. Workflows that are compatible with the Marketing Integrator will appear in the “HubSpot Workflow” panel at the top of the Contact Enrollment screen.
To access the Workflows screen, select Automations → Workflows from the left navigation menu.
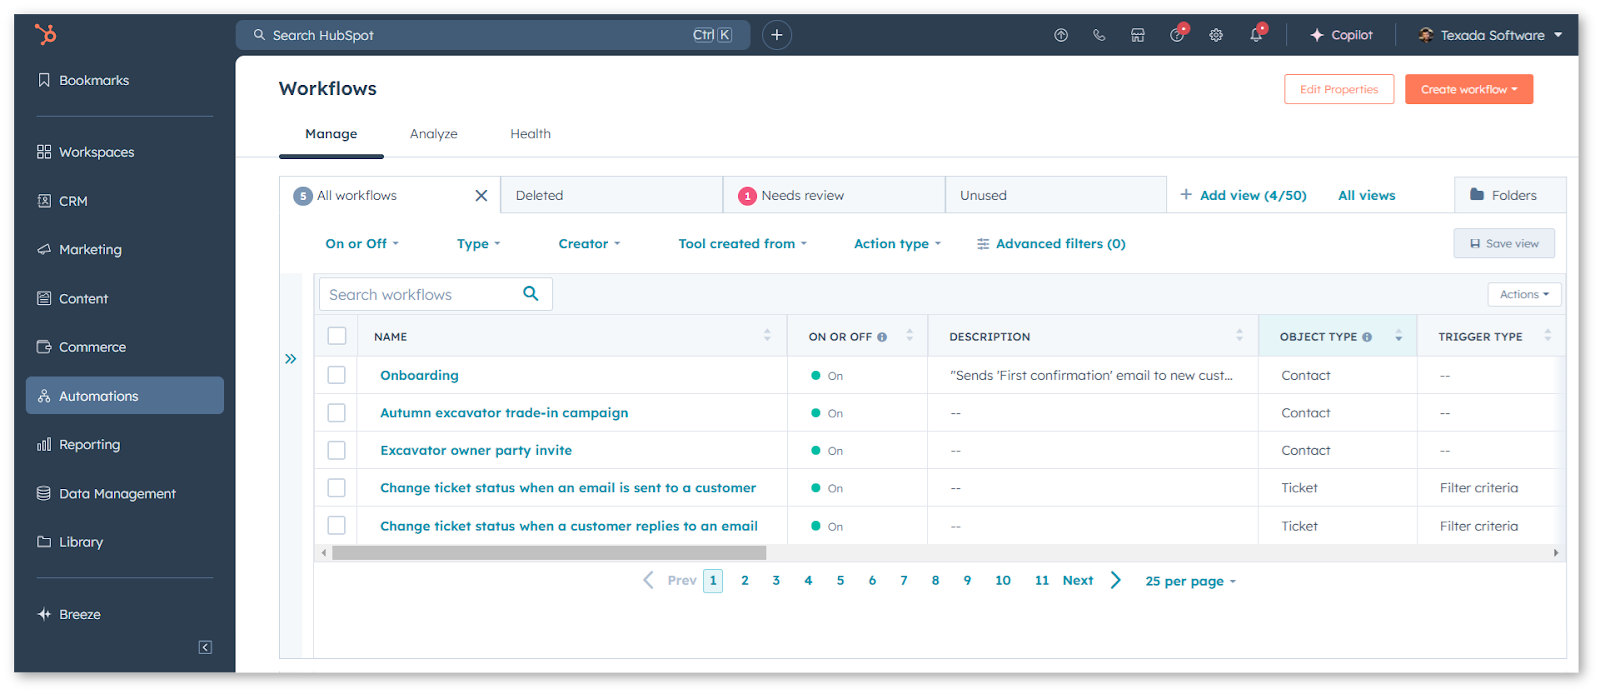
Click the “Create workflow” button in the top-right corner of the screen to create a new workflow.
There are several different types of HubSpot workflows, as indicated by the “Object Type” column. Marketing Integrator currently works with workflows of type “Contact”.
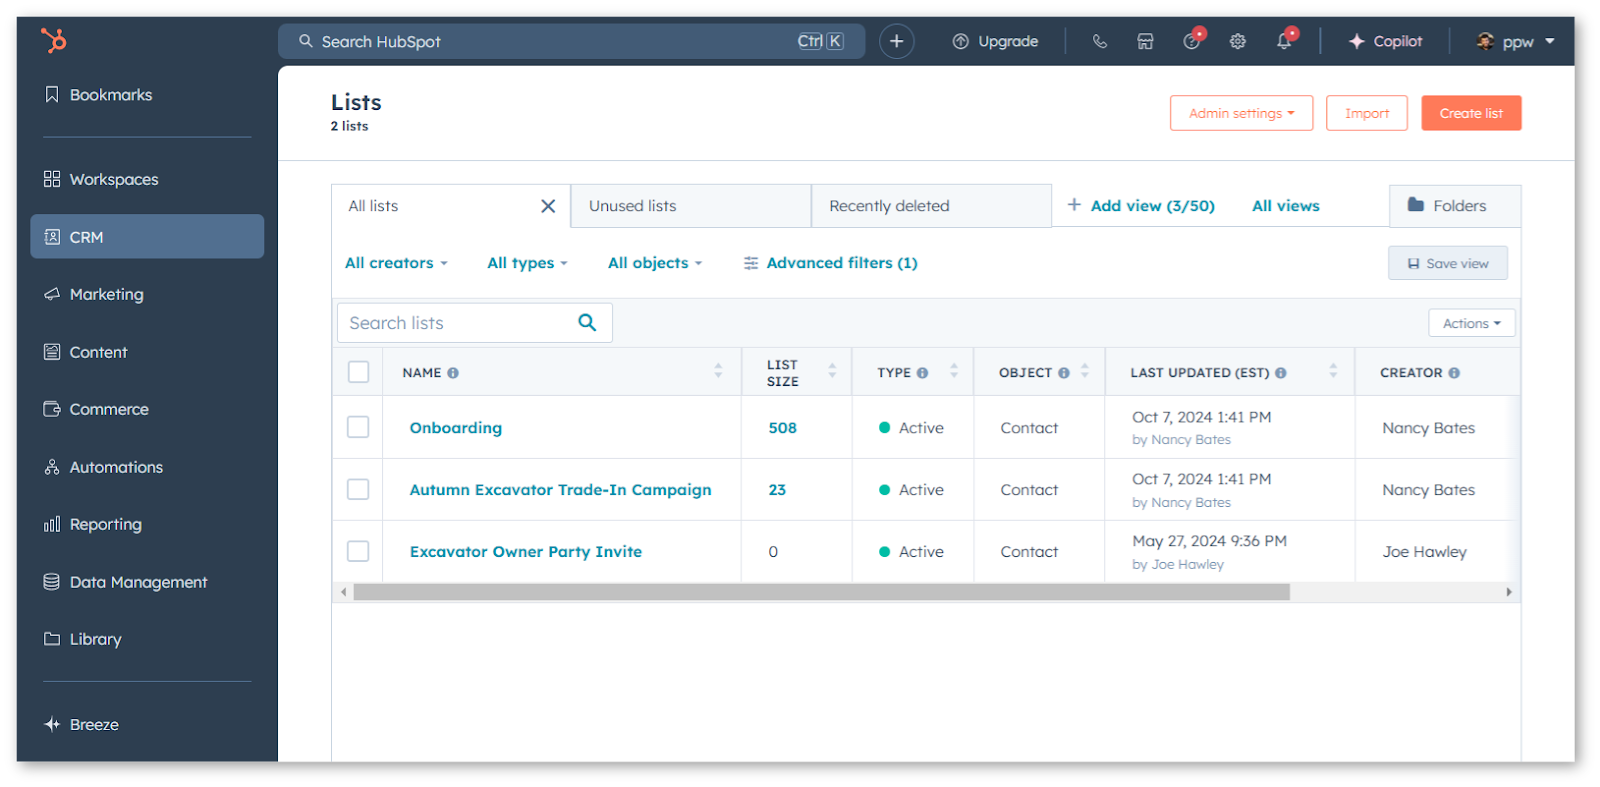
Lists
Once you have started enrolling contacts into workflows, you can use HubSpot’s Lists feature to generate lists of contacts participating in each workflow.
To access this feature, select CRM → Lists from the left navigation menu.
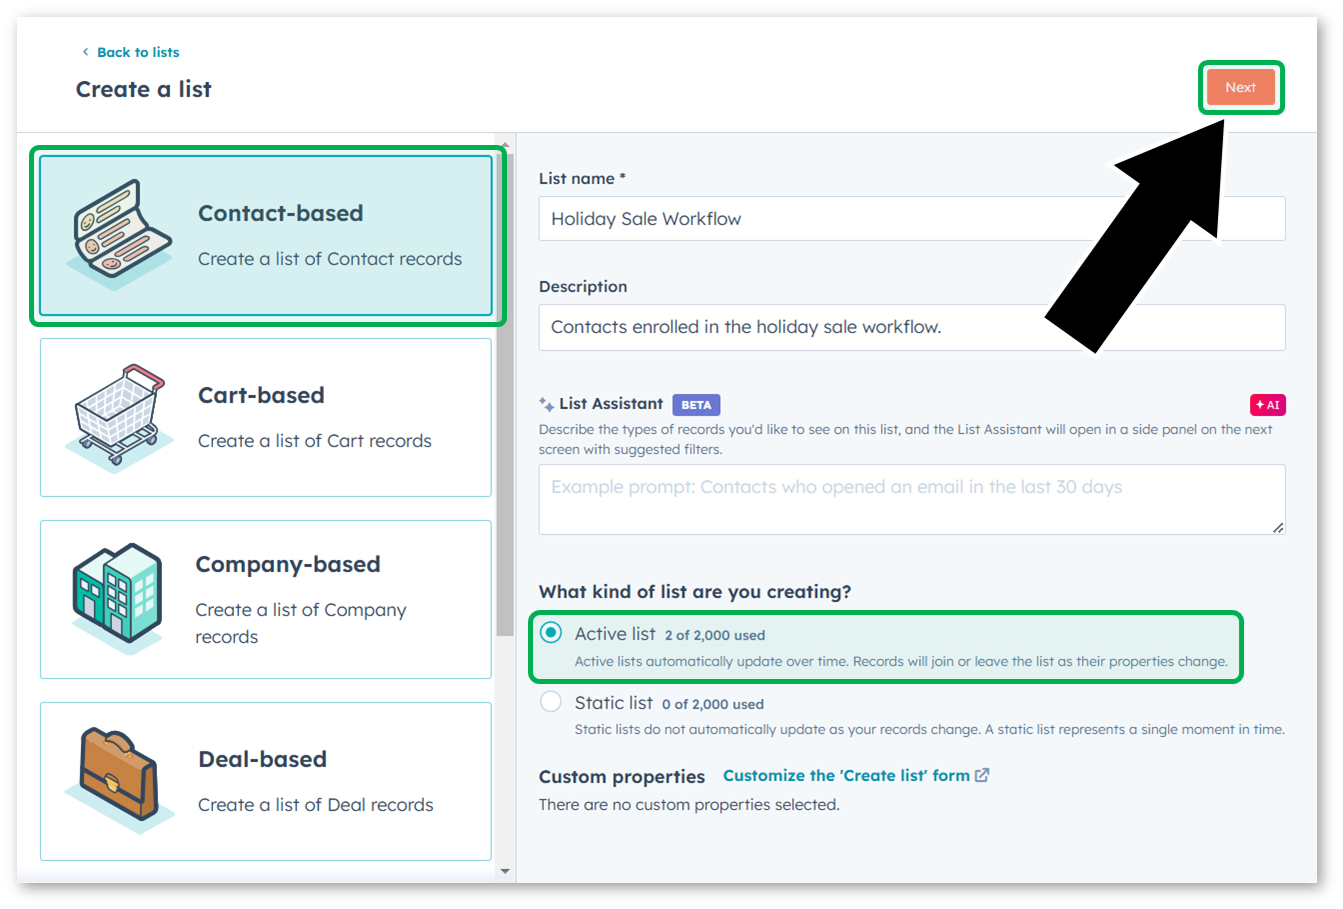
Create a List
To create a new HubSpot list, click the “Create list” button in the top-right corner of the Lists page. To create a list that captures the contacts enrolled in a particular workflow, select the following options during list creation:
- On the Create a list screen, select “Contact-based” as the list’s type. Under “What kind of list are you creating?”, select “Active”. Click “Next” to continue.
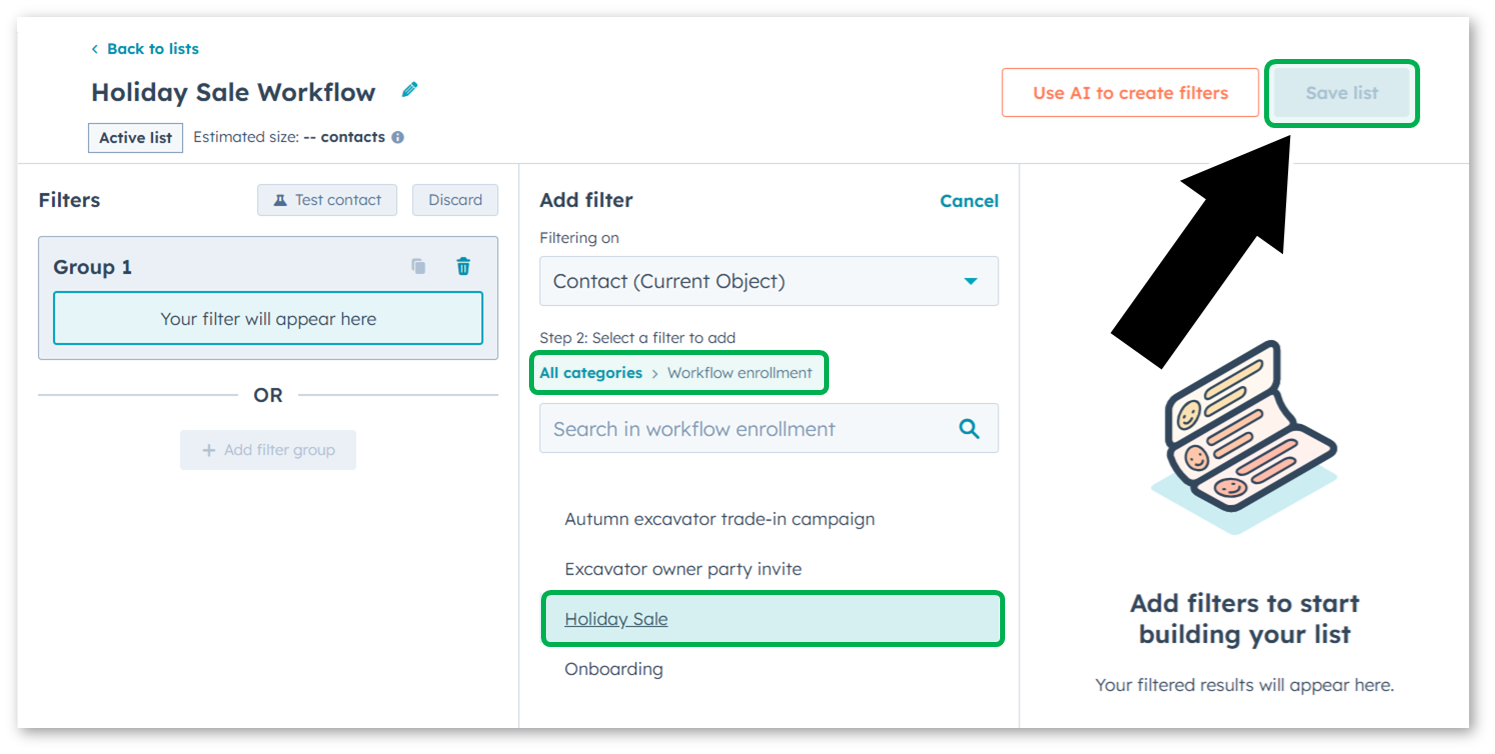
- On the following screen, click the “Add filter” button
to add a new filter. Search for a filter called “Workflow enrollment” and select it. A list of your HubSpot workflows will appear. Select the workflow you’d like to filter on, then click “Save list” to create your list.
View a List
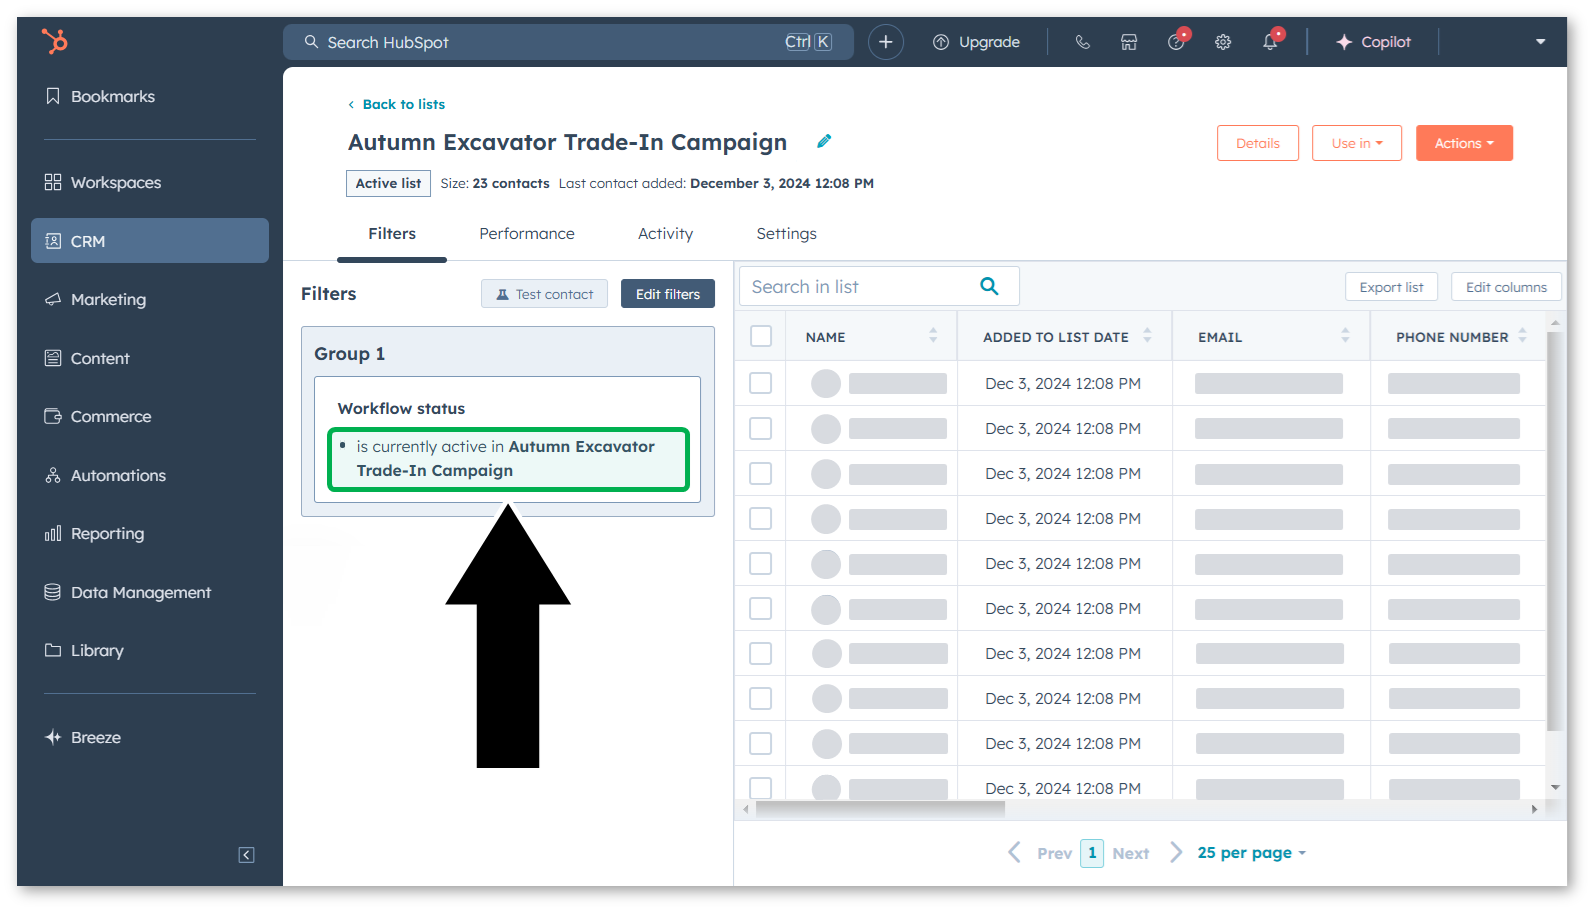
Once you have created a HubSpot list, you can view it by clicking on its name on the Lists page. This will display the contacts currently included in this list.
You can confirm that a list has been created correctly by looking at the Filters panel on the left side of the screen. A workflow-centric list should have a filter that reads “...is currently active in [Workflow Name]”, as in the example below.
Create a Deal
A ‘deal’ in HubSpot is equivalent to a ‘lead’ in SalesLink. HubSpot deals can be created in a number of ways depending on your system’s configuration. For example, they may be created automatically as a result of a workflow or marketing form completion.
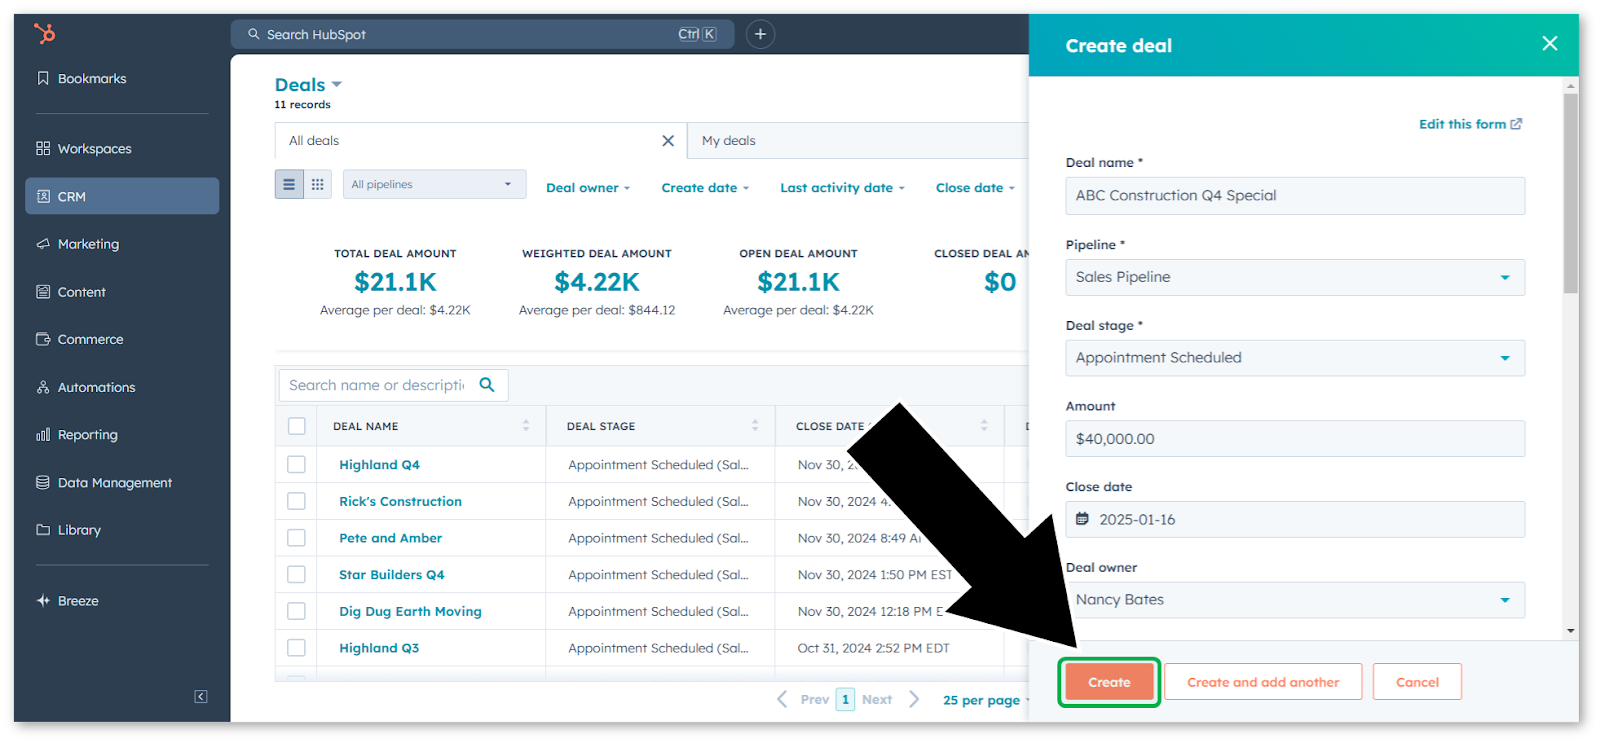
Deals can also be created manually via the Deals page in HubSpot. To reach this page, select CRM → Deals from the left navigation menu.
To create a new deal, click the “Create deal” button in the top-right corner of the screen. Fill out the information for your deal, then click “Create”. Note that the information you need to fill out will depend on your HubSpot configurations.
Marketing Integrator will routinely check created HubSpot deals against the rules established on the SalesLink Lead Creation Rules page. Matching deals will be automatically reproduced in SalesLink.
Salesforce Marketing Cloud
In order to use Salesforce Marketing Cloud with Marketing Integrator, you will need to use Data Extensions to correctly structure your data for reading and writing via API. To learn more, please reach out to your Salesforce Marketing Cloud representative.
SalesLink
The following section outlines a number of SalesLink features relevant to the Marketing Integrator.
Campaigns
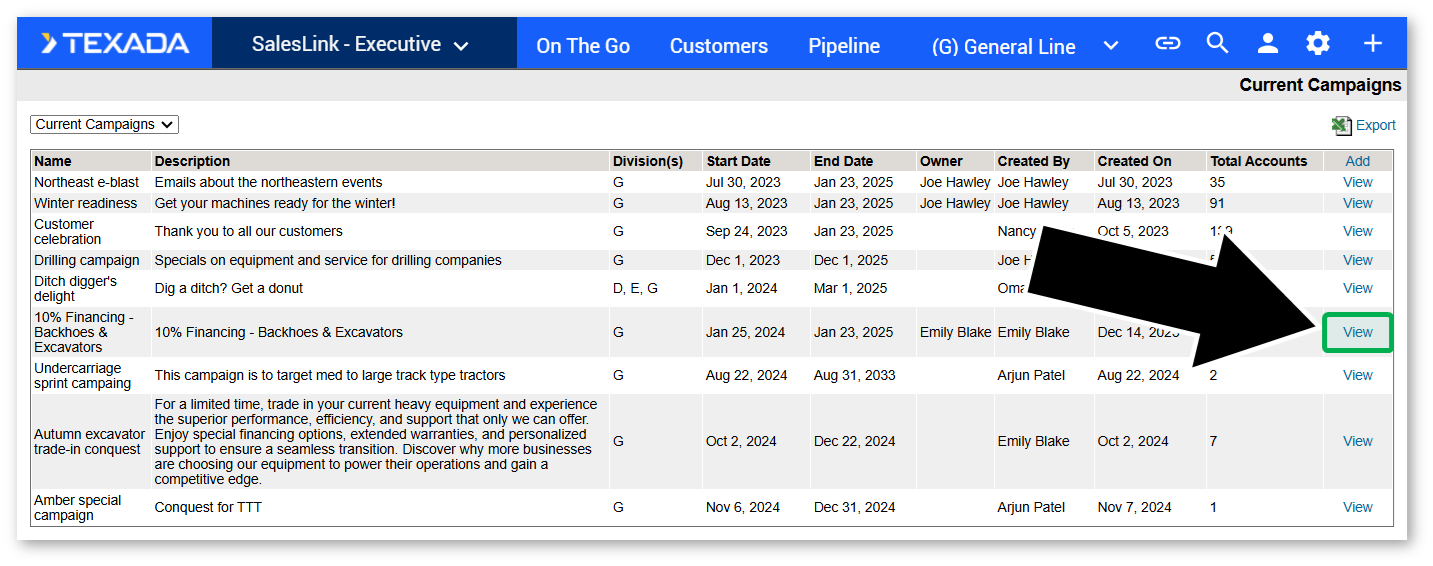
The Campaigns screen in SalesLink - Executive allows you to view, create, and edit campaigns. SalesLink campaigns are an important aspect of the Marketing Integrator, as contacts included in these campaigns can be enrolled in MAP workflows via the Contact Enrollment screen.
Click the “Add” button in the top-right corner of the screen to create a new campaign, or click the “View” button next to an existing campaign to edit its details.
Campaign Details
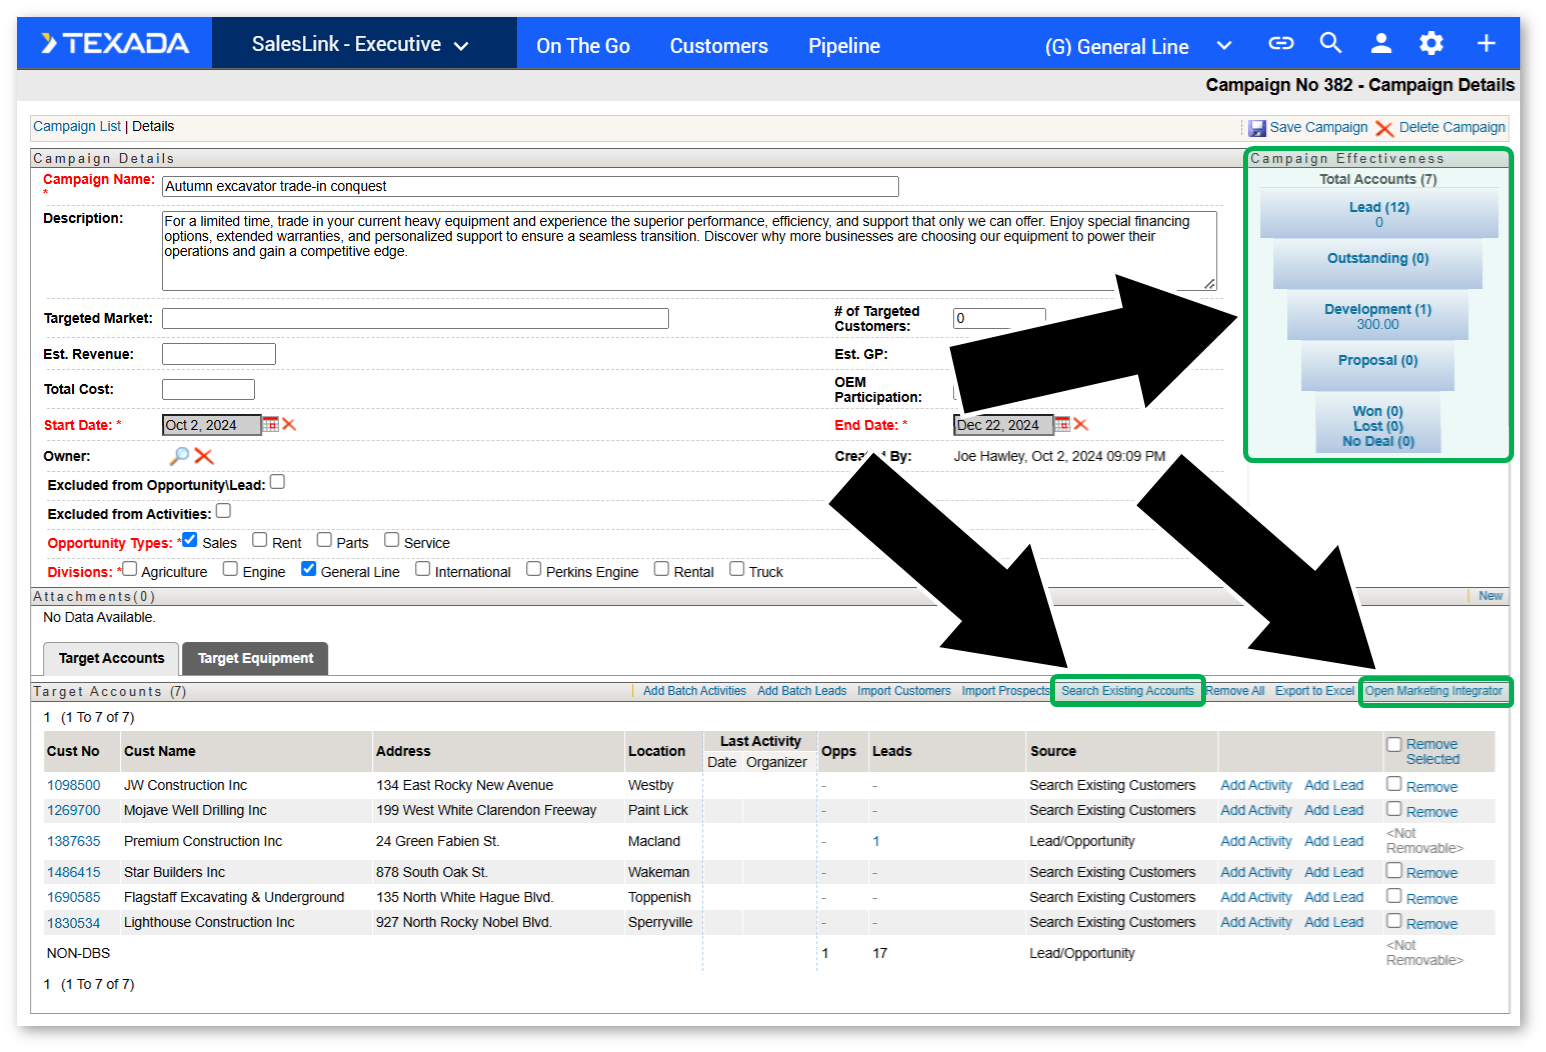
The campaign details screen contains lots of useful information about a campaign. The “Campaign Effectiveness” panel in the top-right corner of the screen shows a breakdown of the number of customers in each stage of the sales funnel.
Click “Search Existing Accounts” to search for customers to add to the campaign. Click “Open Marketing Integrator” to quickly jump to the Marketing Integrator.
For more information on campaigns, see “Campaigns (SalesLink - Executive)”.