
In This Article
Introduction
The Texada Twingate Headless Service is a secure remote access solution that makes it easy to connect your services to Texada’s internal resources. This article will guide you through the steps of installing and launching Twingate on your server for the first time.
Twingate Setup (Windows)
To install the Twingate Headless Service on your server, follow the steps below. Please reference the official Twingate documentation for additional information if needed.
Step 1: Install Microsoft .NET
- Download Microsoft .NET 8.0
Open your web browser and navigate to https://dotnet.microsoft.com/en-us/download/dotnet/8.0. Scroll down until you find the “.NET Desktop Runtime 8.0.13” option. Select either the x64, x86, or Arm64 installer depending on your machine.
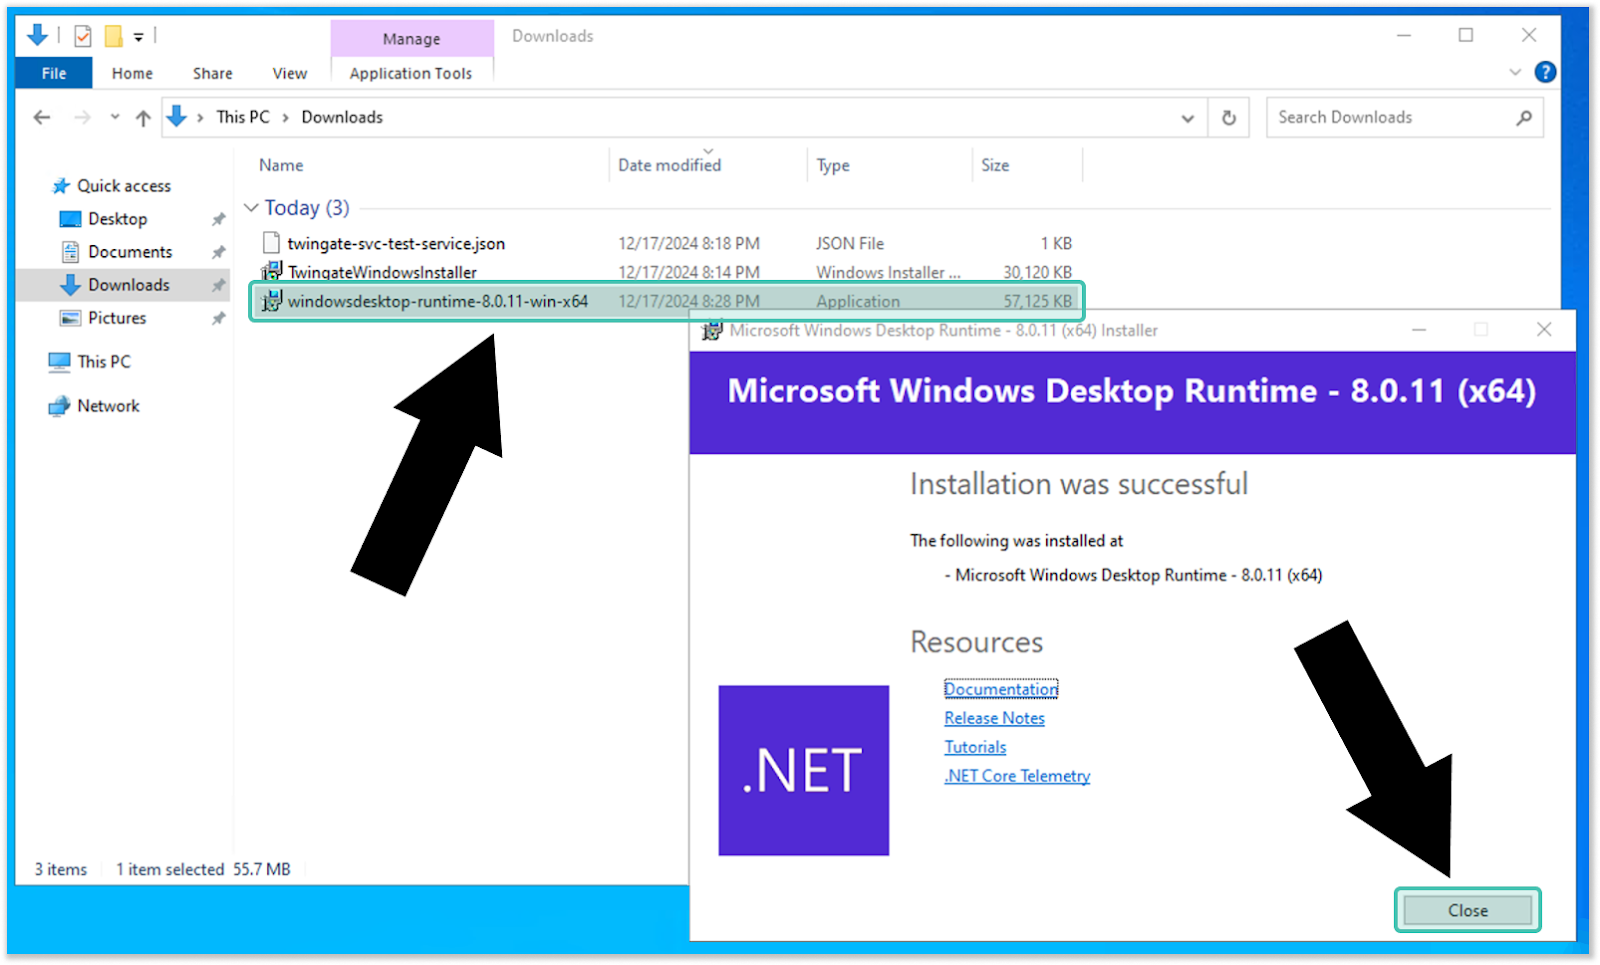
The file you downloaded should be named windowsdesktop-runtime-8.0.11-win-x64.exe or similar. - Install .NET Desktop Runtime
Open the installer file you downloaded in step 1 and follow the on-screen instructions to install the Microsoft Windows Desktop Runtime. You should receive an “Installation was successful” message upon a successful install.
Step 2: Install Twingate
- Download the Twingate client
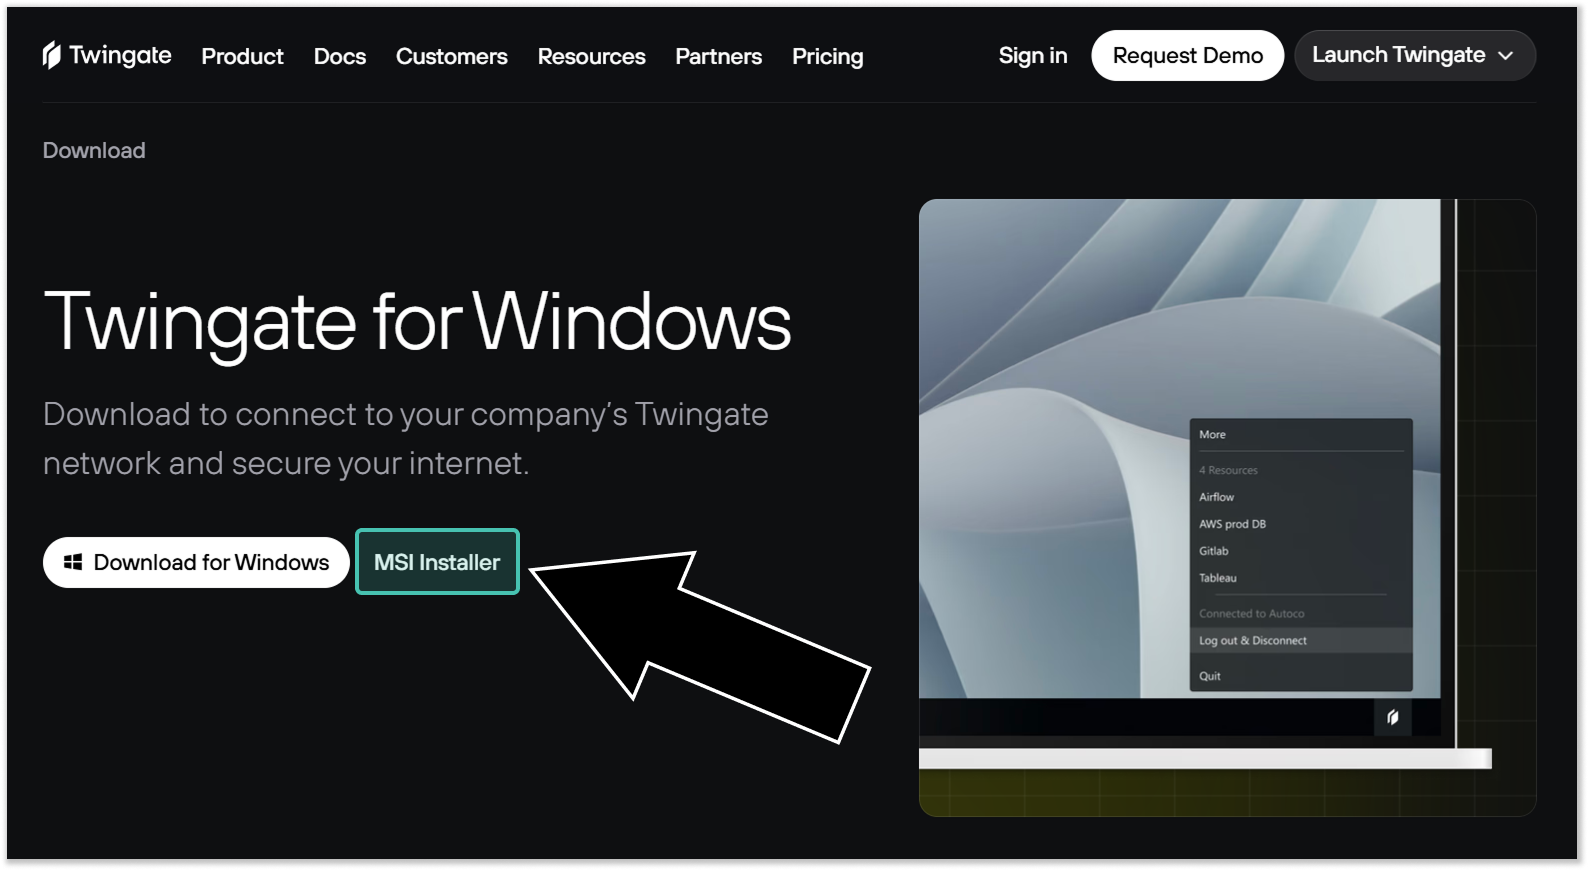
Open your web browser and navigate to https://www.twingate.com/download. Click “MSI Installer” to download the Twingate installer file.
Record this file’s location on your machine for later use.
Make sure you do NOT select “Download for Windows”, as this will download the wrong kind of installer file. The file you downloaded should be called “TwingateWindowsInstaller.msi” or similar. - Receive service_secret.json from Texada
Texada will securely share a file called “service_secret.json” with you. We recommend saving this file to the same location as the Twingate installer file you downloaded in step 1.
If you have not received this file, contact your Texada support representative. - Record the location of the service_secret.json file
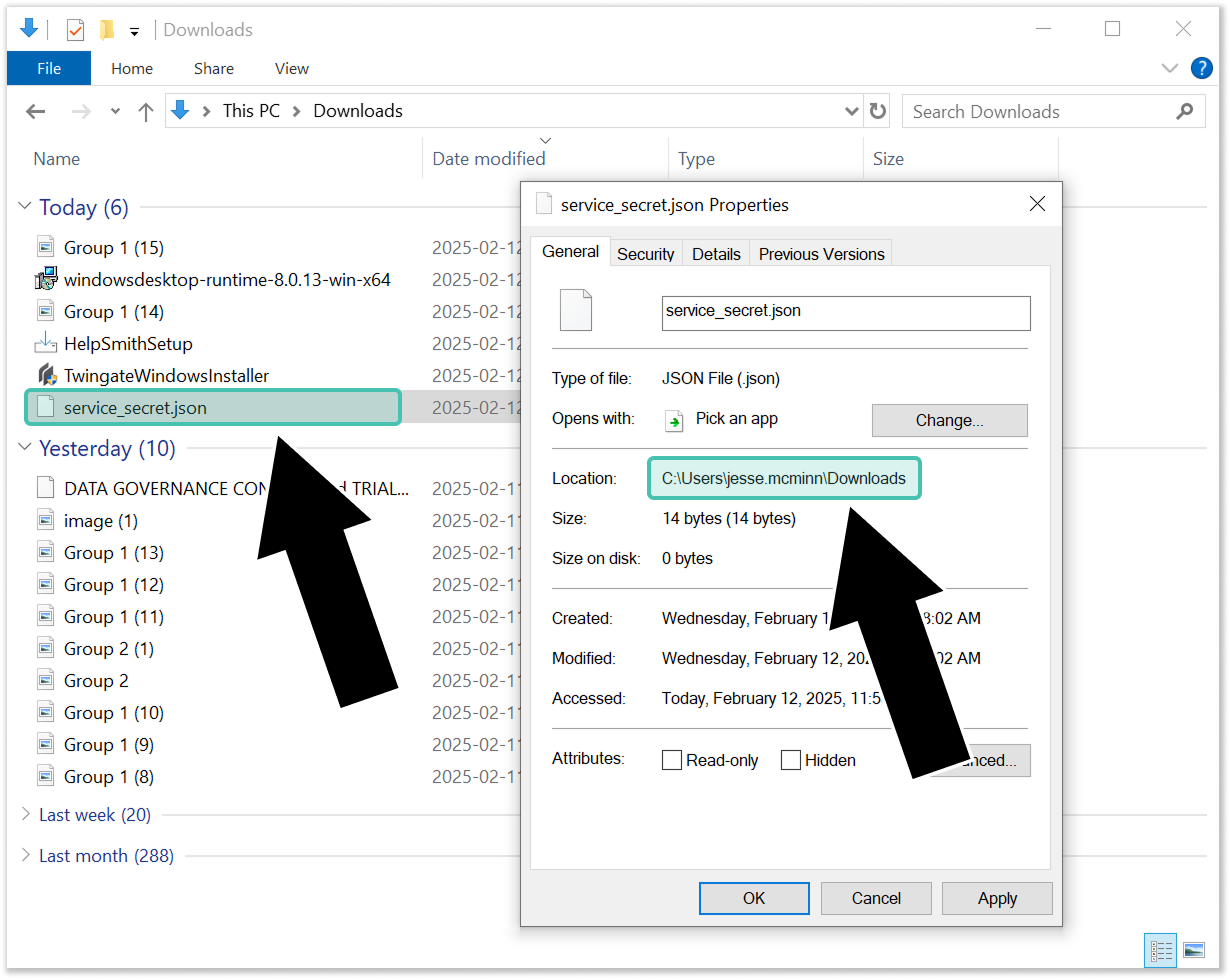
In order to install Twingate, you will need to know the full filepath of the “service_secret.json” file. Locate this file on your machine and right-click it, then select “Properties” to open the Properties window. The filepath can be found next to “Location” under the General tab.
Record the full filepath, including the name of the file. In the example below, this would be:
“C:\Users\jesse.mcminn\Downloads\service_secret.json”. - Open Command Prompt and navigate to the Twingate installer file
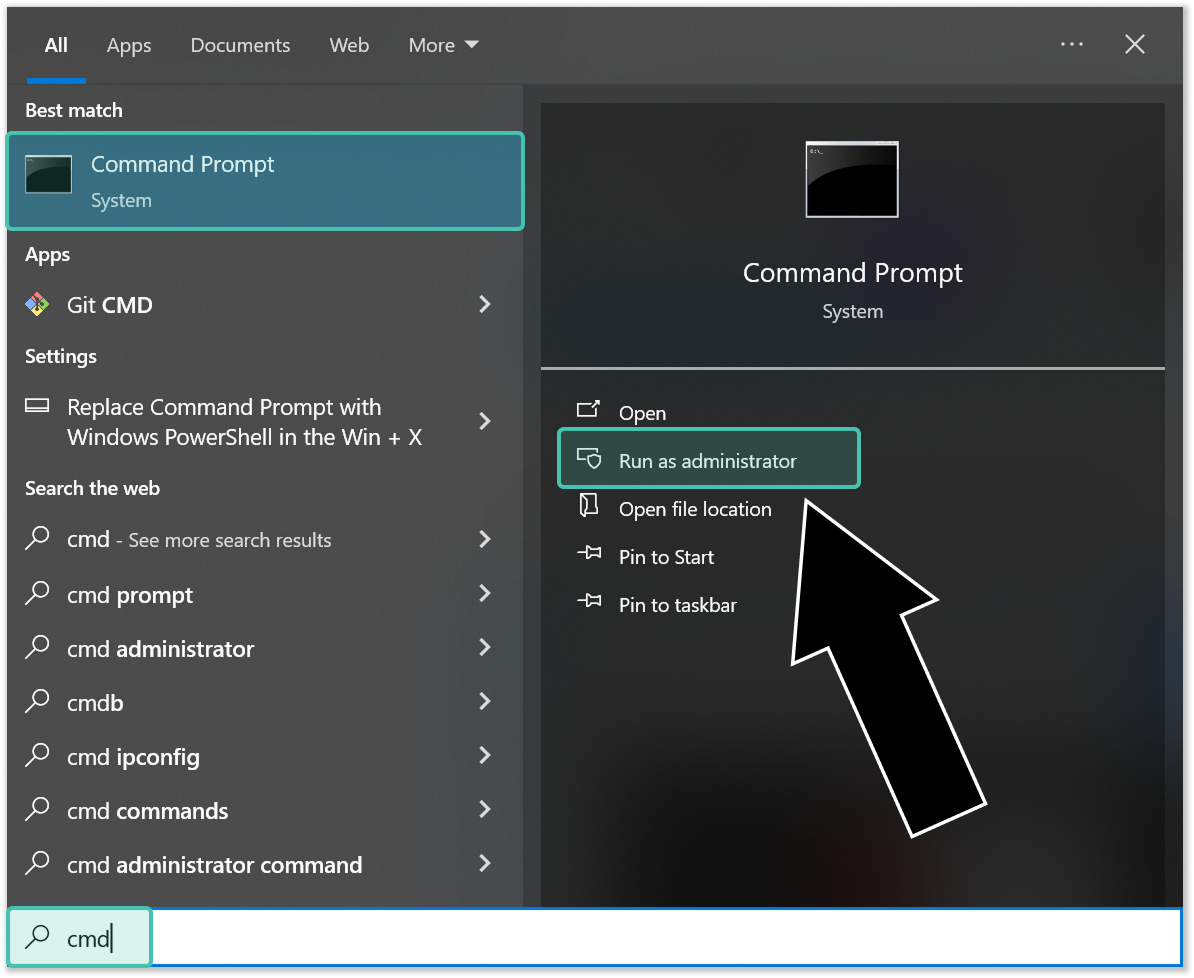
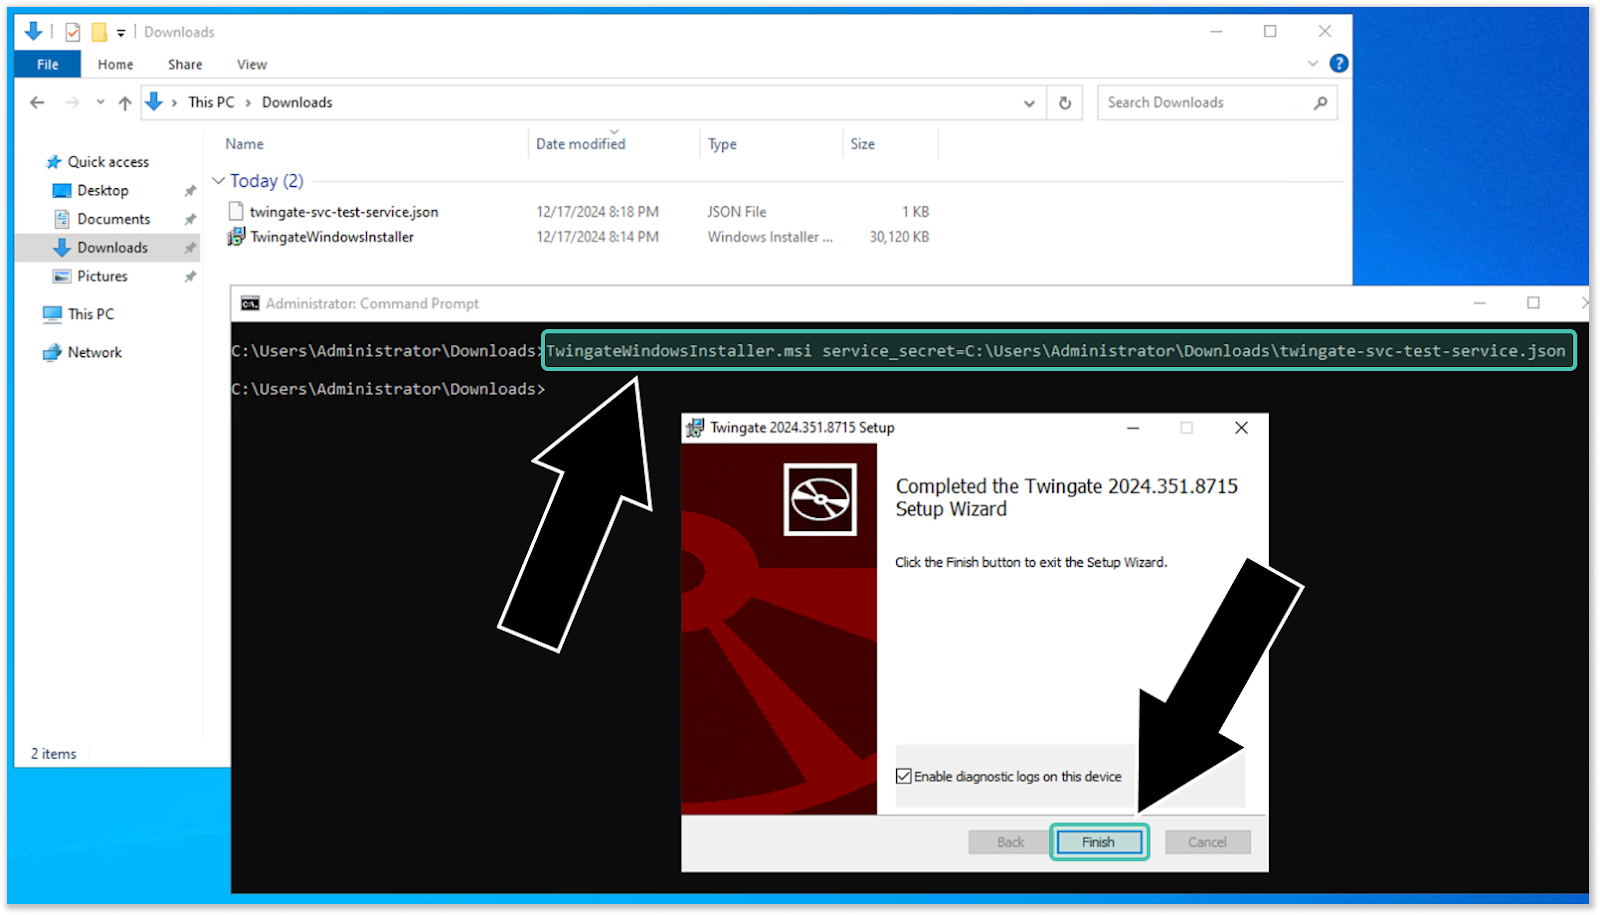
Run Command Prompt as an administrator. This can be done by entering “cmd” in the Windows search bar, then selecting “Run as administrator” when Command Prompt comes up.
Once Command Prompt is open, navigate to the directory containing the TwingateWindowsInstaller.msi file you downloaded in step 1. You can do this using the “cd” command, for example:
cd C:\Users\jesse.mcminn\Downloads - Install Twingate
Run the following command in Command Prompt, replacing [PATH TO SERVICE_SECRET] with the filepath you recorded in step 3:
TwingateWindowsInstaller.msi service_secret=[PATH TO SERVICE_SECRET]
This will open the Twingate setup wizard. Follow the on-screen prompts to install the Twingate client on your machine. You should receive a “Completed the Twingate Setup Wizard” message when finished.
Step 3: Set the Twingate Service to Automatic start
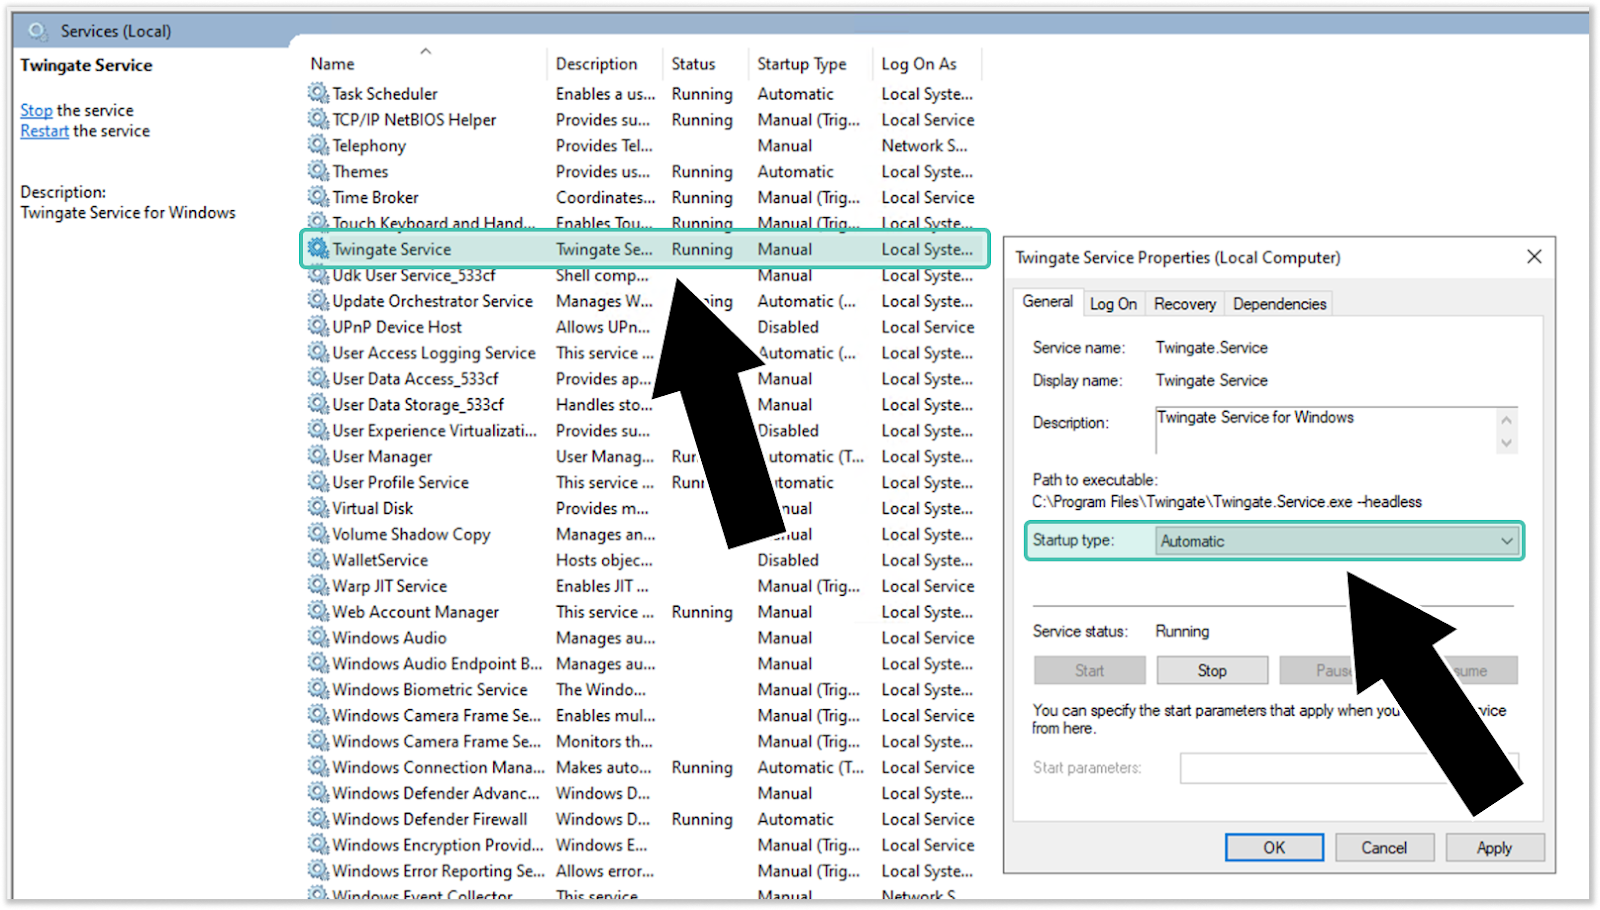
- Open the Services tool. This can be done by entering “services” in the Windows search bar, then selecting “Services” from the results.
- Scroll down until you locate the “Twingate Service” service, then double-click it to open its properties.
- Select “Automatic” from the “Startup type” drop-down, then click “OK” to apply your changes.
Step 4: Reboot and Test
- Reboot your machine.
- Once your server is back online, test your connection to the Texada resource to which you were granted access. You should now be able to access it.