In This Article
- Introduction
- Step 1: Launch Wizard
- Step 2: Configure New Web App Integration
- Step 3: Provide Information to Texada Software
Introduction
The following article describes the process of configuring OpenID Connect (OIDC) identity providers (IdPs) for integration with the Texada Identity Service (TIS). This process involves making several configurations via the IdP portal, then providing Texada with the information it needs to complete the integration.
While this guide uses Okta for screenshots, the configuration process will be similar for any IdP that supports OIDC integrations.
If you are unsure which IdP to use, Texada’s recommendation is to use OpenID Connect (this article) or Microsoft Azure, followed by SAML if the first two options are unavailable.
Step 1: Launch Wizard
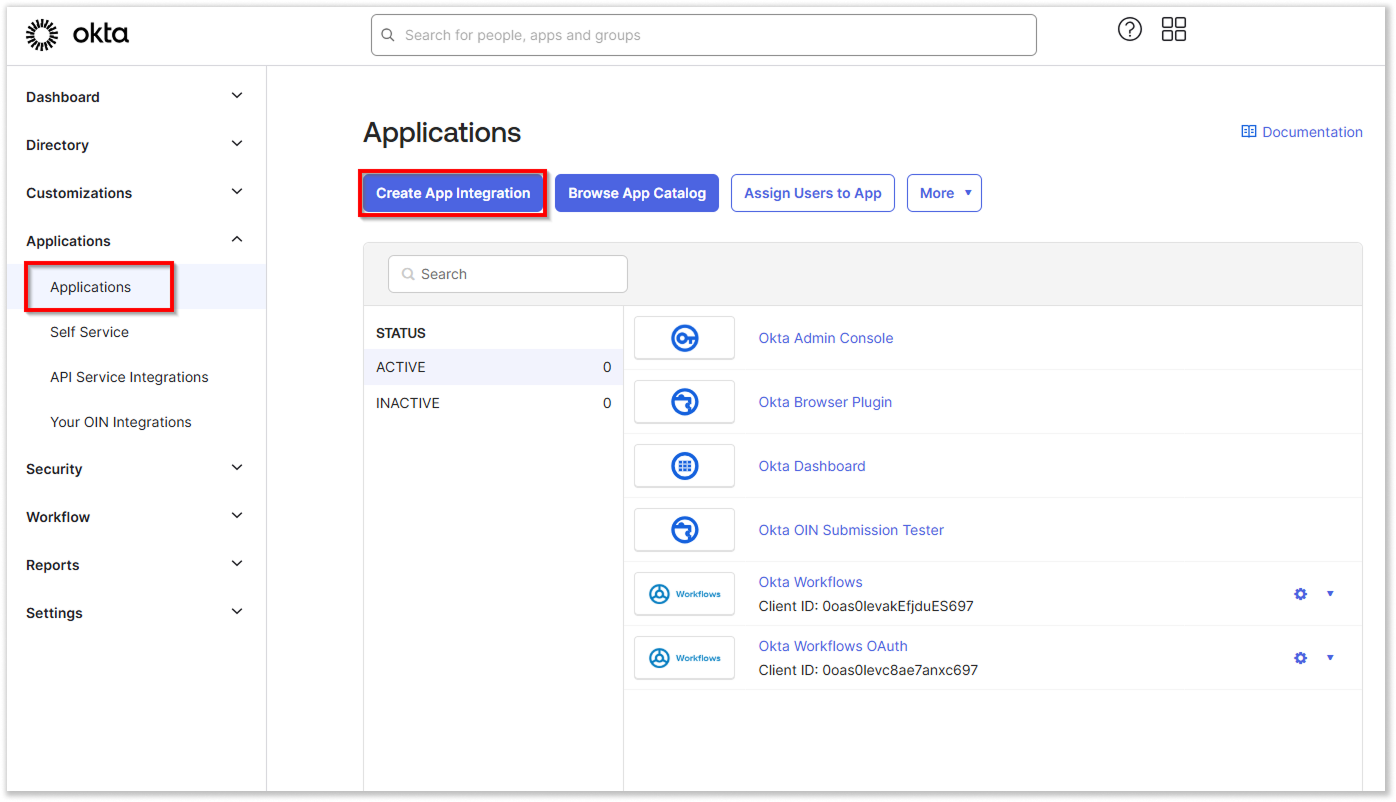
- Log in to your Okta Admin console, then select Applications → Applications from the left navigation menu.
- Click “Create App Integration”.
- Select OIDC - OpenID Connect as the Sign-in method and Web Application as the Application type, then click “Next”.

Step 2: Configure New Web App Integration
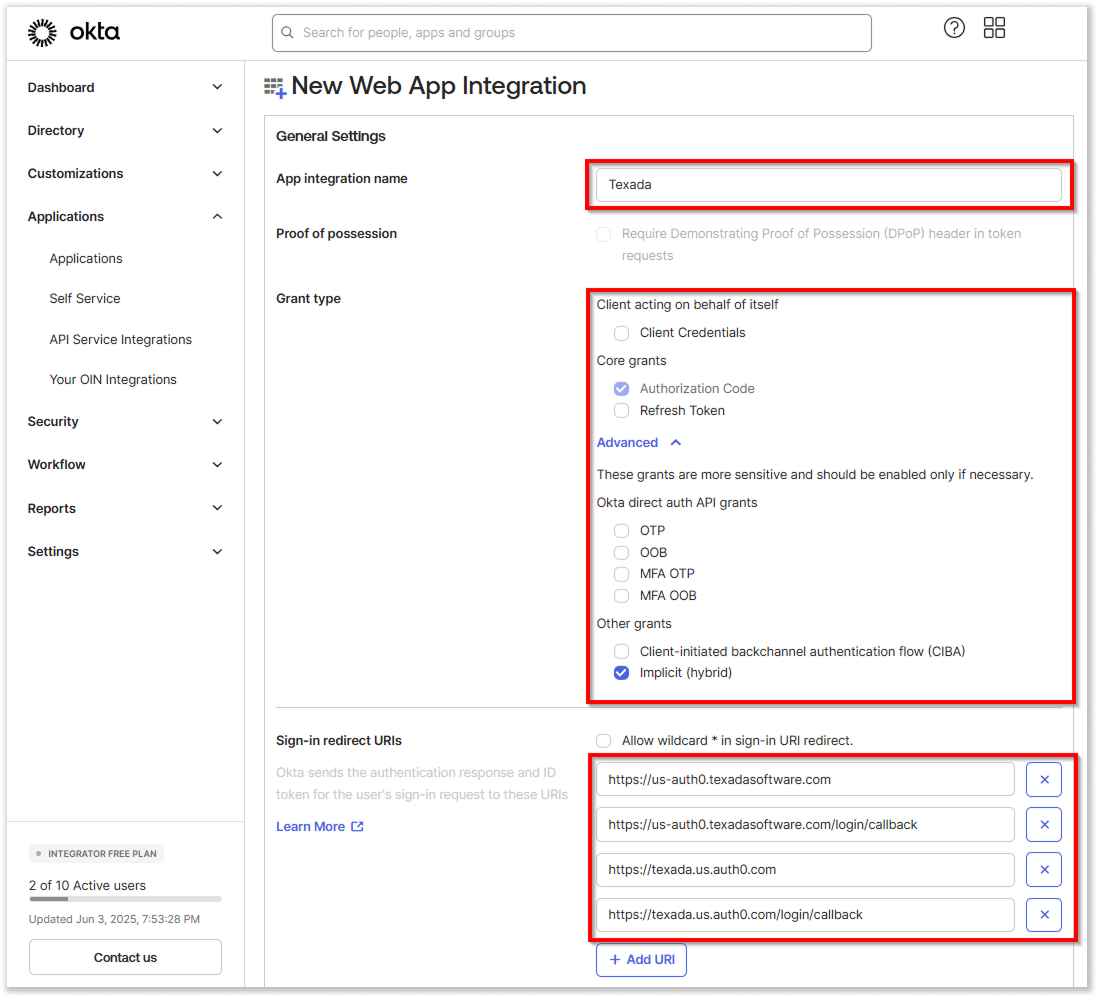
Select the following options on the New Web App Integration screen. Once you are finished, click “Save”.
- App integration name: Choose and enter a name for the application (e.g. “Texada”).
- Grant Type: Open the Advanced Section and select the Implicit (Hybrid) option.
- Sign-in redirect URIs: Add your URIs. These will change depending on your organization’s region:
- North America:
- https://us-auth0.texadasoftware.com
- https://us-auth0.texadasoftware.com/login/callback
- https://texada.us.auth0.com
- https://texada.us.auth0.com/login/callback
- Europe:
- https://eu-auth0.texadasoftware.com
- https://eu-auth0.texadasoftware.com/login/callback
- https://texada.eu.auth0.com
- https://texada.eu.auth0.com/login/callback
- APAC:
- https://au-auth0.texadasoftware.com
- https://au-auth0.texadasoftware.com/login/callback
- https://texada.au.auth0.com
- https://texada.au.auth0.com/login/callback
- North America:
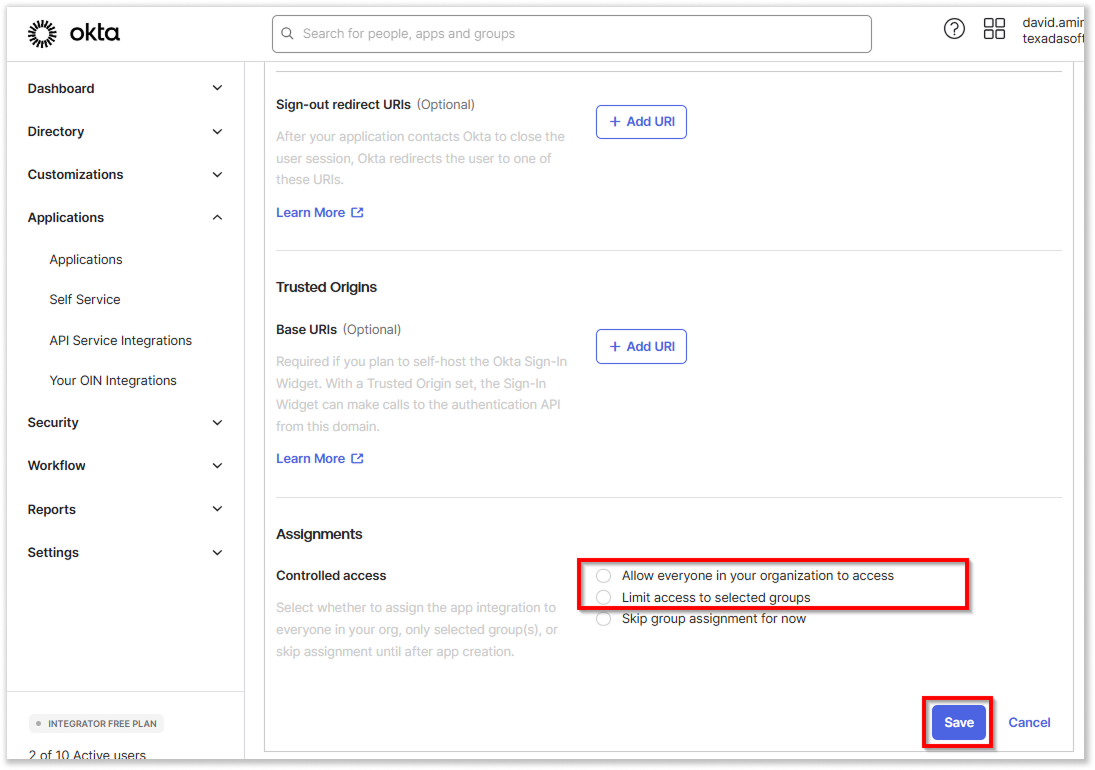
- Assignments: Select one of the following:
- Allow everyone in your organization to access
- Limit access to selected groups
Step 3: Provide Information to Texada Software
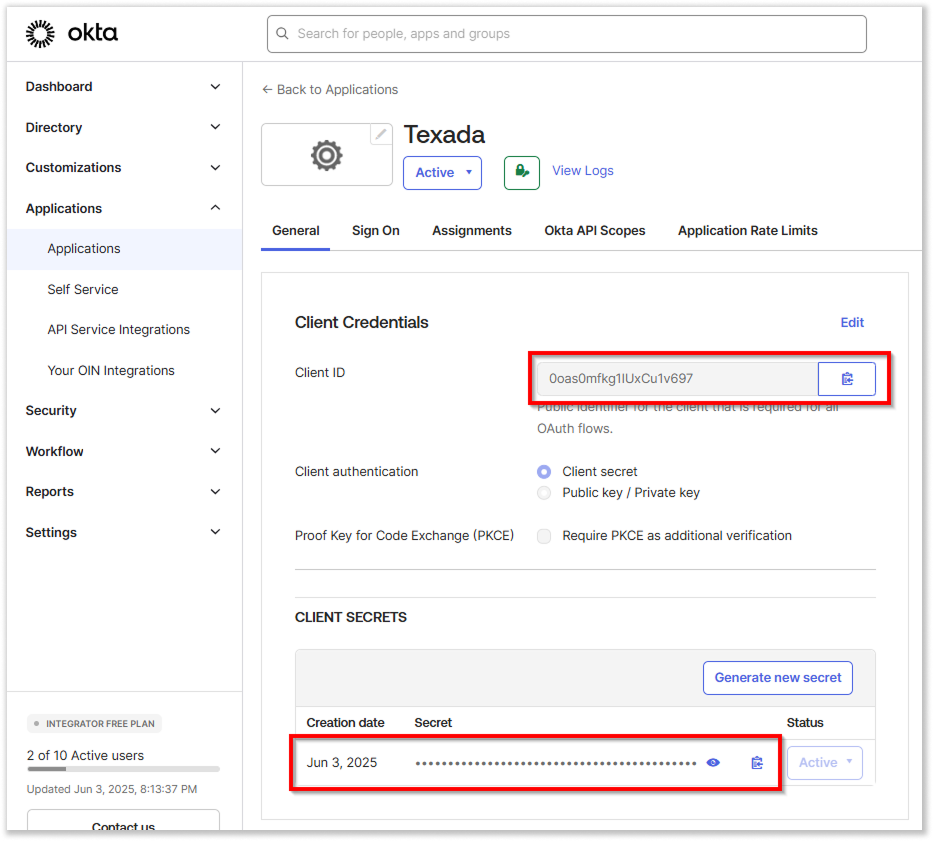
Please securely provide the following 3 pieces of information to Texada Software through Keeper Vault. A free account can be created here.
- Client Id and Secret
- OpenID Connect discovery URL
Provide the .well-known OpenID Connect discovery endpoint. It usually looks like this:
https://{YOUR_OKTA_DOMAIN}/.well-known/openid-configuration
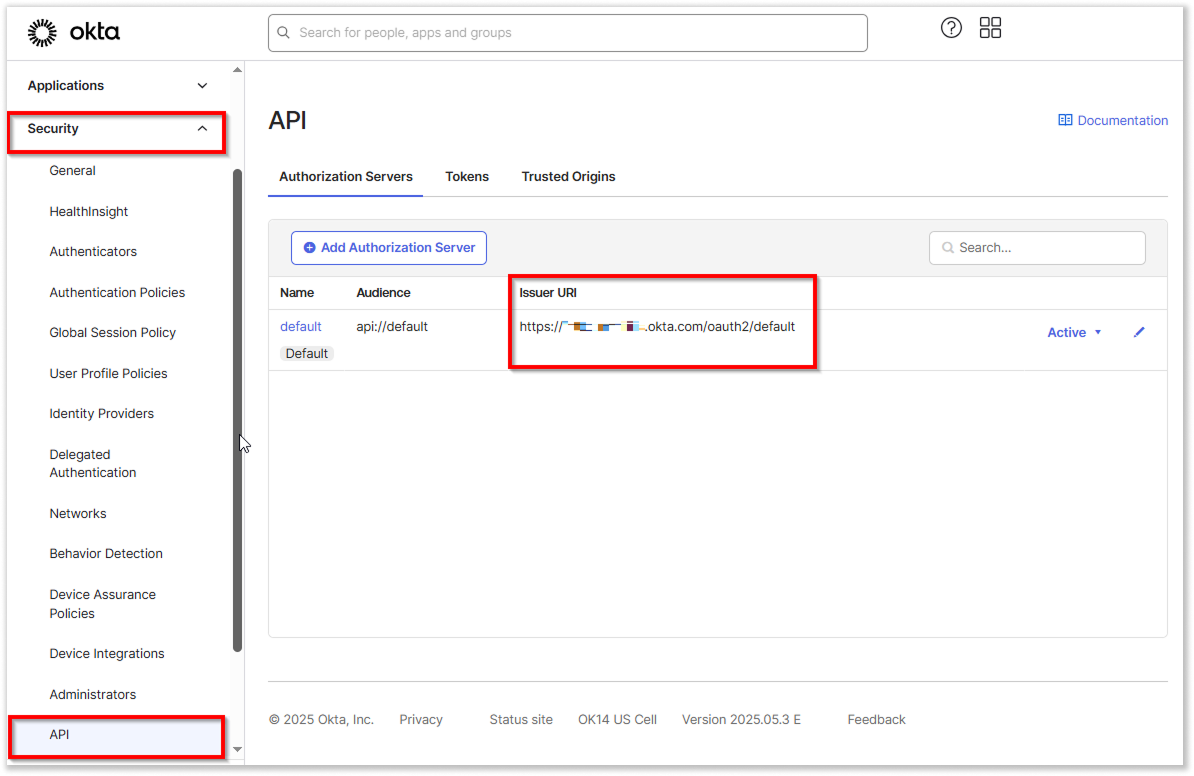
If you cannot locate it within your Admin console, send the Issuer URI by selecting Security → API from the left navigation menu. - Test account (email address)
One account to be used to test the connectivity without MFA, preferably in the format “user1@yourdomain.com”.
These accounts are temporary and will be dropped once the migration is complete.