
In This Article
Introduction
Security roles control what your users can see, create, search, edit, and delete in a given application. They ensure that your users are only able to see and use the parts of the application that you need them to and that their interfaces are not cluttered with unnecessary functionality.
Create a security role in Service, Rental, and Financials (Classic) when your organization introduces a new type of user to your corporate structure. For example:
Your company originally had a dispatcher handling both Work Orders and Tickets. As your organization grew, you split that role into separate service counter and logistics manager roles. In Service, Rental, and Financials (Classic), you would create new service counter and logistics manager security roles, each with their own separate permissions that relate specifically to the needs of their new work roles.
Required Security Roles
Service, Rental, and Financials (Next) and Mobile depend heavily upon their integration with Service, Rental, and Financials (Classic) in order to function. This interdependency extends to users and security roles. In order for (Classic), (Next), and Mobile to work correctly together, the following security roles must exist. You can create other security roles as needed to meet the needs of your organization, but these roles must be created at a minimum:
- Driver
- Logistics Manager
- Service Manager
- Technician
Each role covers a critical portion of Service, Rental, and Financials’ functionality and encompasses the most typical types of users that work within the application. For more information on each type of user, see “About Users in Service, Rental, and Financials”.
Create a Security Role
To create a security role, do the following:
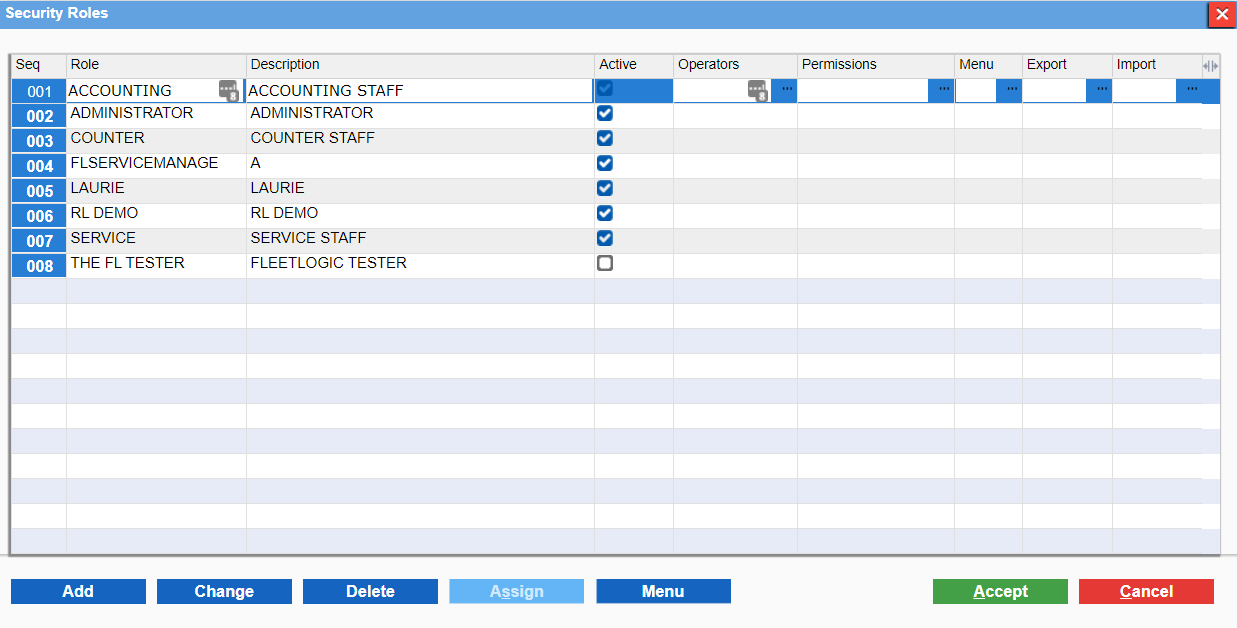
- Log in to Service, Rental, and Financials (Classic) and navigate to System Maintenance → Configure System Settings → Security → Security Roles. The Security Roles window will open, displaying the list of existing security roles.
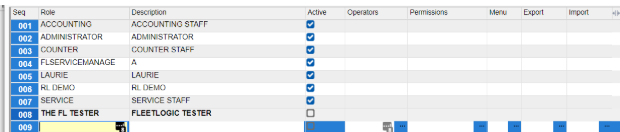
- Click “Add” to add a new line to the end of the list.
- Enter the following information for your new security role:
- Role: Enter a descriptive name for the role, such as “Driver” or “Mechanic”.
- Description: A brief description of the role’s purpose.
- Active: Check this box to make the role active in the system.
- Repeat steps 2 - 3 to create additional security roles as desired.
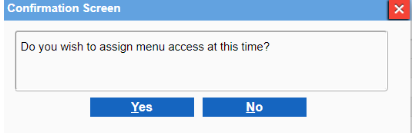
- Once you are finished adding security roles, click “Accept”. The following confirmation screen will appear. Click “No” to proceed.
- Your security roles will now be created. For information on assigning menu access and permissions to these new roles, see “Assign Permissions to a Security Role in Service, Rental, and Financials (Classic)”