
In This Article
Introduction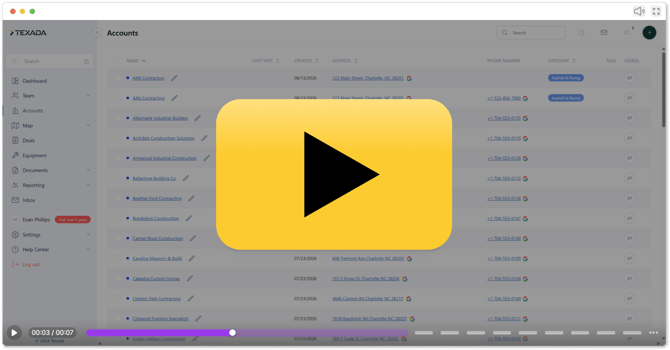
The Import Accounts feature in Field Sales Tracker allows you to quickly import Customer, Prospect, and Site records from a spreadsheet.
Download Spreadsheets
Field Sales Tracker offers a total of four spreadsheet formats for importing Accounts and Contacts:
|
Full Address |
Separated Address |
|
|
Horizontal |
||
|
Vertical |
Click on a spreadsheet’s name in the table above to download it. You can then populate it with your account data in preparation for the import.
Import Accounts
To import Accounts into Field Sales Tracker, follow the steps below.
- Download the spreadsheet of your choosing from the Download Spreadsheets section above.
- Populate the downloaded spreadsheet with the data you would like to import. Note that Customers and Prospects must be imported separately. If you would like to import both Customer and Prospect accounts, you will need to prepare two spreadsheets and perform two imports.
- Log in to Field Sales Tracker and select Accounts from the left navigation menu. Click the plus icon
 in the top-right corner of the screen, then select “Import accounts”.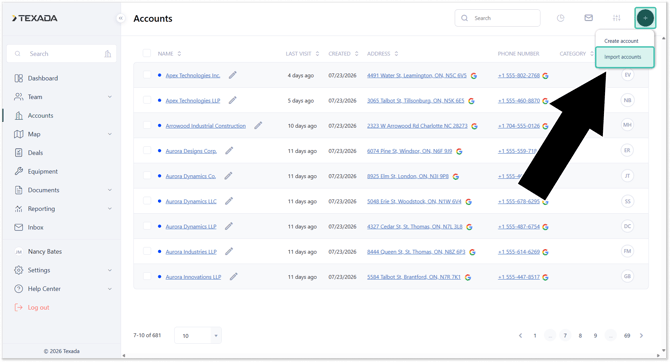
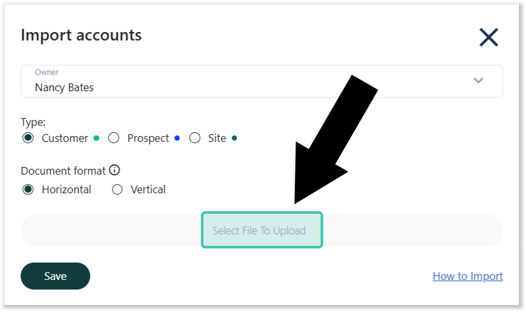
- Select the information for your import:
- Owner: The Field Sales Tracker user to which the import will be attributed.
- Type: Select whether you are importing Customers, Prospects, or Sites.
- Document Format: Select whether the import spreadsheet is horizontal or vertical. See “Download Spreadsheets” for more information.
- Click “Select File To Upload” to select an import file. You will be prompted to upload a file from your machine. Locate the file you prepared in step 2 and double-click it to select it.
- Once you have selected a file, the Import accounts window will expand to show the fields present in the uploaded spreadsheet. Use the “Texada Fields” column to match the fields from the spreadsheet to the fields present in Field Sales Tracker.
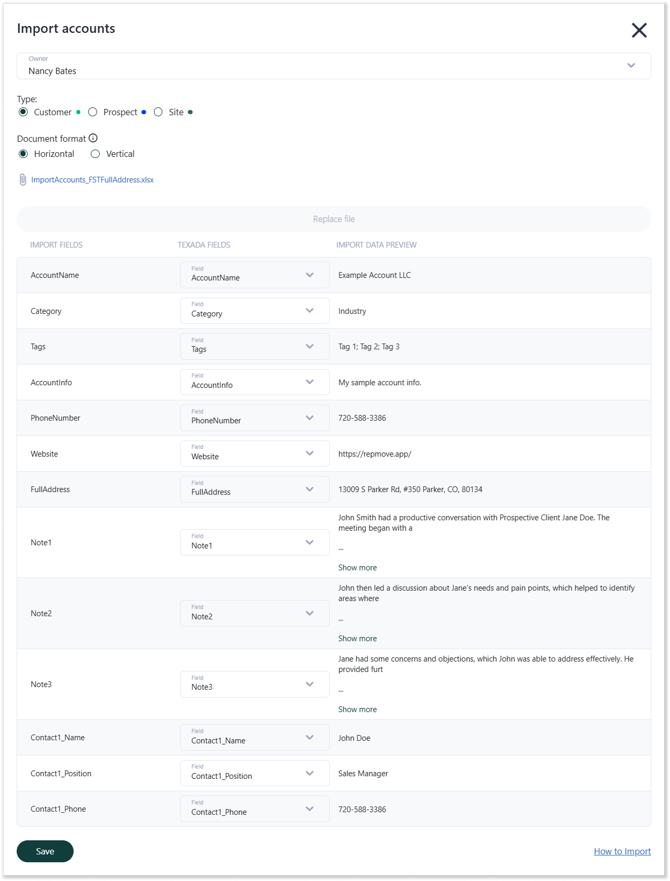
- Once you are happy with the mapping, click Save to start the import. Depending on how many Accounts you are importing, this process can take a few minutes.
If incorrect data is present (such as a bad address or the absence of any required field), a report will be visible at the top of the pop-up that tells you what needs to be fixed.
Copy the report info and paste it into a blank cell on your spreadsheet, so you can go back and fix the issues outlined in the report, and import again.
Field Sales Tracker will only take the corrected fields and will not duplicate your data.