In This Article
Introduction
The area draw feature allows you to bulk modify customer Accounts by circling them on the map. The following article describes how to use this feature in Field Sales Tracker for web and mobile.
Area Draw (Web)
- Log in to Field Sales Tracker and select Map → Accounts from the left navigation menu.
- Click on the Actions button at the top of the screen to enable the Actions menu. This will also convert your cursor into a plus symbol
 when hovering over the map.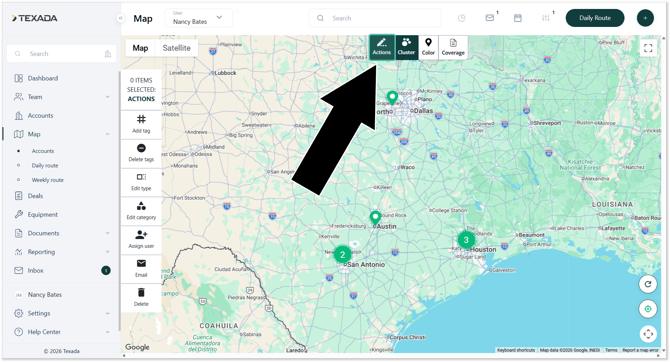
- Click on the map, then use your cursor to draw an area enclosing the Accounts you’d like to edit. Do NOT click and drag, as this will pan the map.
Once you are finished, click on the map again to stop drawing. The number of Accounts enclosed by the area you drew will now be displayed at the top of the Actions menu on the left side of the screen. You can now use this menu to modify the selected Accounts: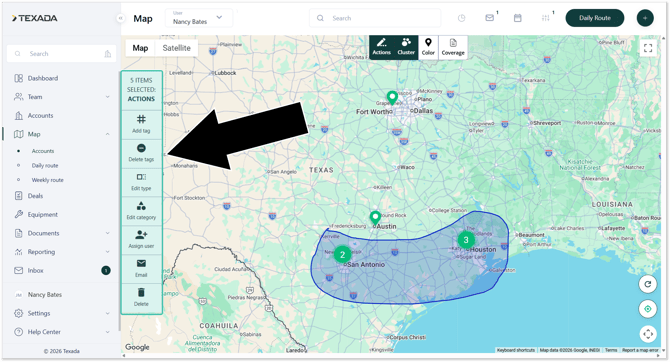
- Add tag: Select one or more tags to add to the selected Accounts.
- Delete tags: Remove tags from the selected Accounts.
- Edit type: Change the type (Customer, Prospect, or Site) of the selected Accounts.
- Edit category: Change the category of the selected Accounts.
- Assign user: Assign one or more users to the selected Accounts.
- Email: Compose an email to one or more users assigned to the selected Accounts.
- Delete: Delete the selected Accounts.
Area Draw (Mobile)
- Open the Field Sales Tracker mobile application and navigate to Home → Map.
- Tap the pencil button
 in the top-right corner of the map (left) to enter Area Draw mode.
Draw one or more circles enclosing the Accounts you’d like to manage (right). Once you are finished, tap the Add to daily route button to add the selected Accounts to your daily route. The number in parentheses is the number of selected Accounts.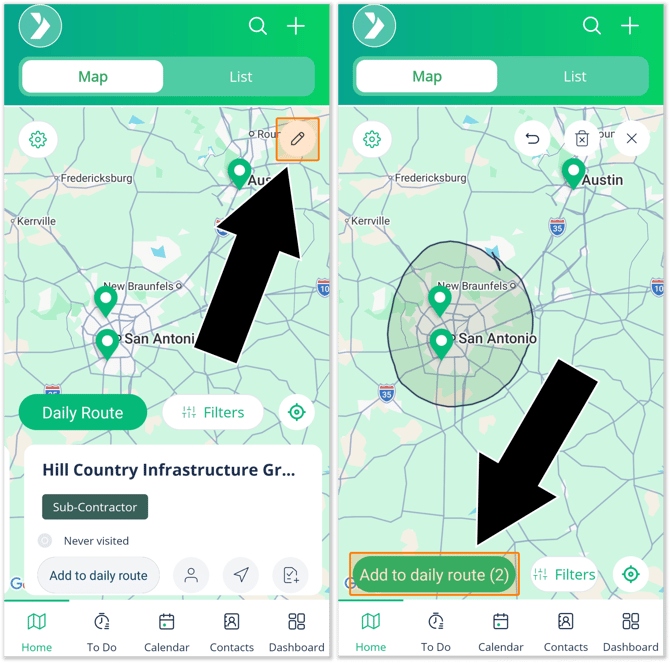
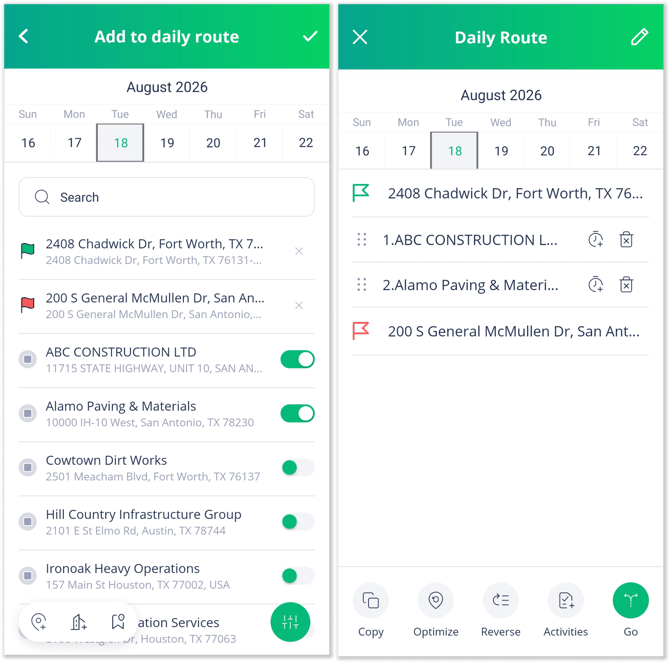
- Select the date to whose daily route you want to add the selected Accounts by tapping it at the top of the screen. Once you are finished, tap the green check mark
 in the top-right corner of the screen to continue.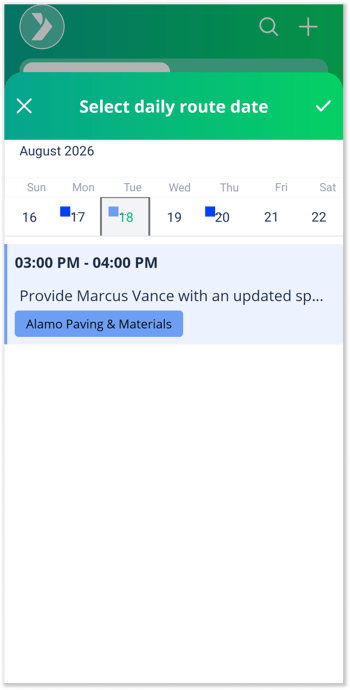
- You can now finalize your daily route as normal – see “Daily Routes” for more information. Add or remove Accounts to or from the daily route and select a start and end location (left), then tap the green check mark to continue. You can now rearrange and optimize the stops (right). Once you are finished, tap Go
 to start navigating.