Configuring Tax Tables by Postal/Zip and Importing from Avalara
The article reviews the setup of the Texada Platform to enable Enhanced taxing to determine taxes by Postal/Zip. This will prepare the system to allow importing tax tables from Avalara.com and import the downloaded tables.
Configuration
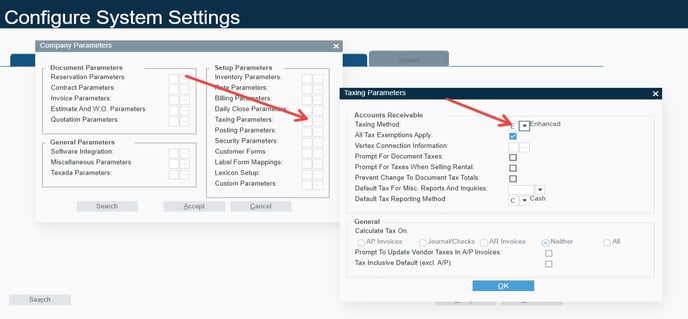
Enabled Enhanced Taxing
To use Taxes by Postal/Zip you will need to have Advanced Taxing enabled. This can only be configured by a Texada Support/Services Representative.
This is found in:
Configuration - System - Company Parameters - Taxing Parameters - Taxing Method

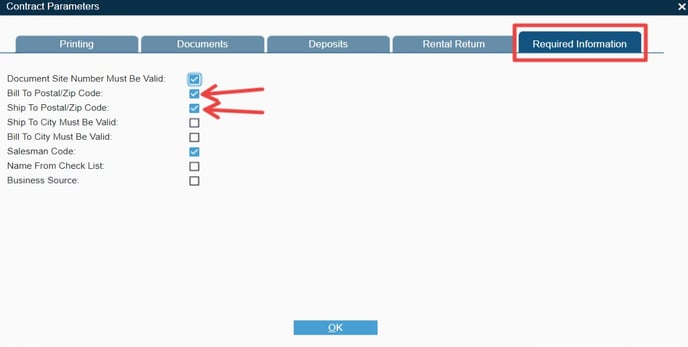
Mandatory Bill To/Ship To Postal/Zip
To ensure taxing accuracy the platform can be configured to require a Postal/Zip code when creating customer and transactions. This is set in:
Configuration - System - Company Parameters - Contract Parameters - Required Information (tab)

Downloading Tax Tables
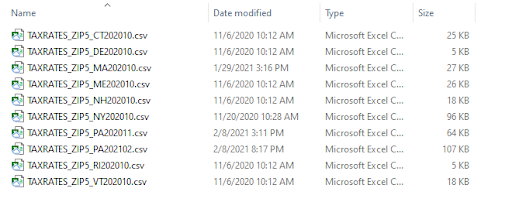
The tables are available for no additional fee from the Avalara.com/download website. You can download multiple states at a time and import each on individually. There will be one zip file per state which will need to be unzipped to a folder on your local computer
Note: You will not need to make any changes to the files provided by Avalara to import them
Example:

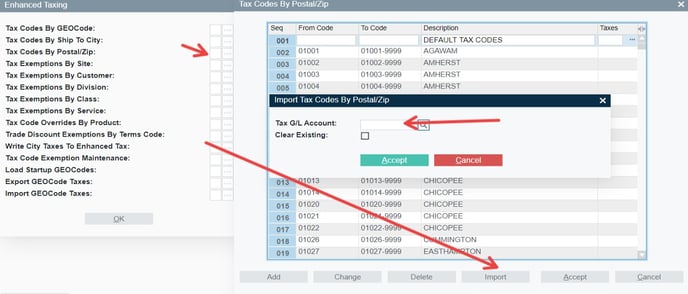
Importing the Downloaded Tax Tables
Once you have extracted the tables you will need to import them into the platform using:
Configuration - Accounting - Tax Codes - Advanced (Button) - Tax Code by Postal/Zip - Import (Button)

- Select the GL account which the tax code will post to (Taxes Payable).
- Search for the file to import, select the .csv from Avalara.
- Clear Existing, only use this IF YOU WANT TO REMOVE ANY TAX CODES CURRENTLY CONFIGURED. If you are updating an existing set of taxes you do NOT need to Clear Existing records.
Upon completion a screen will appear showing you the taxes that were imported and the amounts, along with any errors.
.png?width=365&height=50&name=Texada%20Logo%20(Black).png)