
Introduction
Welcome to iQuote. This user-friendly application allows you to produce a professional quality machine or attachment quote document for presentation to a customer. To access the application, log in to CloudLink with your Username and Password, then click the Enter button ![]() under iQuote. You will be taken to the iQuote Home page.
under iQuote. You will be taken to the iQuote Home page.
Overview
Standard Packages
iQuote is connected to your dealership’s back end ERP system price list for standard packages from CAT MAs or dealer-specific ordering packages. This list is updated daily. Each package for each model is built starting with the standard MA arrangement and can be customized for the way it is sold at your dealership.
Attachments
Attachments are also connected to the dealership’s back end ERP system price list. When adding them to a standard package, there is a list of Mandatory attachments and Optional Attachments.
CAT Claim Programs
These are maintained in a table which contains all the details for these programs as listed in CSS. This table contains the program pricing, details as to its specific prerequisites for connection to a deal, and allows for multiple programs to be added.
Warranties
These are maintained in a table which contains all of the different warranties available for the specific model, as well as the pricing for each.
Trade-ins
For the purposes of incorporating the value of the trade into the quote and, should the deal be approved, pushing the details of over-allowances, outstanding balances of existing financing, and payout details to the Sales Agreement document.
Sales Agreement
All of the details from the quote submitted to the customer transfer directly to a PDF or Microsoft Word document version of the company sales agreement that contains the legal details normally printed with and signed off on by the customer.
Deal Workflow Facilitation
Once the agreement details have been entered into iQuote, the status of the deal can be set to Won, Lost, or No Deal. Each has its own subsequent workflow to enter information required by the dealer process, i.e. Lost Sales detail, Competitive Price information, etc. that saves the sales rep from having to submit that information manually or repetitively.
Navigation
Navigation Bar

The Navigation Bar is located at the top of the screen and includes quote workflow, standard packages, model lines, administration, and links. The Navigation Bar can be accessed from anywhere in iQuote.
Quote Search Bar
A search can be done for an existing quote based on Quote Number, Business Name, Customer Number, Serial Number, or Stock Number for both equipment and attachments.
![]()
To print what is shown on the screen, click the print icon ![]() at the top right of the page.
at the top right of the page.
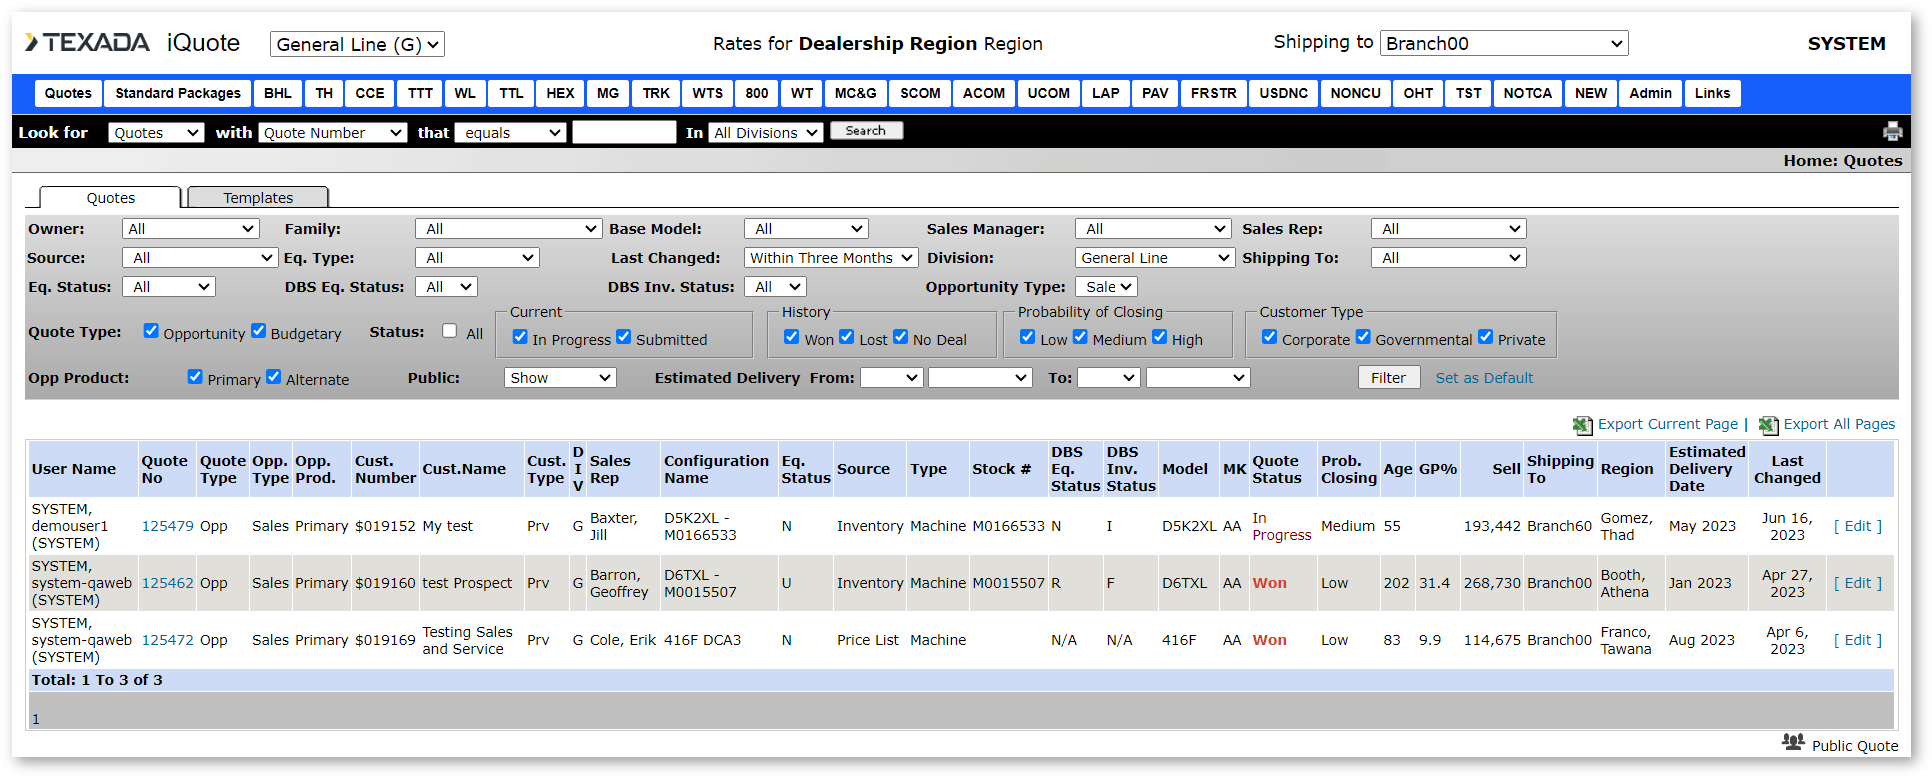
Quote Search Filter
The Quote Search Filter helps you filter the total list of all quotes down to just the quote(s) you’re looking for. Admins can search for a quote developed by anyone. The sales reps can only search for quotes assigned to or shared with them.

Selecting a Model
In the top Navigation Bar, hover over the product family you want to quote on and then click on the base model. This will bring up the homepage for the selected model showing all new, rental, and used machines that are in inventory or on order for that specific base model.
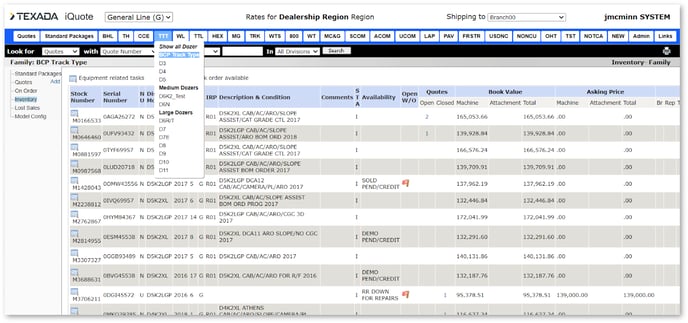
Model Menu
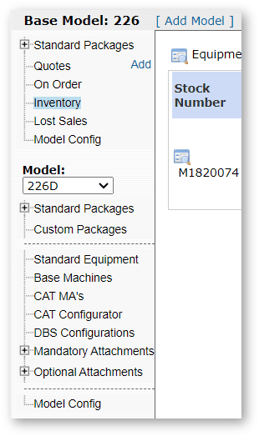
The Model Menu is available when you are working from a product home page.
A drop-down list allows you to drill down to a specific MA or standard package. Everything displayed in the model menu is specific to the model shown in the hierarchy.
Model Config
Users with Admin access to iQuote responsible for the model configurations will see the Model Config link at the bottom of the left menu on each model homepage. Clicking the link will display the following configurable items:
- Model Admin: set highlighted model as default and general model info
- Freight Admin: set the freight amounts from each branch
- Extras Admin: select which extra and its cost to display on each quote by default
- CAT MA’s Admin: modify the description for the MA to make it dealer specific
- Model Description Admin: change the description of the standard features of the model
- Component Description Admin: select which CAT price list items to hide or change the description; if updated, it will affect all quotes with In Progress status
- Options & Bundles Admin: create bundles or specify options that can be added to the quote

These Admin pages are also available on Base Model, Family, and Area levels. This allows users to set up model information from a higher level.
- Changes made on Base Model will apply to all Models of the Base Model.
- Changes made on Family will apply to all Base Models and Models of the Family.
- Changes made on Area will apply to all Families, Base Models, and Models of this Area.
The Base Machines, CAT MA’s, and DBS Configuration Admin pages will only be visible on Model level.
Media Library
The Media Library allows users to attach images or documents to the quote. You can attach an unlimited number of media files at the Area, Family, Base Model, and Model Levels. These media items will be added on the quote when the quote is created and listed under the Documents tab.
This functionality can also be used to store PDF, XLS, PPT, .DOC files as a reference library.
Options & Bundles
An Option is an item which users can add to a quote that would not be included in the base configuration. A Bundle is a group of options that the user can add.
Add Bundle:
- Click the Add Bundles link. The Bundle window displays.
- On the Settings, set up a Description and a target GP% user for the bundle item(s).
- The Components tab shows the available configurations for the quote and also the ability to add more or update/remove the existing configuration. Add/Edit the configurations as needed.
Equipment Related Tasks
Click the Equipment Related Tasks icon ![]() next to the stock number of a piece of equipment to perform the following tasks.
next to the stock number of a piece of equipment to perform the following tasks.
Reservation Request
Click [Request Reservation] to request a reservation for the machine selected on the inventory. Enter all required fields and then click [Send Request].
The email is sent to the users set up to receive the Reservation Request on the Admin module Manage Users for Reservation Request and also for the sales rep selected on the Reservation Request page.
Work Orders
Click [Work Orders] to view a list of all work orders related to the equipment from a segment or invoice view.
Warranty
Click [Warranty] to display a list of all warranties that were purchased for the equipment.
Equipment Configuration
Click [Equipment Configuration] to display a read-only view of the DBS configuration for the equipment including attachments attached to the serial number.
Transaction Register
Click [Transaction Register] to display a complete summary of all the transactions charged or credited to the serial number in DBS, including work orders.