
Quote Editor
The Quote Editor is used to make changes to the quote that do not affect the price but rather the presentation of the quote. You can change the cover page appearance, control the display of standard features and components, and review and modify the text that accompanies the Warranty / CSA / Trade-in information selected on the Configuration tab.
As each page is modified, it is important to move to the next page by clicking the [Save and Go] buttons at the top of the quote. Each of these selections will save the information changed on the page and update the Microsoft Word document connected to the quote. If you make changes and then click on one of the other pages, your changes will not be saved.
Change the Cover Page / Footer Section
The logo line allows you to choose None if you are printing on company letterhead, Black and White if you are printing on a blank page on a black and white printer, or Color if printing on a blank page on a color printer. Edit any other fields as necessary.
Add Picture on the Cover Letter
This feature allows you to add a selected image on the quote document which will be displayed on the first page of the cover letter. There is no option to change the location or size of the image on the document. Image formats supported are .jpg, .bmp, .png, and .gif.
Default Image on the Document
Each model can have a pre-setup equipment image done through the Model Config – Model Admin page. When the quote is created this image is added on the quote document by default. You have the option to remove/change that image from the quote. This default image coming from Model Admin is not available for Used Machines quotes, but you will still have the option to add an image of the used equipment on the quote.
Change Image on Quote
If you have an actual image of the machine being quoted, you can attach the image to the quote. Click [Attach a file], upload your image, then click [Save].
Change the Standard Features Section
The compartments of features are listed in the order in which they appear on the CAT price list and include all features. The order of the compartments can also be changed or turned off as needed.
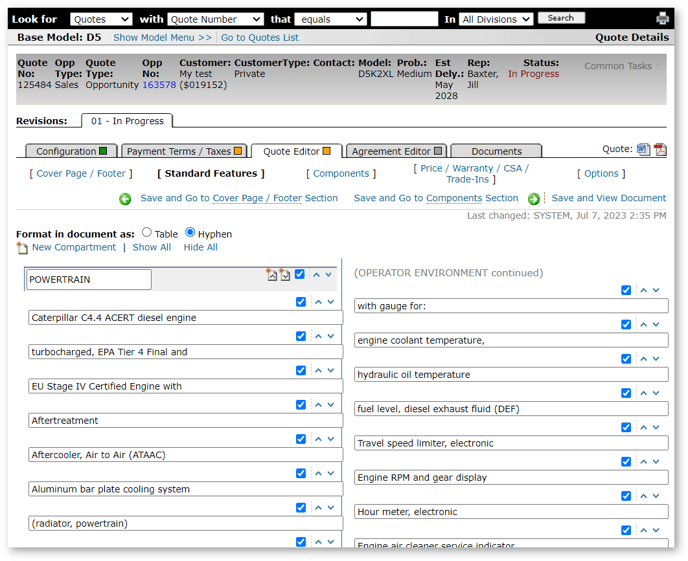
To hide an individual compartment or list item from the quote, click the check box to the right of the line.
To promote or demote a compartment or list item, click on the upward pointing arrow next to the heading of the compartment or list item.
To create a new Compartment, click on the [New Compartment] button and type the name of the Compartment.
When completed, click on either the [Save and View Document] button or the [Save and Go to Components Section] button if you wish to move to the next tab.
Change the Components Section
The components view can be modified to allow the CAT reference numbers and the individual list prices of the components to be displayed.
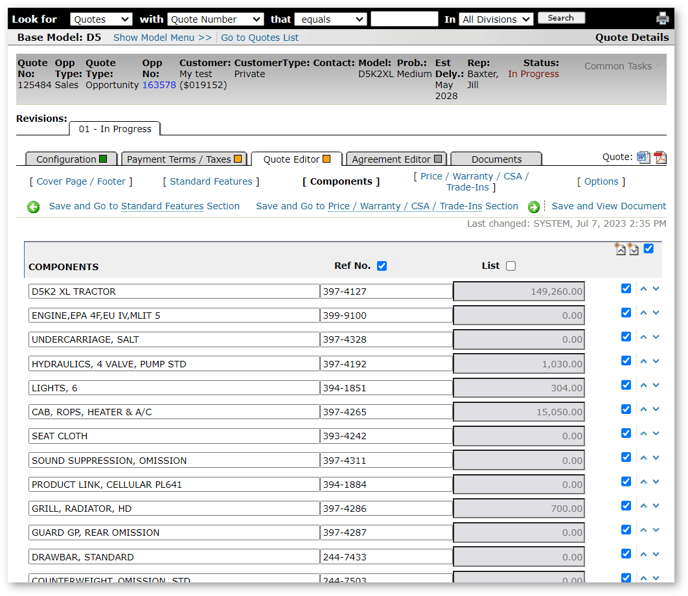
To add the Reference Numbers and/or List Price to the quote document, click the check box next to the column heading.
To hide an individual component item from the quote, click the check box to the right of the line.
To promote or demote a component item, click the upward pointing arrow next to the heading of the compartment or list item.
When completed, click either the [Save and View Document] button or the [Save and Go to Price / CSA / Warranty / Trade-ins Section] button if you wish to move to the next tab.
Change the Price / CSA / Warranty / Trade-ins Section
The page allows for free-form additions to standard text entries set up as defaults for each section.
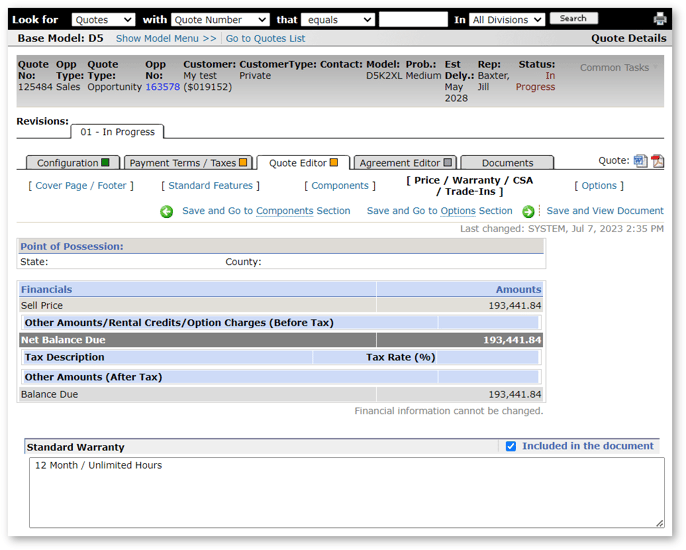
Each section has a check box next to Included in the document that can be checked to hide the section from the quote.
When completed, click the [Save and View Document] button.
Agreement Editor
The Agreement Editor is used to bring the details already entered when developing the quote into the workflow required to produce a Sales Agreement. Changes to the Settings and Customer Section allow for the additional entry of information not required in the quote but mandatory to produce the Agreement document.
As each page is modified, it is important to move to the next page by clicking the [Save and Go] buttons at the top of the quote. Each of these selections will save the information changed on the page and update the PDF file connected to the agreement. The document can be viewed in either letter or legal format and contains a second page of legal terms and conditions associated with a sale or RPO (Rental with Purchase Option).
Change the Settings Page
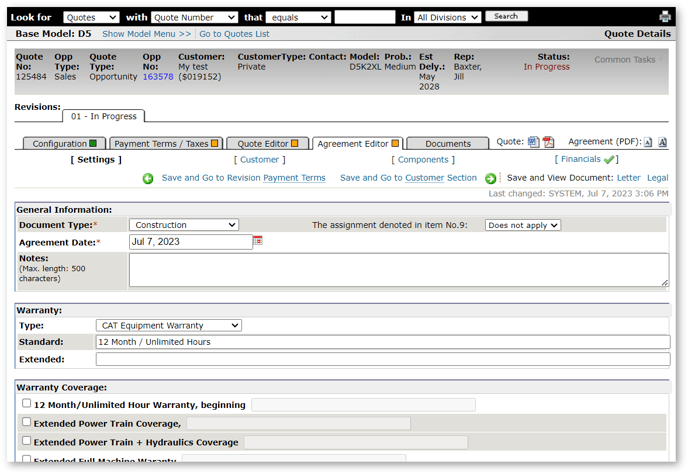
Make all necessary changes in the fields displayed on the Settings page.
The Warranty section is filled in by the workflow of the quote, but the CSA detail needs to be entered prior to the agreement being produced.
When completed, click on either the [Save and View Document] button or the [Save and Go to Customer Section] if you wish to move to the next tab.
Change the Customer Info
Customer Details Section
At this point any change to customer information should be recorded. Click in any of the boxes that require changing and edit it.
The Industry Code and Industry Group must be selected from the drop-down menus to support the reporting of the deal to CAT in the proper way. The Equipment Support Contact and Product Support Contact need to be entered where available.
Alternate Shipping Address Section
This section will be filled out in situations where the shipping address is different from the address in the Customer Details Section above. If it is the same as the address above, click the [Same as Sold To] button.
Other Customer Information Section
This section will be specific to each dealer. Where State and Federal tax exemption numbers are required, and identifying who finances the Federal tax, they are entered here.
When completed, click on either the [Save and View Document] button or the [Save and Go to Components Section] if you wish to move to the next tab.
Change the Components Page
If you are able to determine the Stock Number, Serial Number, Year, and Manufacturer, enter each of them in their respective fields.
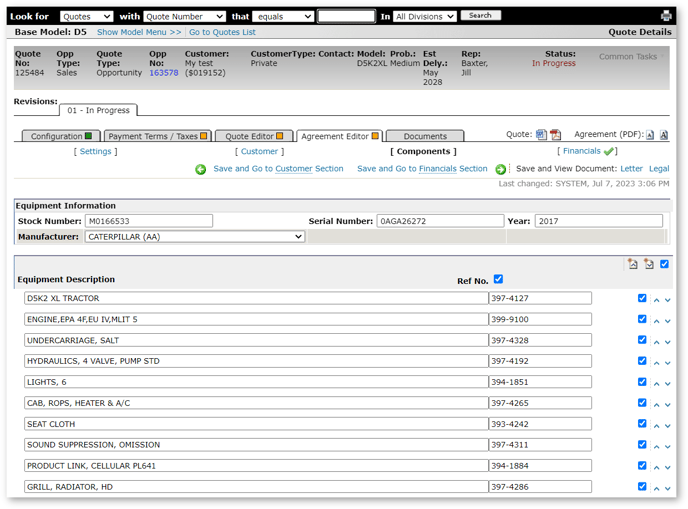
To add the Reference Numbers to the agreement document, click the check box next to the column heading.
To hide an individual equipment item from the agreement, click the check box to the right of line.
To promote or demote an equipment item, click the upward pointing arrow next to the heading of the list item.
When completed, click on either the [Save and View Document] button or the [Save and Go to Financials Section] if you wish to move to the next tab.
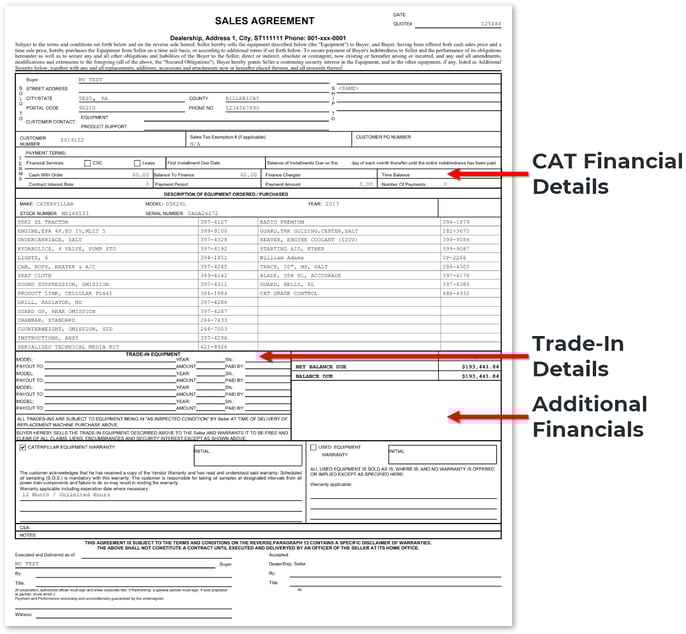
Change the Financials Page
Up to three additional entries can be added manually to the financials section, including items with $0 added to the cost of the deal, discounts to be extended to the customer, and additional cost items. Do not enter a dollar sign or comma in a field.
Click [Save and View Document] to see the Legal or Letter size version of the Sales Agreement for printing and signatures.
The version of the Sales Agreement printed is specific to the dealer, so the document that you see may be different.
Email Documents
Hover over the Common Tasks drop-down menu at the top right, then click [Send Email].
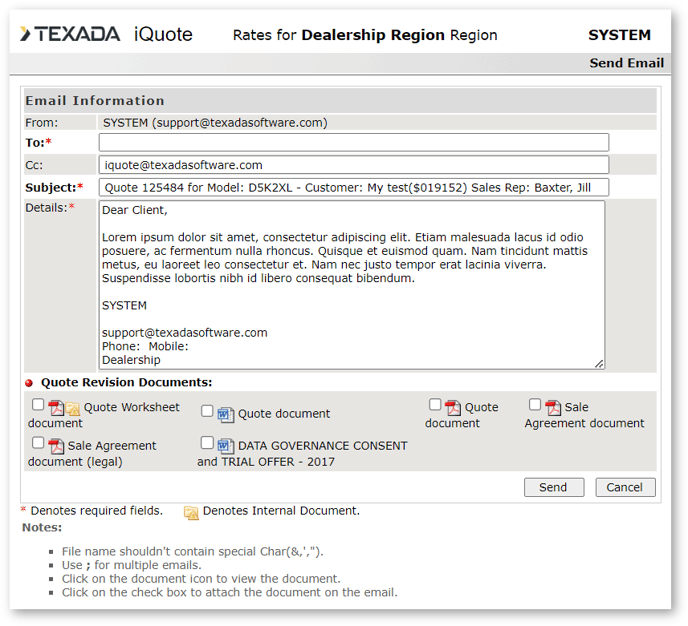
The documents displayed will be from the revision selected. Each document icon can be selected for review. You can select each box document from the quote to attach to the email.
After the email is sent, you will have the option to change the status of the quote to Submitted.