
In This Article
Introduction
Welcome to Customer Order to Invoice (COTI). This application allows you to enter and track all machine and attachment sales and rentals from the time that the customer order is received, through invoicing and completion.
Customization
This user guide will show you how to use Customer Order to Invoice with the assumption that your dealership has made the migration to CloudLink and your COTI application has been set up in a standard configuration. However, it should be noted that depending on your dealership’s level of customization, or if your dealership hasn’t migrated to CloudLink yet, your screens may look slightly different than those shown here.
Customer Order to Invoice
Log in to CloudLink with your Username and Password, then click the [ENTER] button under Customer Order to Invoice. You will be taken to the Customer Order to Invoice Workflow page.
Navigation Bar
At the top of the screen is a navigation bar that can be accessed from anywhere in the application. Access the five major workflows, search for a work order, or select your user role using the Navigation Bar.
Add New Deal
To add a new Deal:
- Click Add New Deal on the top navigation bar.
- Enter all required information into the Add New Deal form.
- Click the [Add Deal] button at the bottom left of the page.
Once saved, the deal will be assigned to the user based on their role.
Workflow
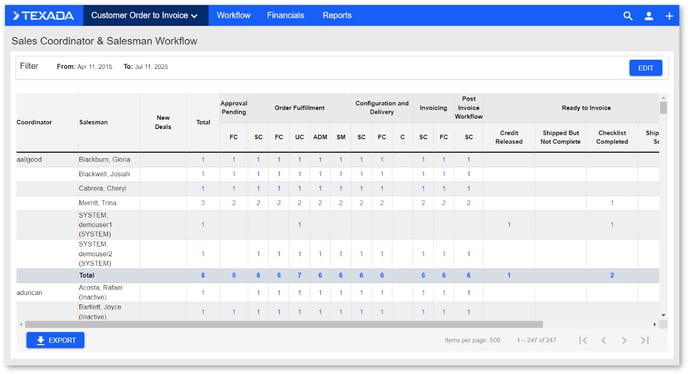
The Workflow page indicates tasks that are outstanding and need to be completed by each of the roles assigned to a particular transaction. These are set up in Phases according to how the dealer designs their specific process. This page indicates how many deals and tasks each role must complete through each Phase.
The Workflow page presents you with the deals that still need to be worked on, along with the deal details needed to complete the deal. Drilling into any of the numbers gives you a list of the deals that need work.
Transaction Details
Each transaction is listed by stock or ID number. Drill into a transaction by clicking on the stock or ID number. Drilling into one of these transactions will give a complete outline of the deal, allowing the user to access deal details, documents, any notes other users have entered, a checklist of tasks that need to be performed, visibility into other users’ checklists, a change request area, credit release function, and more.
Deal Details
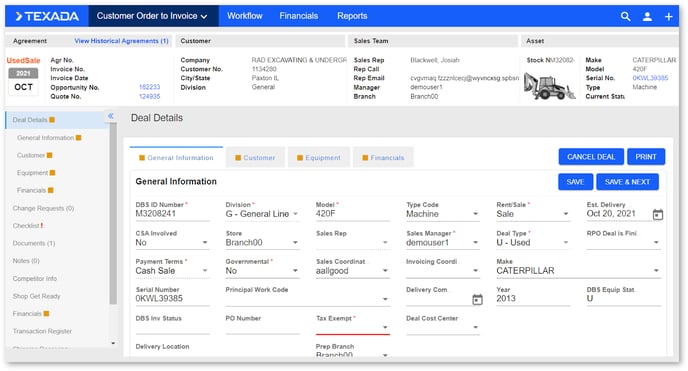
This page provides a detailed view of the deal components and pricing. This page is customized to the dealer’s specific needs regarding information they want to collect on each transaction.
Change Requests
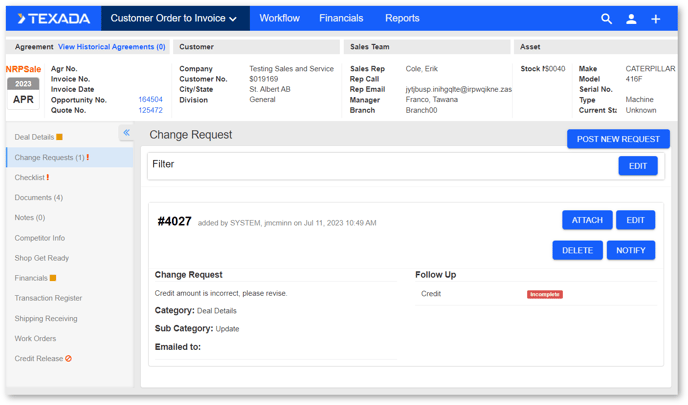
The Change Requests page is used to articulate any changes to the deal once it is in process. Some changes will affect the price; others will act as a notification of any type of change to the original order. This tracking keeps all the transactional changes visible and sends alerts to other affected users.
Checklist

Each task is set up to be either manually checked off as complete, completed via a system related date in DBS, or to be completed only if documents are uploaded into the system. Dealers will define these checklists for themselves along with the method of completion that is appropriate for them. You can see all of the checklists for other departments and roles, but can only affect tasks within your own department and role.
As each user completes the tasks they are assigned to, the tasks are checked off as Completed (either manually or automated via a date or document upload) and indicated as such with a green check box. Incomplete tasks are indicated with a red exclamation mark. Each user is responsible for their assigned tasks.
Documents
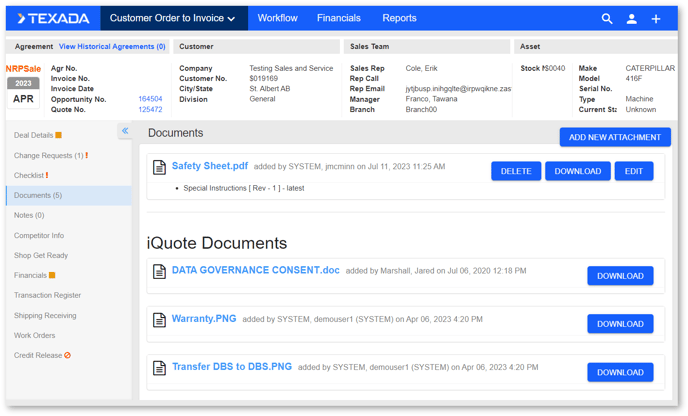
Each stock or ID number represents a deal and has a document repository available for all documents pertaining to that sale.
Adding new documents can be done two ways:
- Transfer from a dealer scanning system
- Upload directly from the user’s desktop
In the implementation phase of Customer Order to Invoice, each dealer will define any document types that are required for the sales process to be completed. These required documents are predefined in the system as mandatory for the checklist items to be completed.
Notes
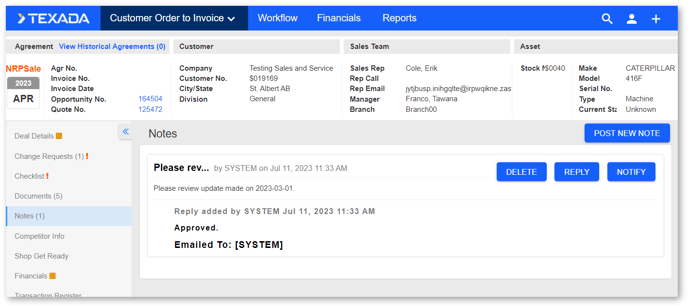
The Notes sections is a free text field for all users to make notes on the transaction. Each note has a reply function to display a trail of other comments on this same note.
Financials
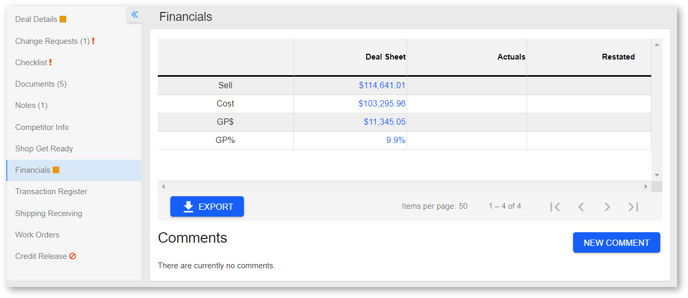
The Financials section represents three levels of Gross Profit (GP):
- Deal Sheet Profit – the original profit percentage expected at the time of sale
- Actual Profit – the dealership’s actual profit in the accounting month of invoicing
- Restated Profit – any changes or additional changes that will affect GP after the month of invoicing.
Transaction Register
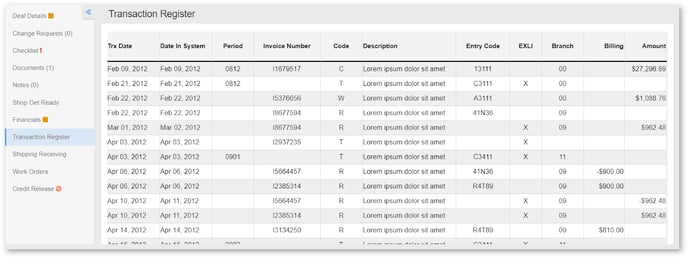
The Transaction Register page provides a view into a deal’s DBS transaction register. This page is refreshed with updated data each morning with any new items that were revised on the overnight batch jobs.
Financials
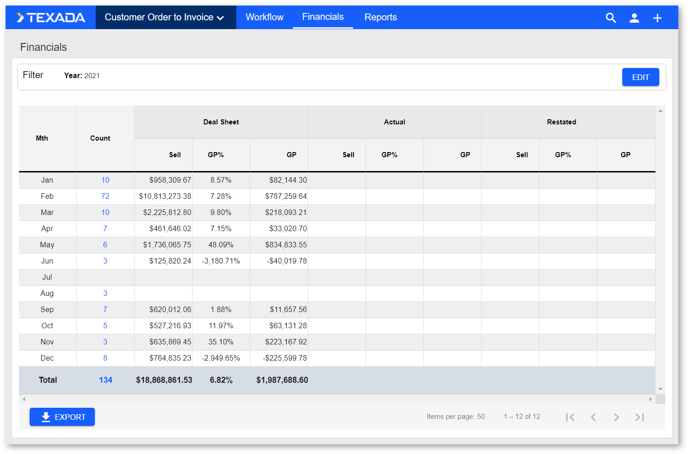
Similar to the Financials page in a transaction workflow, the Financials page represents three levels of Gross Profit (GP):
- Deal Sheet Profit – the original profit percentage expected
- Actual Profit – the dealership’s actual profit in the accounting month of invoicing
- Restated Profit – any changes or additional charges that affected GP after the month of invoicing
All decimal fields in COTI are calculated using up to five (5) decimal places. Remaining values are truncated; for example, the value 25.673159 will be represented as 25.67315. This means that small discrepancies can occasionally be observed when comparing financial values in COTI to those in other applications.
Reports
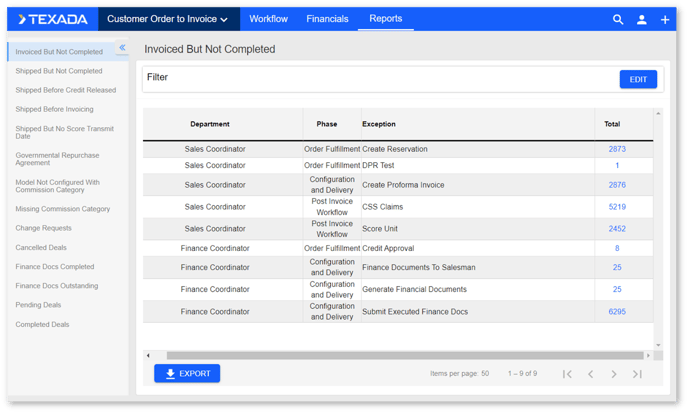
Generate Reports of various common workflows to gain quick insights into the status of deals as well as change requests made on deals. Each of these reports can be filtered and exported.
Search
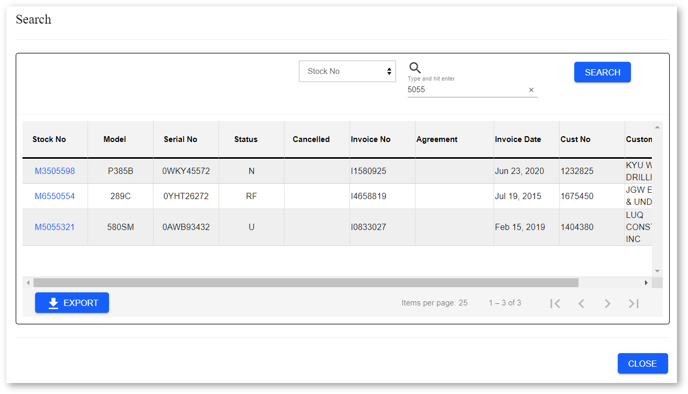
Click on the Search icon and use the filters to find specific information within COTI.
User Roles
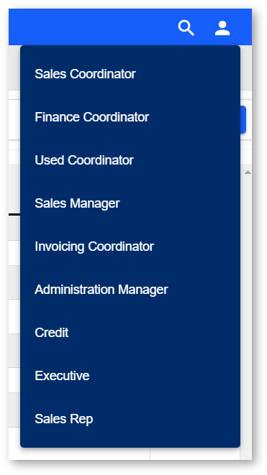
Each dealership can define the key User Roles in their organization that are involved in the sales process and what they are called. Each of these roles have certain tasks that need to be performed in order to complete the sales delivery process.