.png?width=365&height=50&name=Texada%20Logo%20(Black).png)
Key Indicator Dashboard
Click the Key Indicator Dashboard link under ON THE GO in the top navigation bar. A series of useful visual metrics will be displayed on your personal dashboard.

Toggle between dashboards by clicking on the tabs at the top of the page. Each dashboard displays different widgets containing valuable at-a-glance information.
To filter the widgets:
- Select the fields you want to filter by at the top of the page.
- Select the year you want to filter from.
The widgets will automatically update as filters are applied.
Add to My Favorites
- Click the down arrow at the top right corner of the widget you want to add to the My Favorites dashboard.
- Select My Favorites under Add to Dashboards.
You can add as many widgets as you want to create a personalized My Favorites dashboard. To remove a widget, click the X next to the down arrow at the top right.
Extended View
To display an Extended View of a widget, click the down arrow and select Extended View under Views, or click anywhere inside the body of the widget.

The Extended View contains the same information as the original widget, along with a more detailed description and links related to the source data (if available).
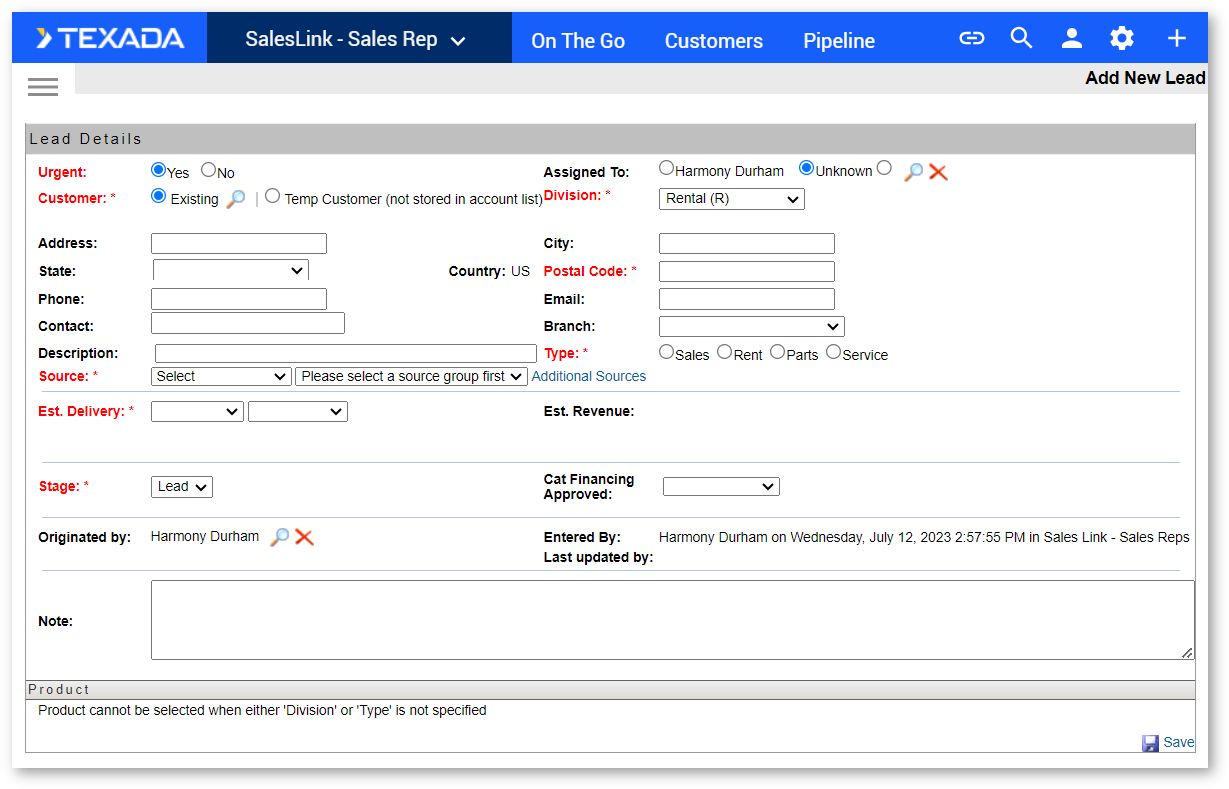
Add New Lead
To add a new lead:
- Click the Plus icon at the far right of the top navigation bar, then click the [Add Lead] button in the drop-down menu. Alternatively, click the Lead link to the left of the Calendar in the Home page, then click the [Add Lead] button at the top right of the Leads page.
- Enter all required information into the fields in the Add New Lead form.
- Once the lead’s Division and Type have been specified, you will have the option of entering information into the Product section.
- Click the [Save Lead] button.
Once a lead has been created it will be added to the Leads page.
Edit Lead
To edit a lead:
- Select a lead from the Leads page. You will be taken to its Lead Details page.
- Make all necessary changes to the lead.
- Click the [Save Lead] button at the bottom right of the page.
You can also edit certain fields in each lead simultaneously by clicking the [Edit All] button at the top right of the Leads page and making all necessary changes, then clicking the [Save All] button.
Transfer Lead to Opportunity
The Leads page displays a list of all leads that need to be followed up on. Click on a lead to view its Lead details.

- Add any activities that occurred when following up on the lead by clicking the Activities tab at the bottom of the page, then click the [New] button.
- Enter all required information into the Add New Activity form, then click [Save Activity] to add it to the lead.
- In the Lead Details section, click the Stage drop-down menu and select the current stage of the lead (Outstanding, Development, or Proposal) to promote the lead to an opportunity.
- Click the [Save Lead] button to promote the lead to an opportunity.
As the opportunity is worked on, Product details, Notes, Attachments, Quotes, etc., can be added to the Opportunity Details page.
Transfer Lead to No Lead
From the Leads page, click on a lead to view its Lead details.
- Add any activities that occurred when following up on the lead by clicking the Activities tab at the bottom of the page, then click the [New] button.
- Enter all required information into the Add New Activity form, then click [Save Activity] to add it to the lead.
- If it becomes apparent that the lead is not going anywhere, click the Stage drop-down menu and select No Lead.
- Click the [Save Lead] button to transfer the lead to No Lead.
Once a lead has been transferred to No Lead it cannot be edited. If the lead needs to be reopened, a new lead must be created.
Add New Opportunity
Opportunities can be created without having to go through the Lead stage first. To view a list of all current opportunities, click the Open Opportunities link under ON THE GO in the top navigation bar.

The Opportunities page displays a list of all currently open opportunities, starting with the most recent.
To filter the list:
- Select the fields you want to filter by at the top of the page.
- Click the [Filter] button.
Export the list into an Excel spreadsheet by clicking the [Export] button at the top right of the page.
To add a new opportunity:
- Click the Plus icon at the far right of the top navigation bar, then click the [Add New Opportunity] button in the drop-down menu. Alternatively, click the All Outstanding Opportunities link to the left of the Calendar in the Home page, then click the [Add Lead] button at the top right of the Opportunities page.
- Select whether this is an Opportunity or a Bid.
- Enter all required information into the fields in the Add New Opportunity form.
- Once the opportunity’s Division and Type have been specified, you will have the option to enter information into the Product section.
- Click the [Save Opportunity] button.
Edit Opportunity
To edit an opportunity:
- Select an opportunity from the Opportunities page. You will be taken to its Opportunity Details page.
- Make all necessary changes to the opportunity.
- Click the [Save Opportunity] button at the bottom right of the page.
You can also edit certain fields in each opportunity simultaneously by clicking the [Edit All] button at the top right of the Opportunities page and making all necessary changes, then clicking the [Save All] button.
Opportunity Stages
Stages of completion are assigned according to which stage the deal is currently in.
- Outstanding: An opportunity to sell something has been identified and qualified, but the sales rep has not started working on it.
- Development: The sales rep has started working on this opportunity, such as gathering requirements from the customer or internal requirements from the dealership. A quote has been started and is in progress.
- Proposal: The sales rep has completed a quote and has submitted it to the customer for review. This stage represents outstanding quotes to customers that are still in negotiation, re-quoting stages, or waiting for customer acceptance.
If the opportunity is changed to the following stages, the information can no longer be edited and the stage cannot be changed back to previous stage types.
- Won: The customer has proceeded with the proposal and will purchase the equipment. When changing to this stage additional information is necessary in order to save the opportunity.
- Lost: The customer has decided to go with a competitor. The lost sale page will appear and must be completed to save the opportunity at this stage. This Lost Sales information will appear in certain reports in SalesLink Reps.
- No Deal: The customer has decided not to purchase. The only additional information that will be necessary is the reason.
Opportunities Reports
Generate reports about your opportunities by clicking the Opportunities By Source link under PIPELINE in the top navigation bar. A table of past and future opportunities organized by Source is displayed.

Click on the tabs at the top of the screen to organize your opportunities by different categories. The table will automatically update as each tab is selected.
To filter the table:
- Select the fields you want to filter by.
- Select a date range to filter by.
- Click the [Filter] button.
Export the table into an Excel spreadsheet by clicking the [Export] button at the top right of the table.
Click the Question (?) icon at the top right of the page for more information on filter options and results.
Lead and Opportunity Performance
Generate a Lead and Opportunity Performance Report by clicking the Lead and Opportunity Performance link under PIPELINE in the top navigation bar. A table of your Closed and Open leads and Opportunities displays, organized by Source.

To filter the table:
- Select the fields you want to filter by.
- Select a date range to filter by.
- Click the [Filter] button.
Export the table into an Excel spreadsheet by clicking the [Export] button at the top right of the table.
Export the table into an Excel spreadsheet and send it to CAT by clicking the [Export to CAT] button at the top right of the table.
My Resolved Leads
Click the My Resolved Leads link under PIPELINE in the top navigation bar. A table of information regarding your currently resolved leads displays.

This page only shows records that originated as leads. It does not include those that originated from Opportunities.
To filter the table:
- Select the fields you want to filter by.
- Select a date range to filter by.
- Click the [Filter] button.