
Add New Customer
To add a new customer:
- Click the Plus icon at the far right of the top navigation bar.
- Select [Add New Customer] from the drop-down menu.
- Enter all required information into the Add New Customer form.
- Click [Submit] to create the new customer.
Add New Prospect
To add a new prospect:
- Click the Plus icon at the far right of the top navigation bar.
- Select [Add New Prospect] from the drop-down menu.
- Enter all required information into the Add New Prospect form.
- Click [Submit] to create the new prospect.
Accounts Receivable
Click the Accounts Receivable link under ON THE GO in the top navigation bar. The Accounts Receivable page displays.
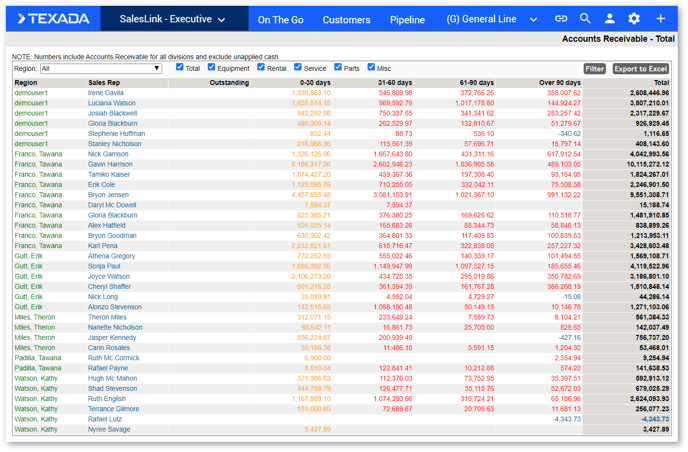
This page displays detailed accounts receivable information for all of your customers, organized by region and sales rep.
Filter what accounts receivable information is displayed by selecting or deselecting the category checkboxes at the top left of the page. The table will automatically update as each filter selection is made.
Export the table into an Excel spreadsheet by clicking the [Export to Excel] button at the top right of the page.
The numbers displayed exclude unapplied cash.
A/R Notes List
Click the A/R Notes List link under ON THE GO in the top navigation bar. The Credit Follow Up Notes page displays.
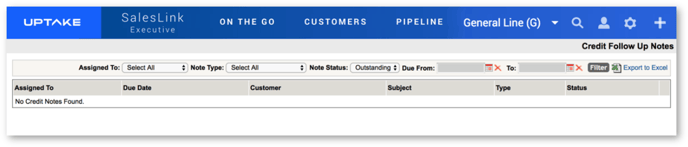
This page displays a detailed list of current credit follow up notes, organized by the person they’re assigned to.
To filter the table:
- Select the fields you want to filter by.
- Select a date range to filter by.
- Click the [Filter] button.
Export the table into an Excel spreadsheet by clicking the [Export to Excel] button at the top right of the table.
My Requests
Requests are changes to a customer’s information, including adding equipment, assigning a customer, adding influencers, etc., that are sent to their assigned SalesLink Administrators (or branch administrators or gatekeepers) to make the change in DBS or in SalesLink.
Click the My Requests link under ON THE GO in the top navigation bar. The My Requests page displays.
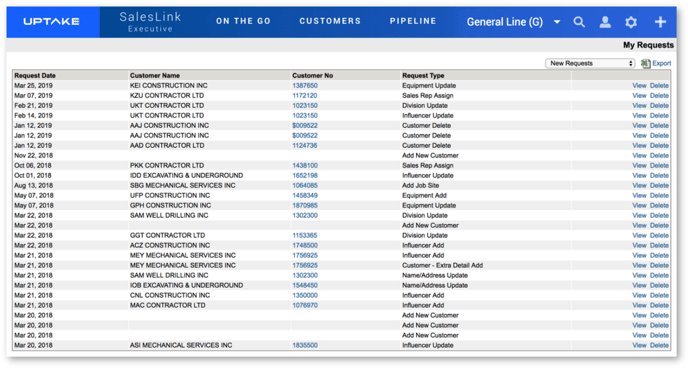
This page displays a table detailing all open requests, organized by Date, Customer Name, Customer Number, and Request Type. Filter the table using the drop-down menu at the top of the page.
Click the [View] button to view a request’s details.
Click the [Delete] button to delete a request.
Export the table into an Excel spreadsheet by clicking the [Export] button at the top right of the page.
Outstanding Requests
Click the Outstanding Requests link under ON THE GO in the top navigation bar. The Outstanding Account Update Requests page displays.
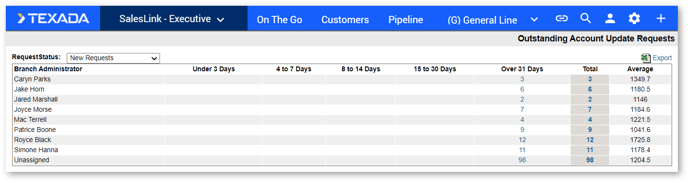
This page displays all your outstanding account update requests, organized by Branch Administrator. Filter the table using the Request Status drop-down menu at the top left of the page.
Click on a number in the table to view details regarding those requests.
Export the table into an Excel spreadsheet by clicking the [Export] button at the top right of the page.
Sales Team
Click the Sales Team link under ON THE GO in the top navigation bar. The Sales Team page displays.
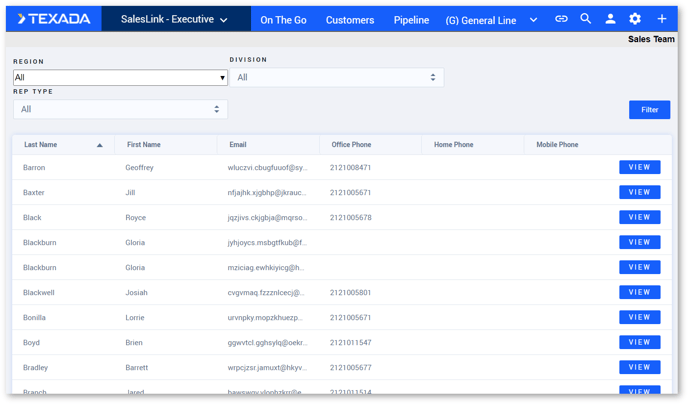
This page displays details regarding each of your sales reps. Click the [VIEW] button to view details about a specific rep.
To filter the table:
- Use the drop-down menus at the top of the page to select a Region, Division, or Rep Type.
- Click the [Filter] button.
Request History
Click the Request History link under CUSTOMERS in the top navigation bar. The Request History page displays.

This page displays a table of past requests, organized by Region and Month. Use the Division and Year drop-down menus at the top of the table to switch the division and year the table displays.
Export the table into an Excel spreadsheet by clicking the [Export] button at the top right of the page.
Change Requests
Click the Change Requests link under CUSTOMERS in the top navigation bar. The Account Update Requests on Hold page displays.

This page displays a table of account update requests that are currently on hold, organized by Branch Administrator. Click on a number in the table to view details regarding those requests.
Filter the table using the Request Status drop-down menu at the top left of the page.
Export the table into an Excel spreadsheet by clicking the [Export] button at the top right of the page.
Prospect Sources
Click the Prospect Sources link under CUSTOMERS in the top navigation bar. The Prospect Sources page displays.
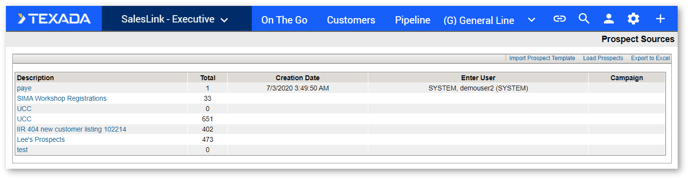
This page displays a table of your current prospect sources. Click the [Import Prospect Template] button to download an Excel prospect template to your computer. Enter any information into the template, then click the [Load Prospects] button to upload your file.
Export the table into an Excel spreadsheet by clicking the [Export] button at the top right of the page.
Customers by Counties
Click the Customers by Counties link under CUSTOMERS in the top navigation bar. The Customers by Counties Summary page displays.
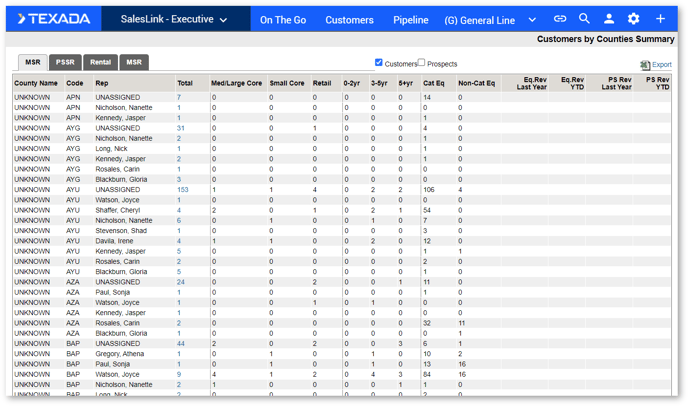
This page displays a table of current customer revenue details organized by county. Use the tabs at the top left of the page to switch between MSR, PSSR, Rental, and Other.
Click the Prospects checkbox to view prospective customers in the table.
Export the table into an Excel spreadsheet by clicking the [Export] button at the top right of the page.
Unassigned Accounts
Click the Unassigned Accounts link under CUSTOMERS in the top navigation bar. The Unassigned Accounts page displays.
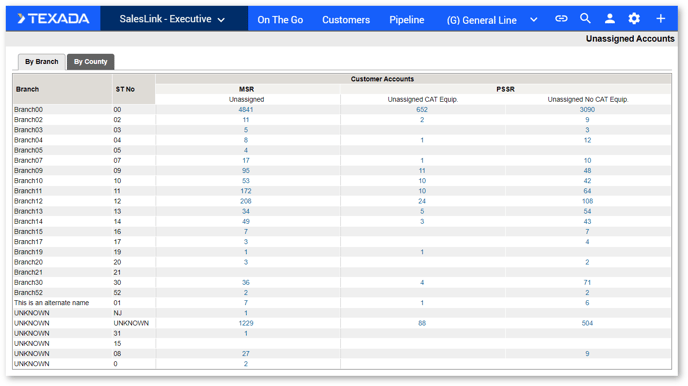
This page displays a table of customer accounts that are not currently assigned, organized by MSR and PSSR. Click one of the numbers to view those specific unassigned accounts.
Click on the tabs at the top of the display unassigned accounts by Branch or by County.
Advanced Search
To run an advanced search for customers or prospects, click the Advanced Search link under CUSTOMERS in the top navigation bar. The Advanced Search – New Query page displays.
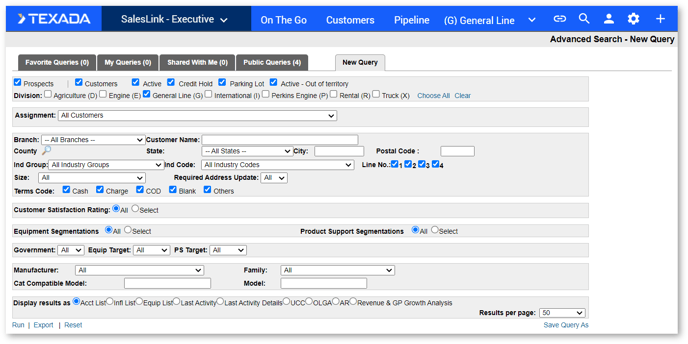
To run a new query:
- Select all parameters you want to search by in the New Query form.
- Select how you want to display your results.
- Click the [Run] button at the bottom left of the page. Your results will display in the manner you selected.
- Click the [Reset] button if you want to return all search parameters to their default settings.
Click the [Export] button to export your results into an Excel spreadsheet.
To save a query:
- Click the [Save Query As] button at the bottom right of the page.
- Enter a Name for your query.
- If you want to share your query, click the [Change] button and select users to share with from the list.
- Click [Save].
Click the tabs at the top of the page to view Favorite Queries, My Queries, Shared With Me, and Public Queries. Click the [Run] button to run one of these queries, or [Export] to export the results of a query to an Excel spreadsheet.