.png?width=365&height=50&name=Texada%20Logo%20(Black).png)
Tickets
To access the Ticket Scheduler, click the hamburger icon next to ServiceLink in the top navigation menu, then select Tickets under Scheduler. You can also click the Tickets tab
on the ServiceLink Home page.

This page displays details regarding all tickets scheduled to be worked on over the current week, along with a list of unscheduled tickets to the right. Use the buttons above the schedule to view different weeks or months, or use the drop-down menu to change how many days are displayed at once. You can also filter the schedule by individual technicians by selecting their name from the drop down menu to the left of the Settings button at the top of the screen.
Click the [Bays] or [Technicians] buttons at the top left to display the schedules for individual Bays or Technicians.
Schedule a Ticket
To schedule a ticket:
- Drag and drop a ticket from the Unscheduled Tickets tab on the right side of the screen into the AM or PM area of the day you want to schedule it. This will open the “Add Event” window. *
- Select a Technician and a Bay from the drop-down menus.
- If necessary, edit the Date and Time the ticket will be scheduled. You can also add a Blog entry for the technician if needed.
- Click [Save] to schedule the ticket.
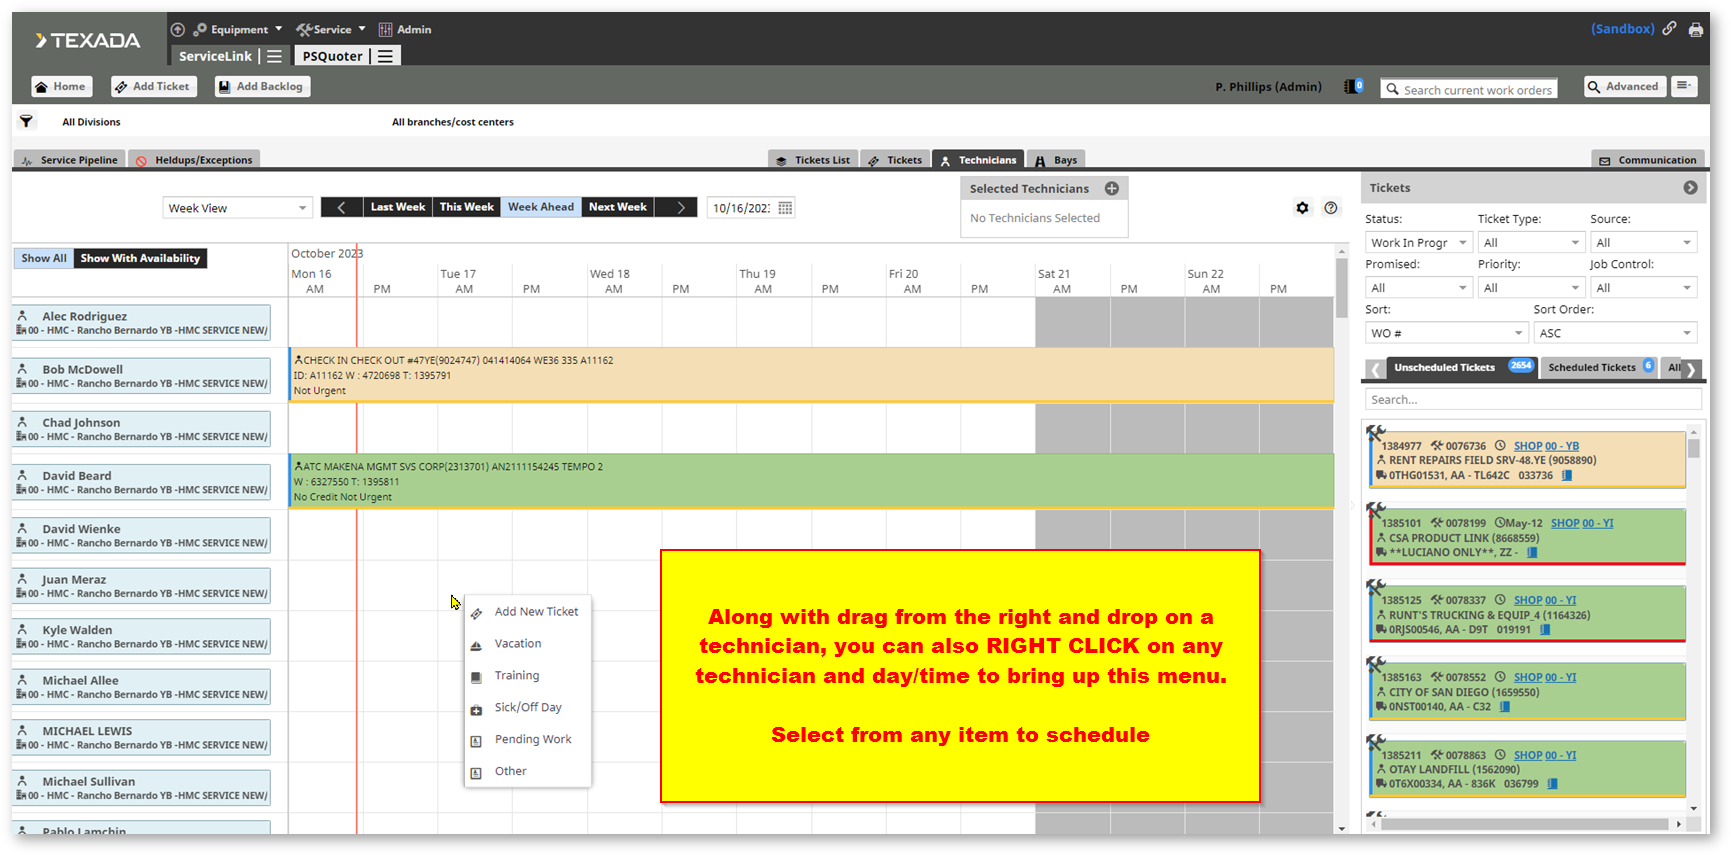
* If you are viewing the details of an individual work order, you can also access the “Add Event” window by navigating to the “Scheduler” tab, right-clicking the schedule, and clicking “Add New Event”.
Technicians
To access the Technicians page, click the hamburger icon next to ServiceLink in the top navigation menu, then select Technicians under Scheduler. You can also click the Technicians tab
on the ServiceLink Home page.

This page displays the same basic information as the Tickets page, but is organized by individual technicians. Use the buttons above the schedule to view different weeks or months, or use the drop-down menu to change how many days are displayed at once.
Click the [Show All] button to display all technicians, or click the [Show With Availability] button to only show technicians with available time slots.
To schedule a ticket, follow the same procedure described in the Schedule a Ticket section of this guide.
Bays
To access the Bays page, click the hamburger icon next to ServiceLink in the top navigation menu, then select Bays under Scheduler. You can also click the Bays tab
on the ServiceLink Home page.

This page displays the same basic information as the Tickets page, but is organized by individual bays. Use the buttons above the schedule to view different weeks or months, or use the drop-down menu to change how many days are displayed at once.
Click the [Show All] button to display all bays, or click the [Show With Availability] button to only show bays with available time slots.
To schedule a ticket, follow the same procedure described in the Schedule a Ticket section of this guide.