.png?width=365&height=50&name=Texada%20Logo%20(Black).png)
Introduction
Welcome to Parts and Service Quoter (PSQ). This application allows you to develop quotes for presentation to customers.
Parts and Service Quoter
Log in to CloudLink with your Username and Password, then click the [ENTER] button under Parts & Service Quoter. You will be taken to the PSQ Home page.
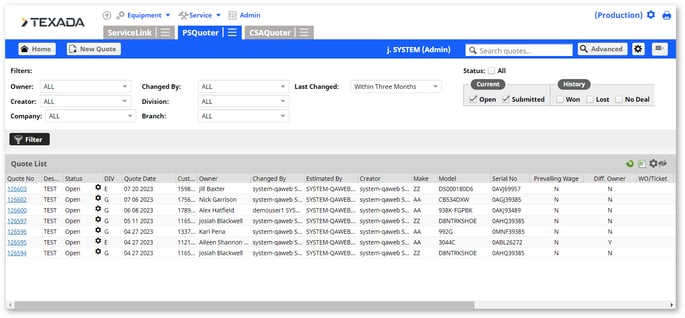
Home
The Home page displays a list of quotes that require action. Filter quotes by status, owner, division, and to find the quote you are looking for.
The Status column allows you to see which quotes require attention. The status column definitions are as follows:
- Open: The quote is being developed or has not yet been presented to the customer.
- Submitted for Approval: The quote has been given to the customer for approval.
- Won: The customer has accepted the quote and the quote is ready to create or link to a work order in DBS.
- Lost: The quote has been rejected by the customer.
- No Deal: Customer or Sales Rep has canceled the quote for reasons other than rejected.
Change the status of a quote from the Home page by clicking the gear icon in the status and select the desired status.
If the quote is associated with an opportunity, the stage of the opportunity will also change to match the stage of the quote.
Click the eye icon to configure the columns displayed in the list.
Click the gear icon in the upper-right corner of the Quote list to reload or export the list, and to save or reset the column configurations.
Navigate back to the home page from anywhere in the application by clicking [Home] in the Navigation Bar .
See a Quote’s details by clicking on the quote number.
Navigation Bar
At the top of the screen is a navigation bar that can be accessed from anywhere in the application. Create a new quote, search quotes, personalize PSQ, and access recently viewed quotes using the Navigation Bar.
Search

For a basic search using a quote number, customer name, or any of several other criteria, use the search field, located in the Navigation bar. Quotes in the resulting list can be sorted by clicking any of the column headers and the quotes can be filtered using the status of the quote or the date range in which it was created.
Advanced Search
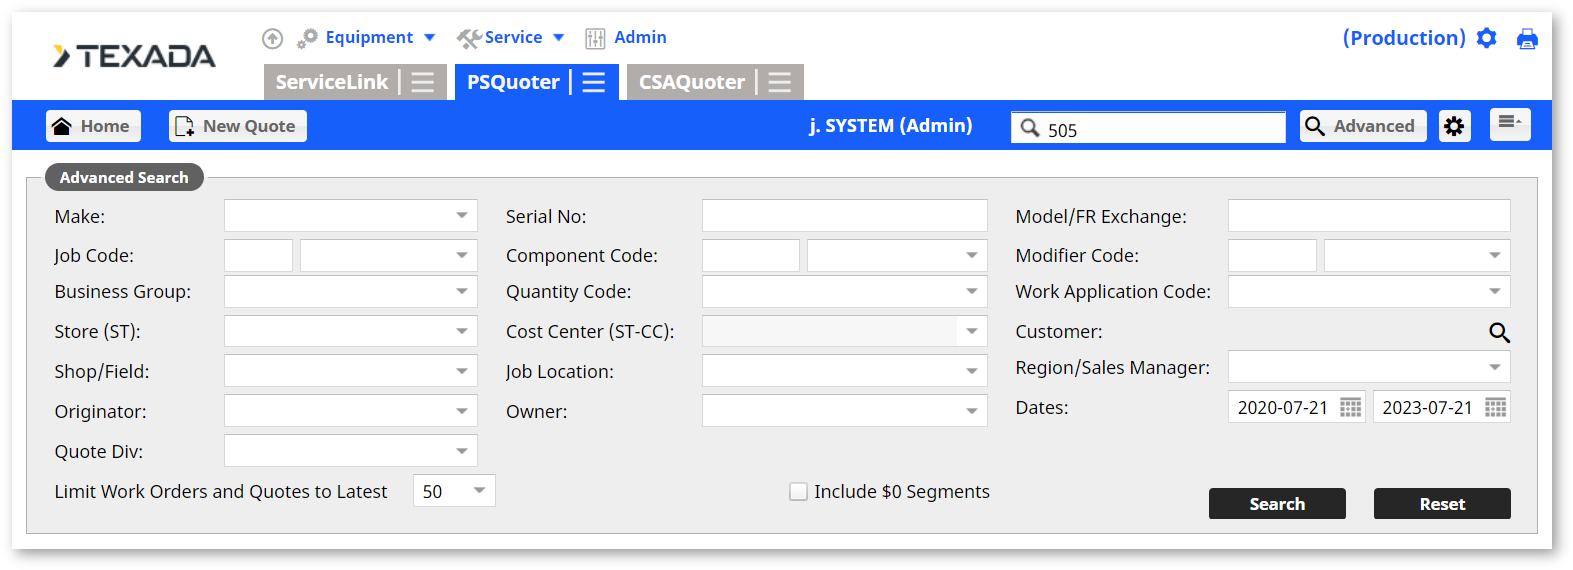
Advanced Search can be helpful when trying to create a new quote based on an existing Standard Job, work order, or quotes. Click the [Advanced] button on the navigation bar to access the Advanced Search page. On this page, you can search with more specific criteria. Once the desired result is located, a new quote can be created from this screen.
Personalize PSQ
Click the gear button to configure your PSQ settings. Select your default division, branch, cost center, contact information, document settings, and quote information.

Creating a New Quote
Creating a Quote from a Source
To create a new quote using customer and/or equipment information:
- Click [New Quote].
- In the window that appears, begin by typing at least two characters in the search field. Use the tabs along the top to filter and search by a specific category.
- Once you find the record you would like to quote, click on the appropriate icon with the action you would like to take.
Create a new quote with a customer
Create a new quote with equipment
Create a new quote with a customer and equipment
- After selecting the desired action, enter the remaining details on the Quote Overview page.
- Fill out the required fields.
- If searching for a customer, click the magnifying glass in the customer information section. Search either the customer name or number and select a customer to see all the customer general information, contacts, and equipment.
- To choose the equipment from a customer’s list, you can filter by selecting the CAT Equipment, Other Equipment, Rental or All Equipment buttons.
- Search for equipment to add to the quote by clicking the magnifying glass in the equipment section. Filter the fields in the search modal by clicking the eye icon
.
- Select the box in the Opportunity section if you would like an Opportunity created from this quote, or if you would like to associate this quote with an existing Opportunity.
- To associate the quote with a new Opportunity, select Create New Opportunity in the Opportunity Number field and enter the Opportunity information. To associate the quote with an existing Opportunity, select the desired quote in the Opportunity Number field.
- Click the [Update] button in the bottom right corner to save the quote details.

Click on a Customer Number to view details regarding that customer.
Click on a number in a month column to view all activities completed for that customer during that month.
To filter the table:
- Select the fields you want to filter by.
- Select how far back in time you want to filter.
- Click the [Filter] button.
Export the table into an Excel spreadsheet by clicking the [Export] button at the top right of the table.
Creating an Empty Quote
You can also create an empty quote in order to manually enter the quote information. To create a new empty quote:
- Click [New quote].
- In the Create Quote modal that appears, click the [Create Empty Quote] button.
- Enter the quote details on the Quote Overview page.
- Select the checkbox in the Opportunity section if you would like an Opportunity created from this quote, or if you would like to associate this quote with an existing Opportunity.
- To associate the quote with a new Opportunity, select Create New Opportunity in the Opportunity Number field and enter the Opportunity information. To associate the quote with an existing Opportunity, select the desired quote in the Opportunity Number field.
- Click the [Update] button in the bottom right corner to save the quote details.

Quote Details Page
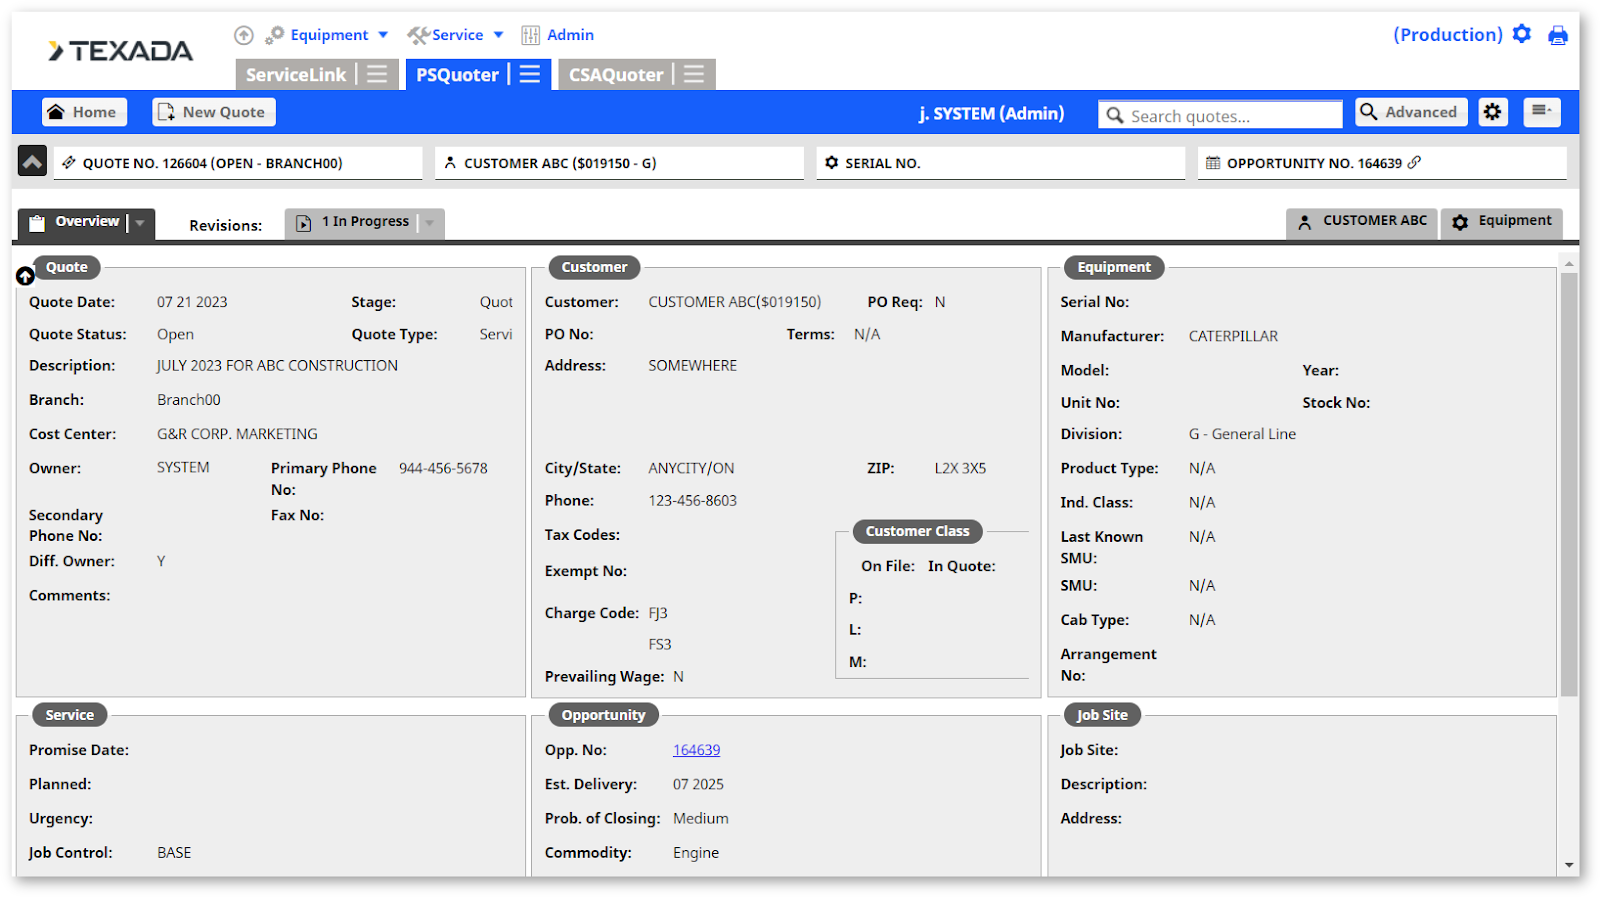
View Quote details including Customer, Opportunity, and Contact information in the overview tab. A collapsible header displays a general overview of the quote.
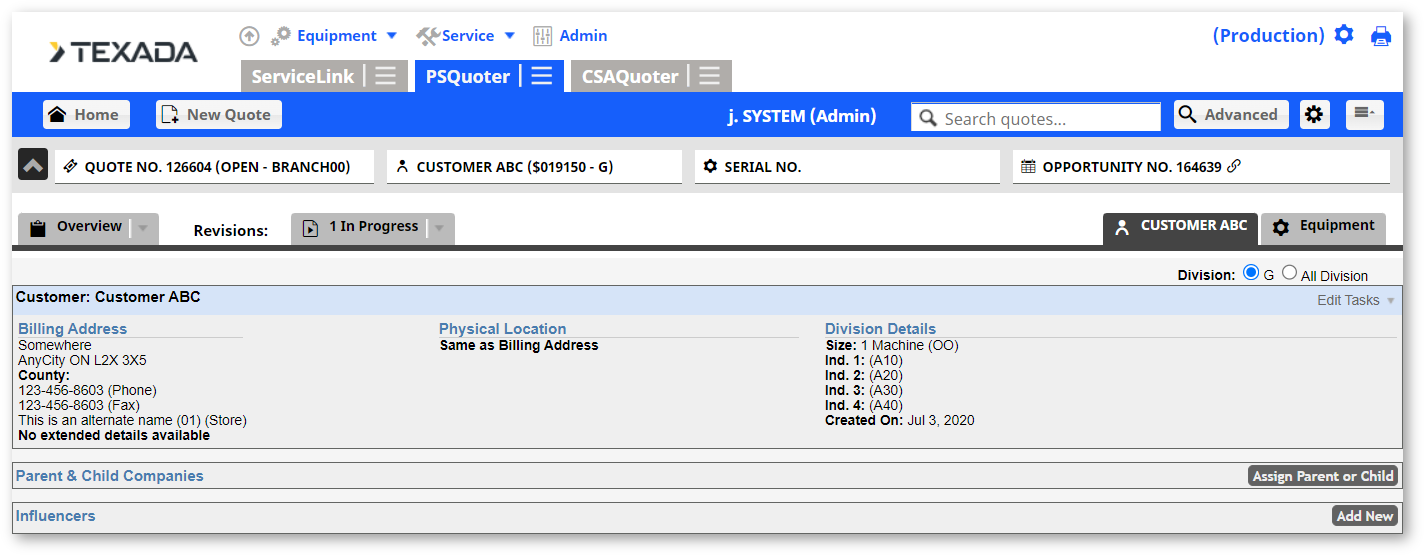
Click the tab displaying the customer’s name to view the customer’s information.
View equipment information by clicking the tab displaying the name of the equipment. This tab shows everything from the current owner of the equipment to the Service letters associated with the equipment.

Editing a Quote

Click the drop down arrow on the overview tab to take action on a quote. You can edit, delete, or change the status of a quote from this menu. Click Edit Quote to make changes on the Quote Overview page.
Revisions
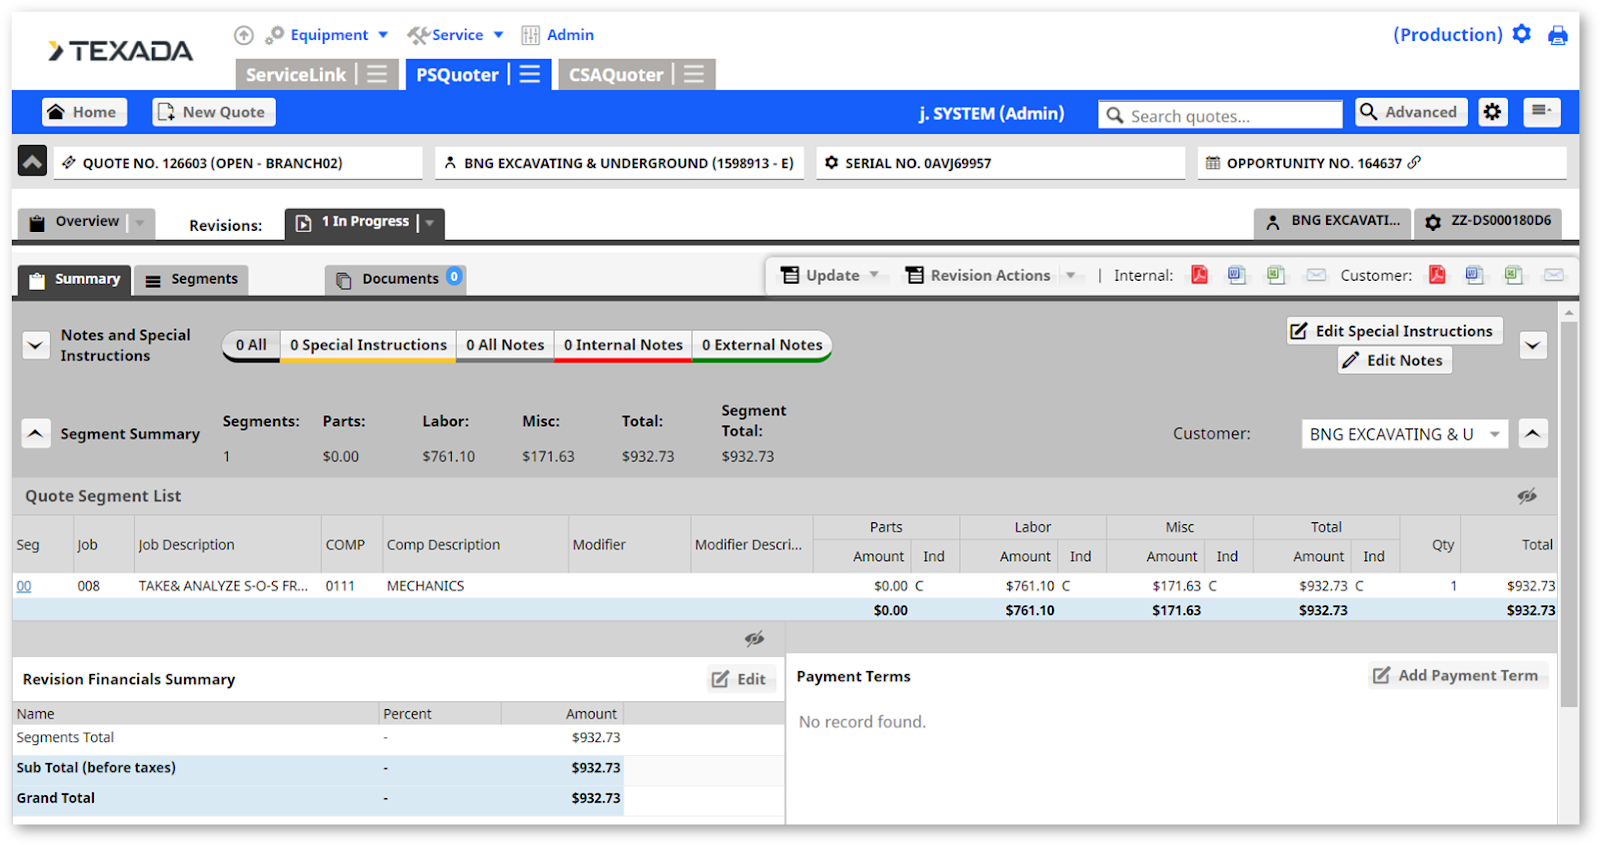
Keep track of changes to quotes and their statuses and prepare multiple versions of a quote with Revisions. You may choose to give the customer several different pricing options by presenting them as separate Revisions. This allows you to keep all of the existing customers and quote details in place.
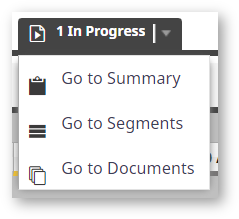
Revisions are displayed by status, as a tab, next to the Quote Overview tab. Click the drop down arrow on a Revision tab to jump to the Summary, Segments, and Documents associated with that Revision.
To change the status of a revision to complete, copy the revision as a new revision, or copy the revision to a new quote by clicking the drop down arrow on the [Revision Action] button. You can also export the internal and external versions of the quote from the Revision tab.
If all the additions and changes to the revision are done, the revision can be marked as complete. This status change is useful when there are multiple revisions on the same quote. This allows for all the revisions to be completed before submitting the quote to the customer.
Summary Tab
The Summary tab contains the notes and special instructions which can be added to either the internal or customer document.
Segments Tab
The Segments tab allows you to view, add, and delete the segments associated with the revision. Segments can be added to a quote from an existing source or manually. A segment can be added from the following sources:
- A template
- An existing quote
- A Work Order
- A Standard Job
- DBS documents
To add a Segment from an existing source:
- Click on the [New Segment] button to open the New Segment modal.
- Click on the appropriate Source tab.
- Use the search fields to find the desired source.
- Once the desired source has been found, use the drop down fields to select the appropriate Store and Cost Center.
- Click the [Save] button.

To create a Segment manually:
- Click on the [New Segment] button to open the New Segment modal.
- Click on the Manual tab.
- Fill in the required fields.
- Click the [Create] button.

There are three options to calculate the total of a segment:
- Time and Material: The sum of the total of parts, labor and miscellaneous.
- Flat Rate: Enter the cost in the Total Amount column and the variance will be calculated based on the flat-rate amount minus the total of parts, labor and miscellaneous.
- Estimated: An amount can be entered in the parts total box (even without any parts) and the field will automatically populate.
Adding and Editing Parts
Click the [Edit Parts] button to add and edit parts. The Edit Parts window appears; add and search for parts here. Click the search icon to search by Part number or description. Alternatively, the user can also enter the appropriate SOS (Source of Supply) and part number in the blank boxes and the system will fill in the pricing information if an exact match is found.
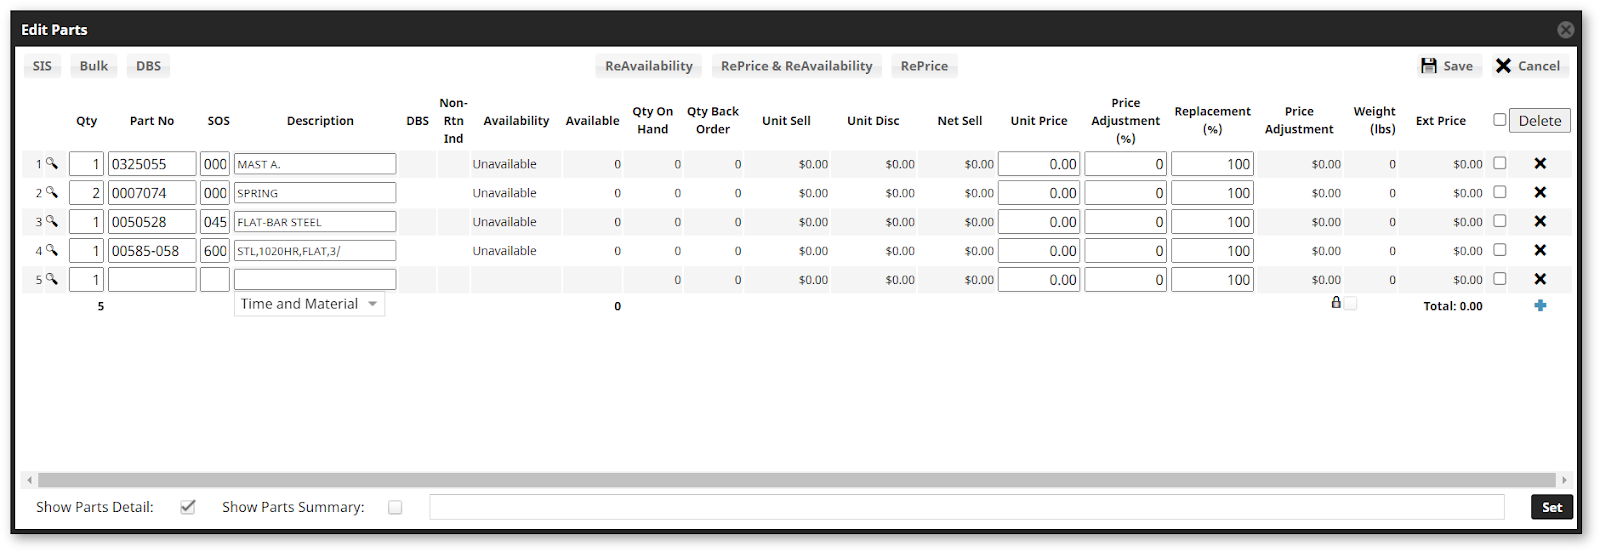
If there is a core charge associated with a particular part, that core charge will be pulled in and created as a separate parts line item.
If more lines for parts are needed, click the Add icon .
Notes:
- Parts pricing is specific to a customer based on discount and uplift parameters that are defined in DBS.
- Part prices can be refreshed only when the status of the quote is open. The user can change the status back to open at any time.
- A user can override a parts price and manually input the price. However, if the Parts Refresh is selected, the entered price will be overridden with the correct price in DBS.
To import a SIS Parts List:
- From SIS, save a file as an .xml on the user’s computer.
- In the Edit Parts modal, click the [SIS] button.
- In the Import SIS Parts modal that appears, click the [Select SIS File] button and browse for the desired file.
- Click the [Upload] button.
You can also upload a SIS parts list directly from the SIS site by clicking the [SISSite] button.

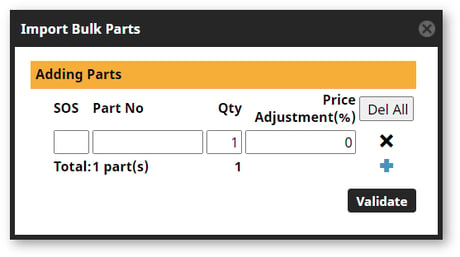
To bulk-add a parts list:
- In the Edit Parts modal, click the [Bulk] button.
- Enter the SOS, full or partial part numbers, and quantity.
- Click the [Validate] button. If there is more than one part number that matches, the application will display the options.
- Select the part you would like to add.
- Click the Add sign
to add more parts.
- Once all the parts have been validated, click the [Import] button.
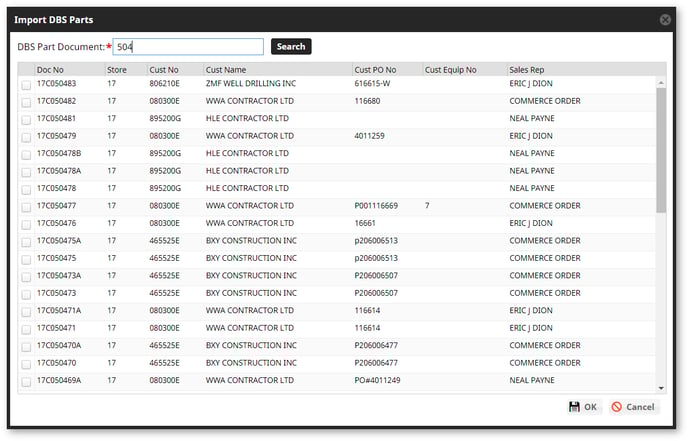
To import a DBS parts document:
- In the Edit Parts modal, click the [DBS] button.
- Enter a DBS Part Document number into the search box that appears in the Import DBS Parts modal.
- Check the boxes of the appropriate documents.
- Click the [OK] button.
Documents Tab
This tab displays two types of Quote Revision documents:
- Quote Revision Generated Documents
- Quote Revision Uploaded Documents
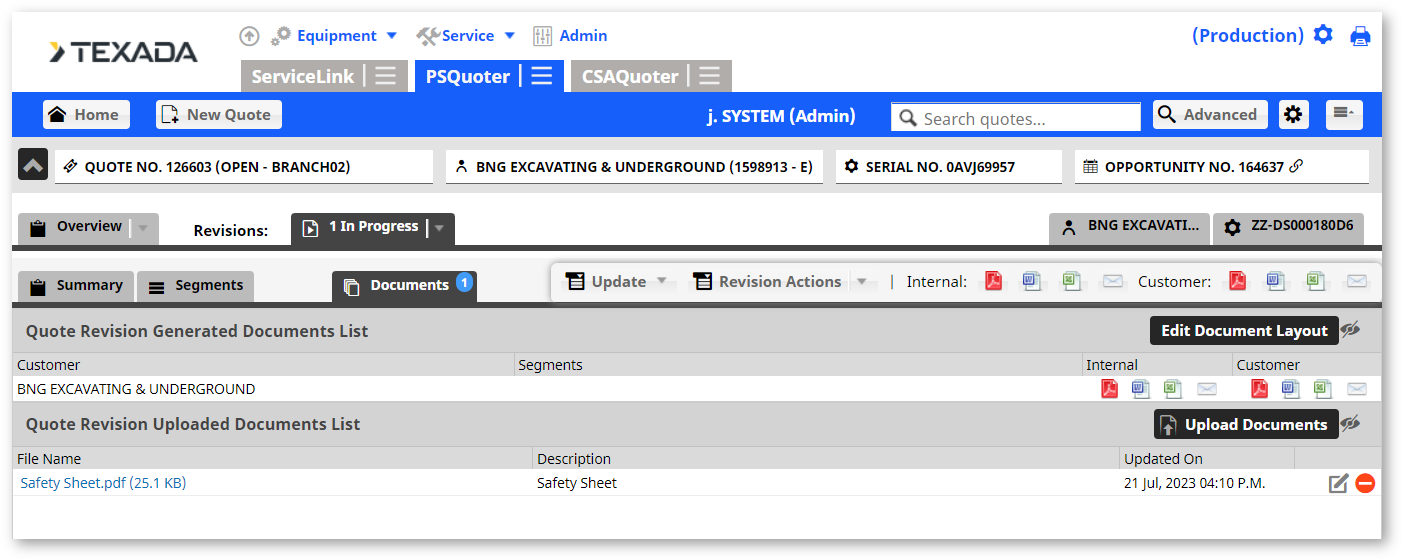
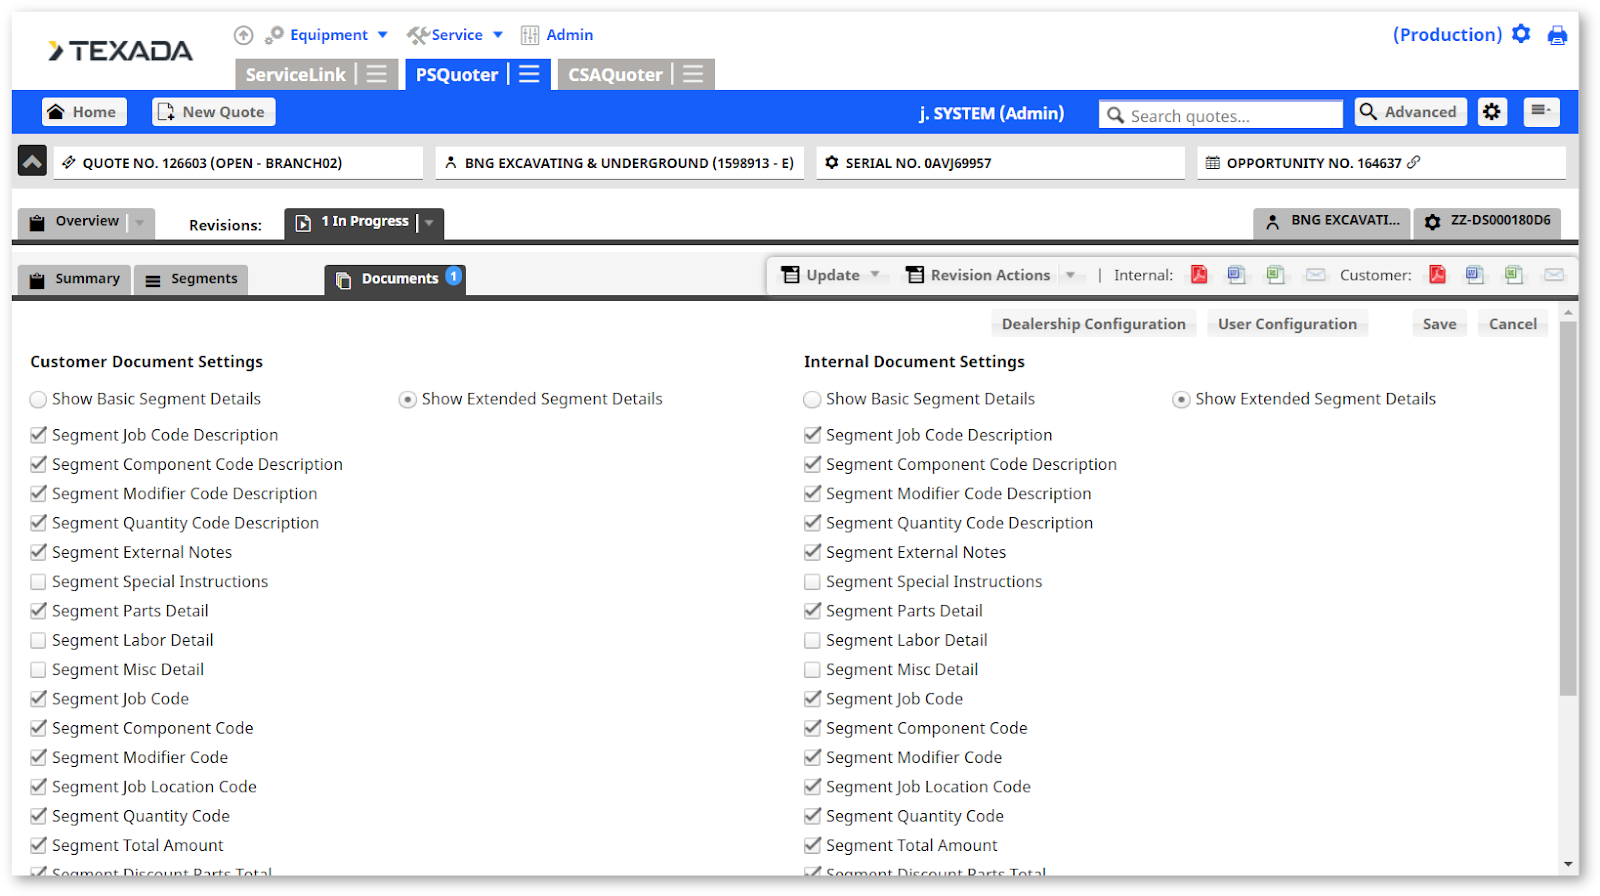
Configure the layout of the Generated Documents by clicking the [Edit Document Layout] button. This allows you to customize which information is displayed in the Generated Documents list. By default, all the items are selected or the items configured by a dealership. The items are shown of the quote will be visible and it can be different for the customer and internal users.
The quote document that is generated is configured for an individual dealer with the appropriate logo, terms and conditions, and any additional information that has been provided. It is available in Word or PDF format and both documents can be emailed.
The Generated Documents can be exported in both their internal and external versions:
- Internal: shows the shop versions of these documents.
- Customer: displays the quote as it would be delivered to the customer. You can select whether segment detail (individual parts) is to be displayed on the quote.

There are three different versions of these documents that can be exported:
- Email: Please note that an email recipient must be entered in the email field.
- Word Document