
Introduction
The EMT Dashboard is a collection of useful links and information and is arranged based on a recommended workflow.
Legend
The smaller information boxes in the Dashboard are color-coded based on the following legend:

- Informative
- No action req’d
- Attention
- Exception
- Service Escalation: Displays in the Event or priority of Active new event.
- Pending SMU Sync: Displays in machine service tab in PM Code column, waiting to sync with Service Scheduler and Work orders (when closed).
Monitoring Subscriptions
The Monitoring Subscriptions box reports the number of machines that have Product Link installed.
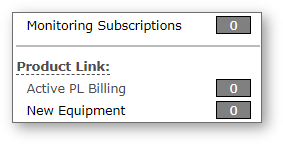
- Monitoring Subscriptions: Equipment being monitored in EMT.
- Active PL Billing: Active Product Link devices.
- New Equipment: Product Link reporting readings but no rental contract.
- Non-Reporting: Product Link units that have not reported in a period of time, normally 7 days.
- Non-Reporting Rental: Product Link rental units that have not reported in a period of time, normally 7 days.
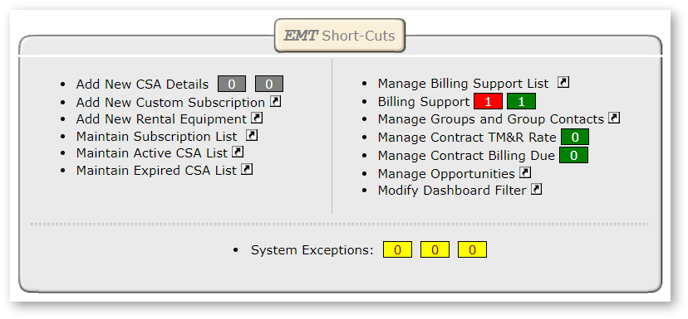
EMT Short-Cuts
Add New CSA Details
A list of serial numbers that have a CSA contract but are not set up in EMT. You have the option of setting up the serial number in EMT or deleting the equipment. As new contracts are added in DBS they are loaded into EMT overnight.
Add New Custom Subscription
This section allows you to add a machine to EMT without a CSA contract. You can also set up a serial number before the contract has been created, allowing EMT to begin monitoring.
The equipment must already be in the dealer’s equipment population.
Add New Rental Equipment
This list is the same as Custom Subscription, but the Machine type will default to Rental Fleet.
Maintain Subscription List
If you need to edit the CSC contract subscription, this will display a list with edit or delete options for all machines. A map link is also provided for equipment that is enabled with Product Link. The pop-up window will display the machine on a map along with any other equipment that is close by.
Clicking [Edit] will display the Machine Information page where you can edit the information.
Clicking [Delete] will change the equipment status to Deleted. The system will ask for confirmation before deleting. You can undelete a serial number by hovering over the Admin menu and clicking on Manage Deleted Equipment.
Maintain Active CSA List
This list displays all equipment with an active CSA contract even if they are not being monitored by EMT. Click [Edit] to edit the equipment information, or click [Delete] to remove it from this list and into the Deleted Equipment list.
Maintain Expired CSA List
This list displays all equipment with an expired CSA contract even if they are not being monitored by EMT. Click [Edit] to edit the equipment information, or click [Delete] to remove it from this list and into the Deleted Equipment list.
Manage Billing Support List / Billing Support
The Invoice Supporting Data functionality of EMT allows a dealer to provide invoice supporting data to their customers. This does not create an invoice, but instead creates a customizable Excel sheet that can be attached to the invoice to show the customer the details that support the invoiced amount.
The invoice supporting data has two main processes:
- Create and configure an invoice supporting template.
- Create the template and attach it to a customer.
- Determine the values that should be included in the supporting data.
- Attach one or more machines to the template.
- Once a billing period is completed, EMT will generate the invoice supporting data.
- Based on the billing template parameters, EMT will automatically create a billing report.
- EMT uses the month end SMU readings that are set in Box 1 to determine the SMU reading at the beginning and end of the period.
- EMT uses the TM&R rate that is set on the Contract Information page to calculate the invoice amounts.
- If there are different TM&R billing amounts during the period, EMT will use the appropriate billing amount for each of the corresponding billing periods.
- If the billing amount is a flat rate, EMT will calculate a daily rate.
Create and Configure Invoice Supporting Data
Click on the Manage CSA Billing List link under Admin in the top navigation bar, or click Manage Billing Support List on the Dashboard.
The Manage CSA Billing List page displays a list of existing templates that have already been set up. Templates are linked to a customer and each customer can have 1 or more templates attached.
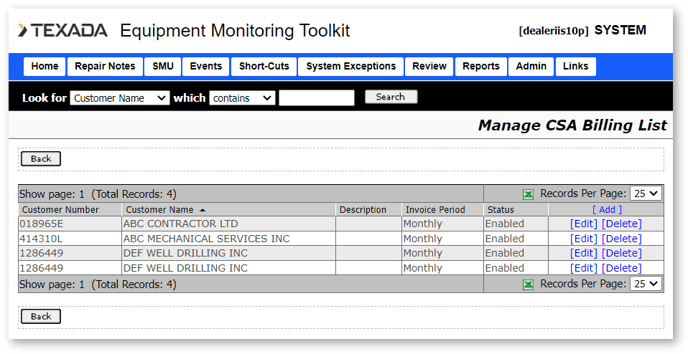
From this page you can do one of the following:
- Add a new template by clicking [Add].
- Edit an existing template by clicking [Edit].
- Delete a template by clicking [Delete].
Clicking [Add] or [Edit] displays the Edit Customer Template page.
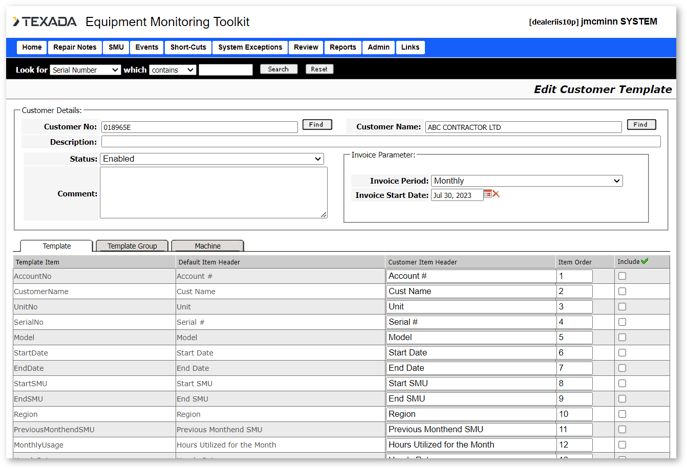
To attach the template to a customer, enter the customer number and name manually or use the [Find] buttons to search for the customer.
Enter a Description, Status, Invoice Parameter, and any Comments.
Template Tab
The Template tab provides a list of the available attributes that can be displayed on the final invoice supporting document. From here you can:
- Choose the attributes to include.
- Click in individual Include checkboxes, or click the green check mark to select or deselect all.
- Modify the column headers. A generic header is provided, but you have the ability to modify them as needed.
- Modify the sort order. This determines the order in which the attributes will be displayed on the final invoice supporting Excel document.
Template Group Tab
The Template Group tab allows you to include one or more groups within a single invoice supporting Excel document.
Each template must contain at least one group.
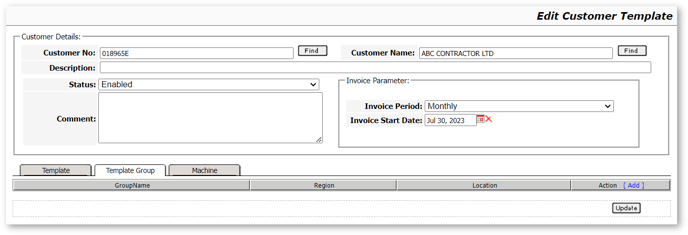
Click the [Add] button, enter a Group Name, Region, and Location, then click [Add] again.
Machine Tab
The Machine tab allows you to associate one or more serial numbers to a template group.
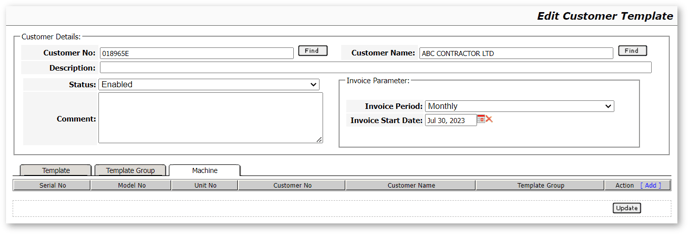
To add a new serial number to the list:
- Click [Add].
- Search for the serial number by Serial Number or Customer Number.
- Click the checkbox next to the serial number, then click [Select].
To set the Template Group:
- Click [Edit].
- Select the Template Group from the drop-down menu.
- Click [Update].
To delete a serial number from the Template Group:
- Click [Delete].
Generated Report
Once the template is completed, the next step is to create an actual report. A separate report is created for each billing period based on the parameters entered in the Template Definition page.
The reports are generated automatically once one or more of the associated serial numbers have the Month End SMU set (using the Update Machines Month End SMU link on the dashboard).
Clicking the Billing Support link to display the list of generated reports.
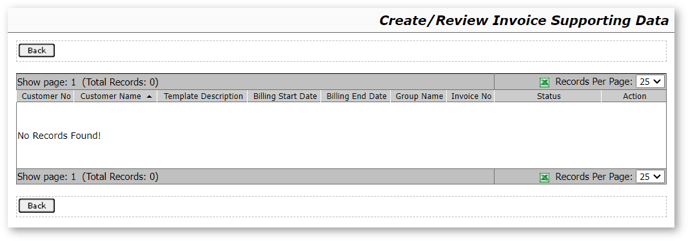
Click [Edit] to display the details of the generated report. Here you can enter the customer purchase order, work order, and invoice. Within each group you can click on the [Machine Link] button to view the machines that are linked to the group, or click [Machine Loaner] to enter loaner machines.
Manage Groups and Group Contacts
Groups can be associated with a particular piece of equipment for different reasons, such as issue notifications. See the Groups and Contacts section for more information.
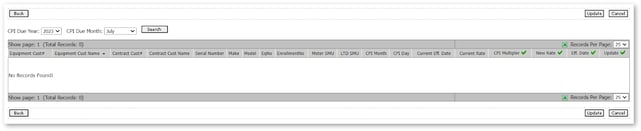
Manage Contract TM&R Rate
EMT has the ability to alert you when a contract is due for a yearly rate review. When and if the contract is due for yearly rate reviews are set up in the Contract Information Page.
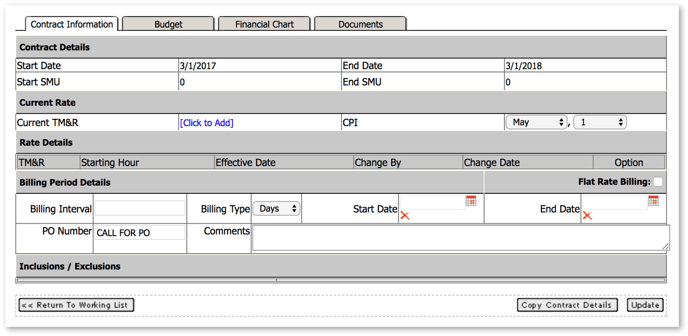
Once the month and day are set, EMT will alert the user on the dashboard when a contract is due for a rate review.
The Manage Contract TM&R Rate page allows you to either enter a percent increase or manually type in the exact new rate. You can also manage the new rate’s valid date range.

If the rate increase is the same for all the equipment shown:
- Click the green arrow in the CPI Multiplier header.
- Enter the percent increase. The same rate will be applied to all listed equipment.
If the effective date of the rate change is the same for all the equipment shown:
- Click the green arrow in the Eff. Date header.
- Enter the effective date. The effective date will then be set for all listed equipment.
You can select which specific rates to update by clicking the Update checkbox. To include all items:
- Click the green arrow in the Update header.
- The first time the green arrow is selected it will select all items. The second time the green arrow is selected it will deselect all items.
- Click [Update].
Manage Contract Billing Due
EMT has the ability to notify you when billing is due. There are two parts to this process:
- Billing Notification Setup
- Billing notification setup is done on the Contract Information page. Refer to the Contract Information section for more information.
- Enabling billing notification for the machine is set in the Machine Information page.

- Based on the billing parameters, EMT will notify you when billing is due for the equipment. You can set where on the dashboard you will be notified.

- Click on Manage Contract Billing Due to display the Manage Contract Billing Cycles page.
The Manage Contract Billing Cycles page:
- Displays all pending billings for the current month.
- The start and end date can be changed to display a broader range.
- Click the Show Historical Billing checkbox to display any billing notifications that have already been updated as well as any outstanding items.
- The attributes of the billing period are displayed within the grid.
- This information is managed in the Contract Information page.
- You have the option to enter a Work Order Number.
- Enter the date the billing was sent.
- This can be done manually or for all items by clicking on the green arrow in the header and entering in the billing date for all items.
- Update the billing item by clicking the Update checkbox, this can be done manually for each item or by clicking on the green arrow in the header.
- Click [Update] to save the data.
- Once the billing notification is saved, EMT will alert you when the next billing period occurs.
Manage Opportunities
Click Manage Opportunities to display the Opportunity Management page. Here you can view details of all opportunities.
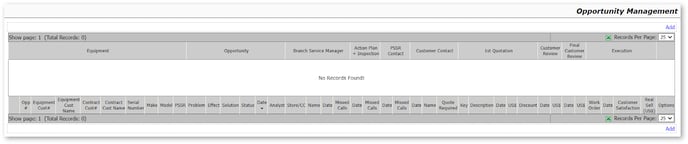
Click [Edit] to edit the details of an opportunity, or click [Delete] to delete an opportunity.
Add Opportunity
- Click [Add]. The Opportunity Detail Form will display.
- Click [Find Serial Number]. A popup window allows you to search for a customer or piece of equipment.
- Click the Select checkbox next to the customer or equipment you want to add an opportunity for, then click [Select]. The information for this customer or equipment will automatically be added to the form.
- Enter all other required information into the form. You can also attach Quote Document and PO Document files.
- Click [Submit] to create the opportunity, or [Submit and Close] to create the opportunity and close the Opportunity Detail Form window.
Modify Dashboard Filter
Modifying the dashboard filters relates to the branch that you would like to review. Select the box beside the branch filters that are to be applied to the numeric indicators on the Home page.

Click [Save]. The numbers on the dashboard will now only reflect the branches that are selected.
System Exceptions
Hover over the System Exceptions boxes to view what the number is indicating.
Machine Exceptions: Prevents system from successfully monitoring equipment. Machine Exceptions include:
- Equipment without Service Plan
- Serial Number is being monitored by EMT but the Service Plan has not been set up.
- Custom registration isn't CSC controlled
- A Custom subscription has been set up but the CSC Controlled flag has not been set.
- Last SMU Reading is less than Last PM Service SMU
- The current SMU reading of the equipment is less than the SMU reading of the latest service.
- Less than or equal to 5 services remaining
- Billing Cycle not configured correctly (not all the billing details entered)
- The serial number has been set to monitor billing due, but not all the billing parameters have been set on the Contract Information page.
- Service Events not set to the end of the contract (CEDTUG=2 By Hour)
- There are not enough events to go to the end of the contract. This is based on contracts that end by hours.
- Service Events not set to the end of the contract (CEDTUG=1 By Date)
- There are not enough events to go to the end of the contract. This is based on contracts that end by date.
- Service Events are created past the end of the contract (CEDTUG=2 By Hour)
- Service Events are created past the end of the contract (CEDTUG=1 By Date)
- Service Events not set to the end of the contract (CEDTUG=3 By Date or Hour)
- Service Events are created past the end of the contract (CEDTUG=3 By Date or Hour)
- Service SMU is Not Consistent with the Work Order SMU
- More than One Open CSA Contract
SMU Exceptions/Warnings: This number indicates equipment that has raised a flag during SMU retrieval from the Work Order System at the time of the work order closing.
Ownership Change/Ownership: If the contract owner or machine owner has changed in DBS it will appear in this list indicating that the information needs to be changed in EMT.
- On the Machine Information page, you have the ability to:
- Sync the owning customer in EMT with the owning customer from DBS.
- Sync the contract owning customer in EMT with the contract owning customer from DBS.
- If the serial number is a custom subscription the contract owning customer can be manually entered.
- A custom subscription is a serial number that does not have a CSA contract but EMT is still monitoring the equipment.
SMU Update

Valid SMU readings are important because EMT bases scheduling on the SMU readings. If the readings are not up to date then EMT will not be inaccurate when managing events.
This section and the SMU dropdown menu in the top navigation bar provide four links to the following functions.
Update Machines SMU
SMU from this page can be updated individually. To update an individual machine, use the search bar to locate the machine and enter the updated SMU reading in the New SMU Update box.
You can also update SMU readings by uploading an Excel file. Click [Choose File], select your file, then click [Upload].
Missed SMU Updates
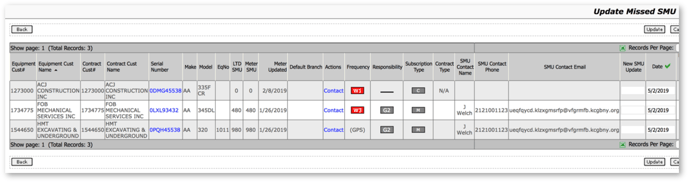
This list is populated two ways: when a reading has not been received through Product Link in 7 days, or based on the SMU Update Frequency on the Machine Information page an SMU reading has not been received.
If the equipment has a Product Link unit the SMU Update Frequency is disabled and the last date the unit has reported is displayed.
If the Product Link unit has not reported within 7 days you will have the ability to change the SMU Update Frequency. This is required if the unit is removed from the equipment and SMU will be done manually.
Update Machines “Month End” SMU
This displays a list of machines and their Life to Date (LTD) and Meter SMU readings that require a SMU reading for month end. To set the reading as the SMU for the month end, click the check box at the end of the row and then click [Update]. This will remove the machine from the list.
Month end SMU readings are used to calculate the monthly usage of the machine. This is useful if the dealer is using the Invoice Supporting reports.
Events Notification
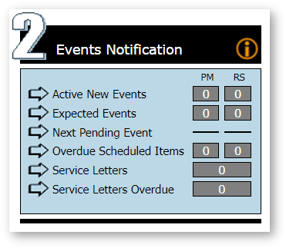
The Events Notification section displays events that have triggered a notification based on three types of services:
- PM (Preventative Maintenance)
- RS (Repair Service)
- SL (Service Letters)
The lists are populated based on the services indicated in the Machine Service tab of the Machine’s page. The triggers are based on the Event Trigger set in the Additional Information section of the Machine Information tab.
Active New Events
Active events are services that are indicated in the Machine Service tab with a target SMU or target date that is on or within the Event Trigger.
For example, if the event trigger is set to 31 days and the next service date for the machine is within the 31 days, then the machine will appear in this list.
Expected Events
Expected events are services that are scheduled in the near future and are based on the target SMU or target date and the event trigger. The list is based on a date range that is calculated by the Event Trigger and the Service Date. A machine will appear on the list if the service date is double the trigger date to the trigger plus one.
For example, if the trigger is set to 30 days, the machine will show up on the list from 60 (double the trigger) days to 31 (trigger plus one) days before the service is due. Once the service is marked as Complete, it will be removed from the list. If not completed, it will appear in the Active New Events list because it is less than the trigger.
Next Pending Event
This list is the next event for all machines and is not based on any triggers. No numbers will appear in the boxes because they do not apply to these reports.
Overdue Scheduled Items
This list provides you with four links:
- Serial Number: Opens the machine Information page.
- Follow-up: View any follow-up communication made by email.
- Action: Sends an email to the service department; when completed, the Follow-Up value will change to View.
- Appt Status: Opens a new window to the schedule from Service Scheduler.
If the service date or SMU target is passed in the Service Scheduler appointment over 7 days, it alerts EMT.
Service Letters
This list displays all open service letters in EMT. To schedule an open service letter, click the Schedule checkbox next to a service letter and then click [Schedule]. To cancel an open service letter, click the Cancel checkbox next to a service letter and then click [Cancel].
Service Letters Overdue
This list displays all service letters that have been open for more than 7 days without any action taken on them.
Review
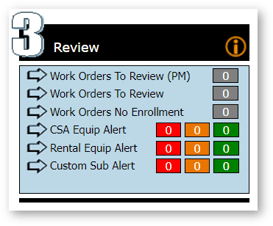
The Review section displays Work Orders, Product Link, and SOS™ notifications that require review. The boxes in gray indicate the number of work orders that require review.
The colored boxes indicate the number of machines that have sent a fault code or SOS™ exception based on three levels: Green (Level 1, notification), Yellow (Level 2, monitor situation) and Red (Level 3, immediate attention required).
Work Orders To Review (PM)
This list displays work orders that are CSC initiated. You can also access the Work Order details and the Machine Details from this page.
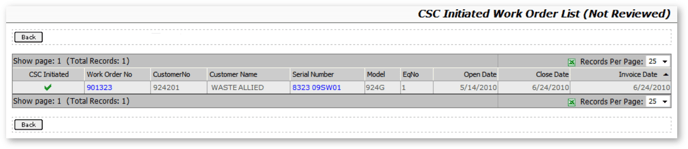
Select the Work Order number to review and approve all parts of the work order or just specific segments.
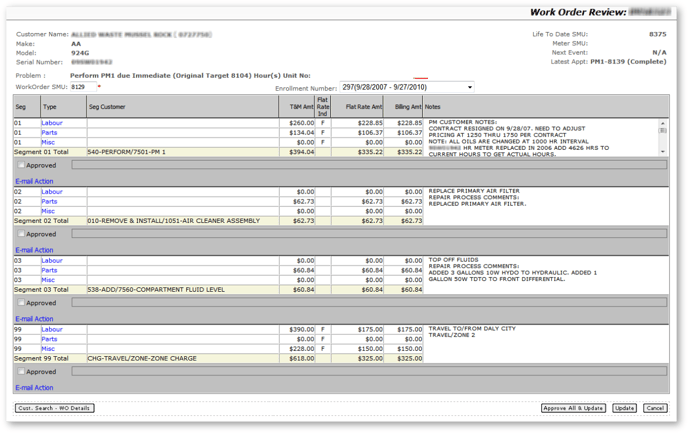
Each segment contains the following:
- Work Order SMU: The machine’s SMU on the day of the work order.
- Enrollment Number: CSA contract number based on date ranges, hours; set to expire but will still be listed.
- Seg: segment number
- Type:
- Labor: select to view more detailed information
- Parts: select to view more detailed information
- Misc.: select to view more detailed information
- Seg Customer: Customer that the segment belongs to; if blank then it belongs to the customer but may be assigned to dealership for warranty work.
- T&M Amt
- Flat Rate Ind: Flat rate indicator which will be F (flat rate) or blank (not flat rate).
- Flat Rate Amt
- Billing Amt
- Notes: Any notes entered by the tech.
- Segment Totals: Total amounts of the three types of billing.
- Approved box: Select this box to approve this segment.
- Email Action: Emails service people to say that the segment is not correct for a specified reason.
The following buttons that appear at the bottom of the page perform the following functions:
- [Cust. Search – WO Details] – Different view of the WO.
- [Approve All & Update] – Approve all of the segments and/or update SMU and enrollment number.
- [Update] – Update SMU and enrollment number.
- [Cancel] – Cancel any changes to SMU, enrollment number, or individual approved checkboxes; any segment(s) that has been approved previously will remain approved.
After the WO is approved it is removed from the Work Orders to Review list.
Work Orders to Review
After the calculator file has been imported it matches the work order job and component codes to the work order segments. If there is a direct match (job and component code) the whole row is highlighted yellow and is separated from the other by a red line. If only the job or component code match, it is not highlighted but still appears above the red line.
EMT does not use the data but the cost split is still a workable option for dealers to use.
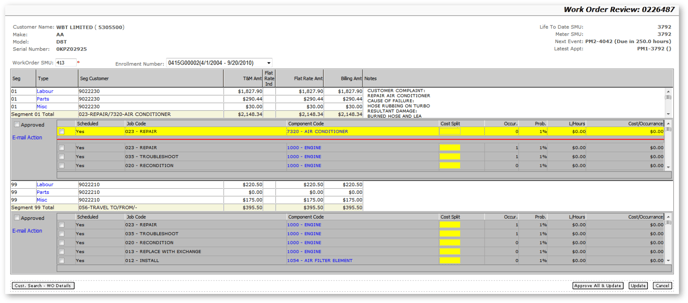
Cost split is taking a segment and matching it between multiple job component codes. To split a cost of a segment, check the box of the job and component code and enter the percentage in the cost split box.
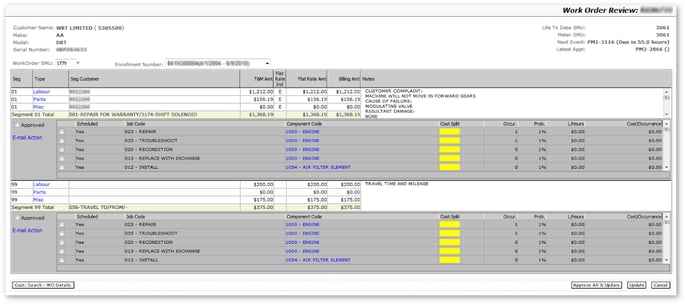
Clicking the Approved box and then clicking the [Update] button will approve the segments that have been selected. The approved segments will be removed and the outstanding segments will remain. If all segments are approved, click the [Approve All and Update] button.
Work Orders No Enrollment
This list displays the same work order information as the other work order lists, however the equipment here is not currently enrolled in a CSA contract.
CSA Equip Alert / Rental Equip Alert / Custom Sub Alert
If your dealership also uses the Condition Monitoring Portal, clicking on any of these links will automatically open the application in a new tab. See the Condition Monitoring user guide for more information.
Financials
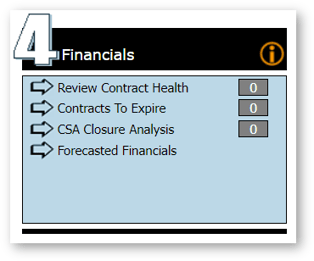
The Financials section displays alerts for current contracts, contracts that are about to close, and closed contracts. For active contracts, EMT also provides a report to forecast the end of contract variation.
Review Contract Health
This is a list of contracts that require review due to having a negative balance. This page can also display financial information at the individual serial number level.

Check the Review box and add comments, then click [Submit]. This removes the contract from this list and into the Equipment in Process list, where the contracts can be reviewed and marked as resolved.
Contracts to Expire
This is a color-coded list of contracts that are about to expire based on their Expires By column. Red means the contract has already expired, gray means it is close to expiring, and white means there is still time until the contract expires.
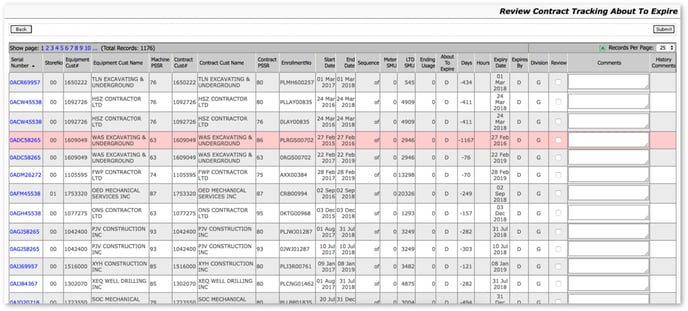
To remove the contract from the list, review the information (including the History Comments) and click the box in the Resolve column. After selecting all contracts that have been resolved, click [Submit].
CSA Closure Analysis
The purpose of this report is to show contracts that have closed but still have a balance. Based on this information the user can review the contract and request a closeout amount be applied to the contract.
Forecasted Financials
The forecasted financial report displays both the current financial health of the contract and the predicted health at the end of the contract.
The future revenue is calculated based on the remaining hours of the contract and the hourly usage rate. The future expense is calculated based on the remaining hours and contract budget data that was manually added to the Contract Information page or automatically created when the Calculator file was imported.
You also have the option to add comments and show that a reserve or closeout amount has been requested.
Analyze
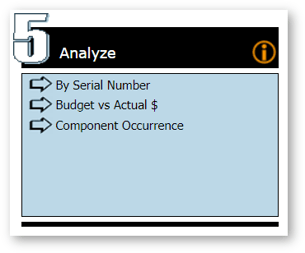
The Analyze section provides the dealer with visibility into the component financial and service occurrence budget vs actual values.
The financial related reports display the budgeted and actual values at both a summary and detailed level. The summary level of the reports looks at component ranges (1000 Engine, 2000 Hydraulics etc.). The Detail level of the reports looks at the individual component codes for the selected range (Turbo Cartridge Housing, Exhaust Manifold etc.).
The budget amounts are taken from the CAT Calculator files that are imported into EMT and the actual amounts are taken from work order segments.
By Serial Number
This report shows the budget and actual amounts associated with component ranges (Summary) or individual components (Detail).
The report allows you to search using a combination of:
- Serial Number
- Enrollment Number
- Model
- Customer Number
Click on the summary link to display the Work Order Review Page.
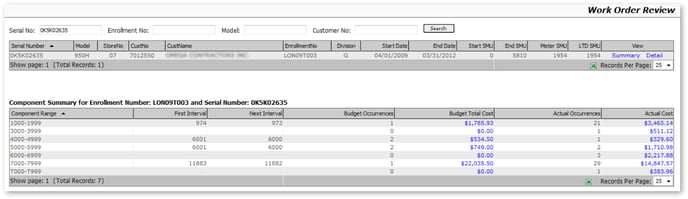
Field Definitions:
- Component Range: Grouping of Component codes.
- First Interval: The SMU when the first event occurred in this component range.
- Next Interval: The SMU when the next event occurred in this component range.
- Budget Occurrences: Based on the CAT Calculator file that was imported to EMT; how many events in this component range that were budgeted to occur.
- Budget Total Cost: Based on the contract amounts that were imported into EMT from CAT Calculator.
- Actual Occurrences: Based on work order segments; how many occurrences of this range of events occurred.
- Actual Cost: Based on work order segments; the total amount for this component range.
Click the [Detail] button to display the budget and actual values for individual components. From here you can click on [Budget Cost] or [Actual Cost] to view more detailed information.
Budget vs Actual $
The Budget vs Actual $ report is an extension of the By Serial Number report, displaying the same data but allowing the user to compare up to 5 serial numbers at the same time. This report has the same summary and detail view, displaying budget and actual amounts.
Use the Search fields at the top of the page to search by serial number, contract number, and contract status, then select up to 5 different serial number/enrollment number combinations. Click [OK].
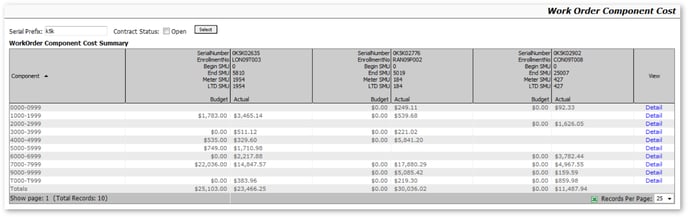
This portion of the report shows the comparison between budget and actual amounts for component ranges. Details relating to the serial number are displayed in the header of each serial number.
The budget information relates to the CAT Calculator data that is imported into EMT, and the actual information is related to the work order segments.
Click [Detail] to display the budget and actual amounts for individual components within the selected component range.
Component Occurrence
The Component Occurrence report is similar to the Budget vs Actual $ report, except instead of showing budget and actual amounts it displays the budget and actual occurrences of events related to component ranges or specific components.
Use the Search fields at the top of the page to search by serial number, contract number, and contract status, then select up to 5 different serial number/enrollment number combinations. Click [OK].
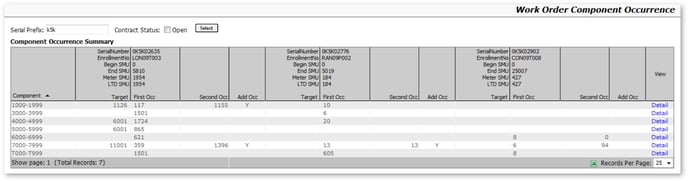
The Target column displays the first occurrence of an event in the component range for each serial number. This information is imported from CAT’s Calculator into EMT.
The First Occ. and Second Occ. columns display when the first and second occurrence occurred in this component range. This information is based on work order segments.
The Add Occ column displays when at least a third occurrence has occurred based on the work order segments.
Click [Detail] to display a list of the occurrences based on each individual component code.