
Introduction
Welcome to Customer Hierarchy. This application allows you to capture, access, and share customer information, which over time will build an information base that becomes a significant asset to managing large accounts.
Login to Customer Hierarchy
Log in to CloudLink with your Username and Password, then click the [ENTER] button under Customer Hierarchy. You will be taken to the Sales Summary page.
Navigation Bar
![]()
At the top of the screen is a navigation bar that can be accessed from anywhere in the application. Access the four major views and search for a customer using the Navigation Bar.
Search
For a basic search of customers by Account Name, Account Number, Company Name, and Company Number with the ability to filter by Hierarchy, click the search icon ![]() located in the Navigation Bar.
located in the Navigation Bar.

Company Information
View more detailed customer information including company structure. Customer Hierarchy allows the user to view customer information at a high level or a detailed level.
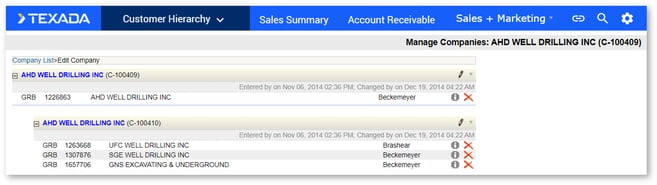
Company Structure
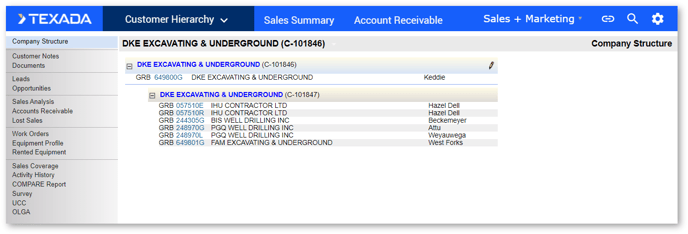
Companies can be organized in a hierarchical structure with other companies that fall under them. The lower level companies are Child Companies, while the higher level companies are called Parent Companies. View the structure of a company and the associated accounts with the Company Structure view.
Customer Notes
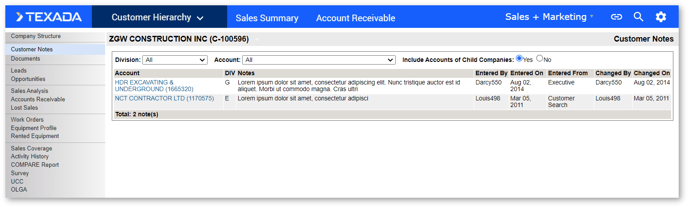
This section allows you and your colleagues to keep track of important information and ongoing discussions with the company.
Documents
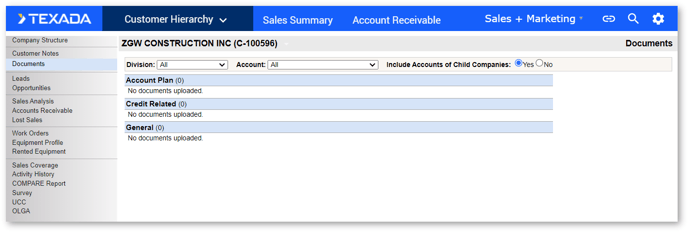
The section allows you to file store any documents pertinent to a company or group of customers. This can include anything from pricing structure, discount programs, satisfaction survey results, and more.
Sales Analysis
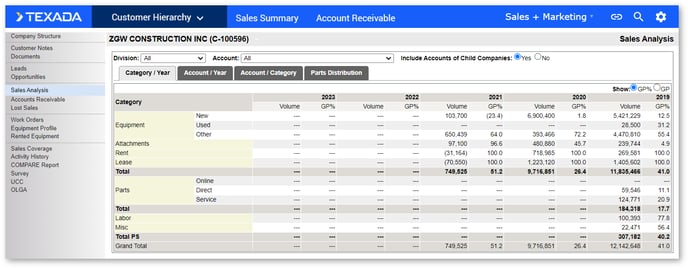
View a year over year history of revenue for the company with the Sales Analysis section. Drill down into a specific year to see revenue information in even greater detail.
Accounts Receivable
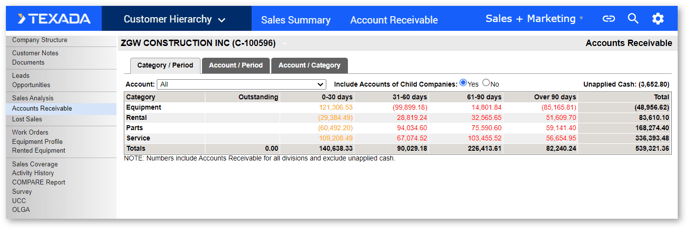
This section displays the current outstanding accounts receivable for the company. This view includes all divisions.
Equipment Profile
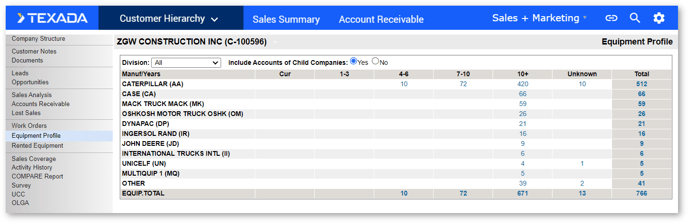
Each Company will have a view of their complete equipment list with all the details on each serial number. This view starts out with an aged view of equipment units categorized by the manufacturer. Each of these numbers represents the number of units in that category. Click into the numbers for more detailed information.
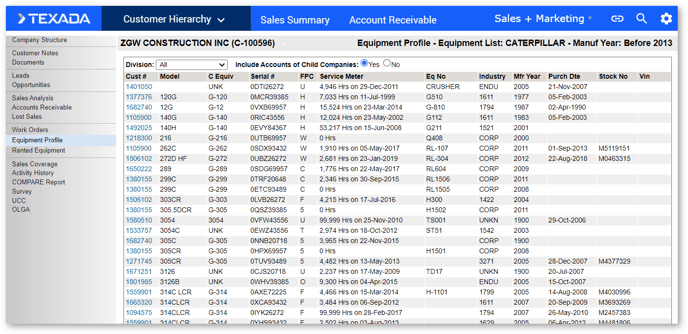
Click into the customer number on the left-hand column to view the account details in SalesLink.
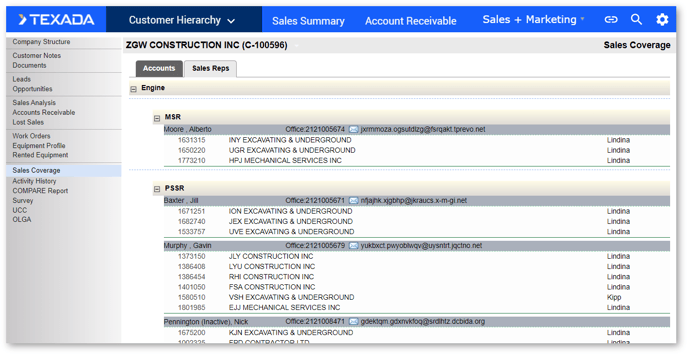
Sales Coverage
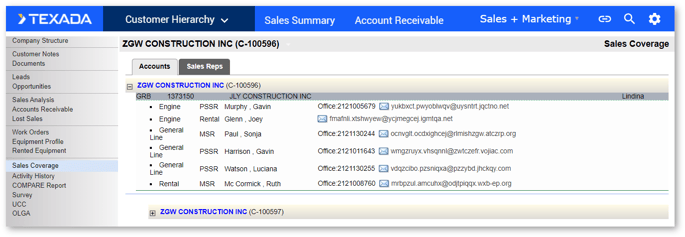
This view of the Company’s sales coverage model provides sales managers and executives with visibility into how the account is being managed. View by accounts to see the individual DBS accounts and the Sales Reps that are assigned to them, organized by division. Click into the Sales Reps tab to view the same data organized by Sales Rep.
Activity History
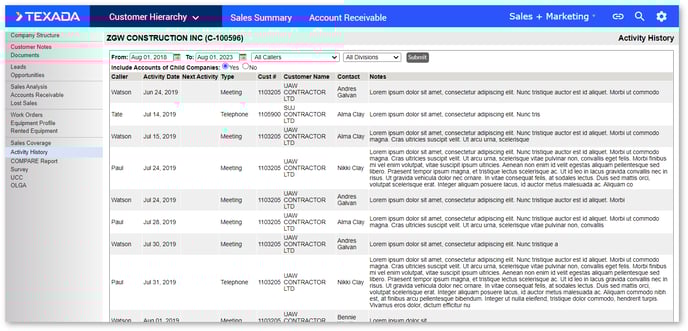
View details of the latest dealer contact with a customer in the Activity History section. This section displays reports on any of the accounts included in the customer structure.
Sales Summary
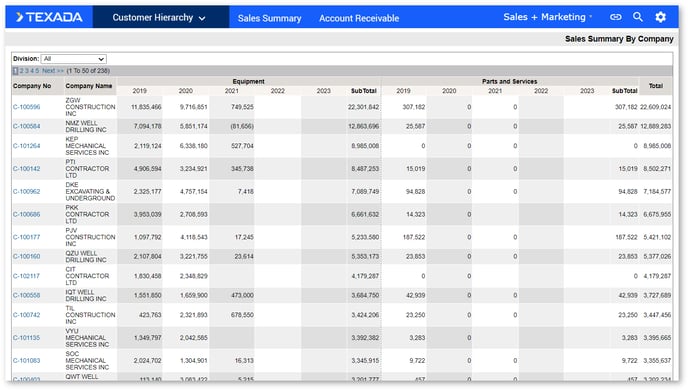
View the revenue details for all of the companies that are set up in Customer Hierarchy with the Sales Summary page. This page displays a five-year historical view for Equipment and rentals as well as Parts and Service. This allows you to easily view trends. To see a company’s details, click on the desired Company Number.
Click the drop-down menu at the upper left to filter for a specific group. Configure this dropdown in the admin menu under Manage Hierarchies.
Account Receivable
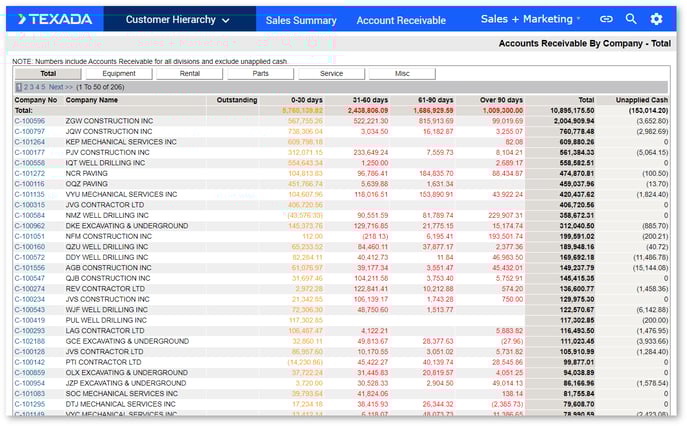
View accounts receivable information by company and filter by equipment, rentals, parts, service, and miscellaneous by clicking their respective buttons. The numbers include Accounts Receivable for all divisions and exclude unapplied cash.
Admin
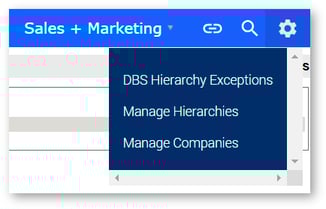
Click the gear icon ![]() in the top-right corner of the screen to open the admin menu. This menu provides access to a configurable set of Administrative tools including user, hierarchy, and customer management. This menu item is customized during your system implementation.
in the top-right corner of the screen to open the admin menu. This menu provides access to a configurable set of Administrative tools including user, hierarchy, and customer management. This menu item is customized during your system implementation.
User Management
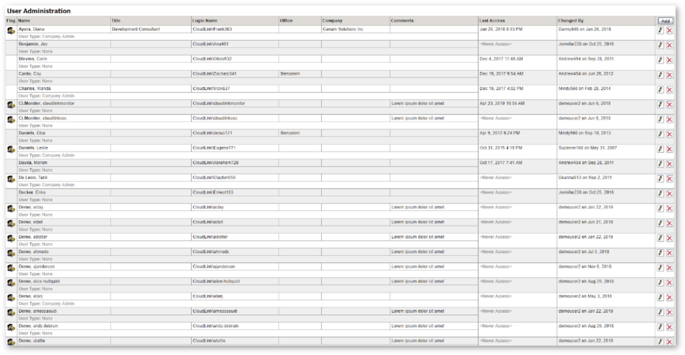
Manage user access and privileges in the application, without the need for Information Technology specialists to create new user IDs or user type allocation.
Each user of the Customer Hierarchy application is identified in a user table. The source of the information is an operating system feature called Active Directory. Active Directory is managed by your IT department for all systems and contains all corporate users along with their names and email addresses. To add a new user, they must first be set up in Active Directory.
Certain users may be designated as Company Administrators. These users have the authority to set up customers within the application. Users without that authority will have read-only access.
Add a New User from Active Directory:
- Click [Add] in the upper right-hand corner of the User Administration window.
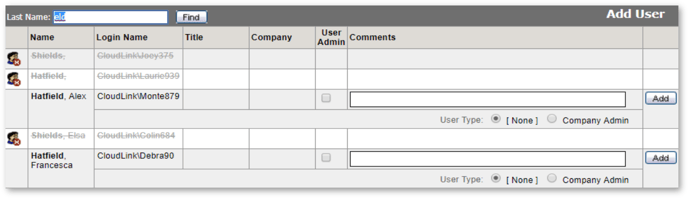
- In the Last Name search box, type at least three letters to begin the search and click [Find].
- Select the desired user type, select whether you would like for the user to be an admin, and enter any appropriate notes.
- Click [Add].
Editing and Deleting Users
Click the pencil icon ![]() to edit the user type, add a user as an admin, or to add a comment for that user. Click the red X icon
to edit the user type, add a user as an admin, or to add a comment for that user. Click the red X icon ![]() to remove a user.
to remove a user.
Company Management
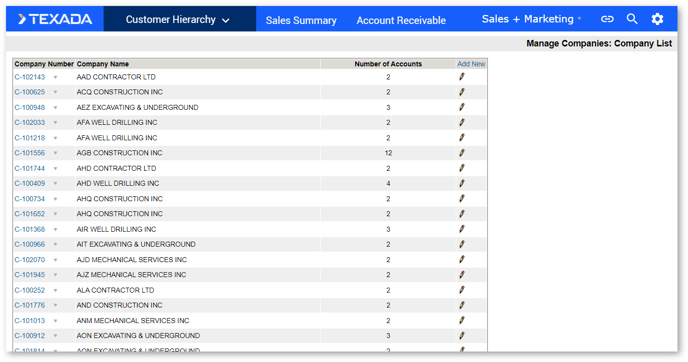
Add and edit Companies on the Manage Companies page. In the Admin menu, click Manage Companies.
Add a New Company
To add a new company:
- Click [Add New] in the Company List header row.
- Enter the name of the company in the dialog box that appears.
- Click [Add].
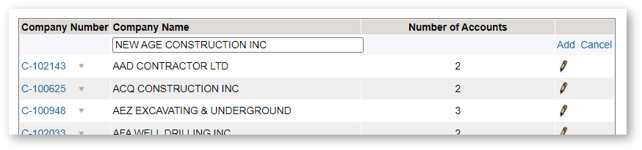
Once saved, the new company will appear in the company list.
Editing a Company
Users have the ability to edit the name of a company, manage company accounts, as well as add and manage child companies. Click the pencil icon to the right of the desired company. This will take you to the Edit Company page. From there click the pencil icon drop-down and select the desired editing action.
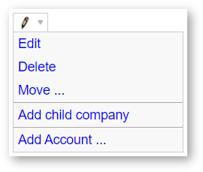
The following editing actions can be taken:
- Edit - allows you to edit the name of the company.
- Delete - allows you to remove the company.
- Move - allows you to relocate the company to another company hierarchy. Please note that the destination company number is required.
- Add Child Company - allows you to add a lower-level company under this company.
- Add Account - allows you to add company accounts by searching Customer Hierarchy as well as DBS accounts.
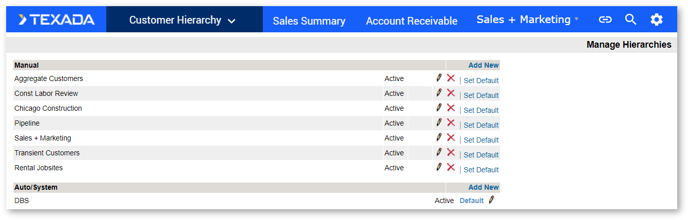
Managing Hierarchies
In the Admin menu, click Manage Hierarchies to add and edit the company groupings in the Customer Hierarchy drop-down at the top of the application. Click the pencil icon next to a hierarchy to set the Hierarchy as Active or Disabled, or set that Hierarchy as the default.
Links
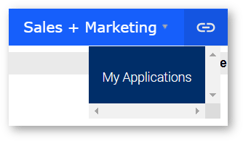
Links on the Navigation Bar ![]() allows a user to create customized quick links to other applications from within Customer Hierarchy. This menu item is customized during your system implementation, or later when you decide what links you would like to appear here. My Applications is listed by default and navigates you back to the CloudLink Application selection page.
allows a user to create customized quick links to other applications from within Customer Hierarchy. This menu item is customized during your system implementation, or later when you decide what links you would like to appear here. My Applications is listed by default and navigates you back to the CloudLink Application selection page.