
- Texada Knowledge Base
- Condition Monitoring Portal
- Administration
-
Top Searched Articles
-
Release Notes
-
Support & Troubleshooting
-
Onboarding Programs
-
Equipment CRM
-
Service Management
-
SRM
-
Handle
-
Analytics
-
E-Commerce
- Getting Started
- New Administration Panel
- Administration Panel
- Administration Panel - CMS
- Administration Panel - Products, Categories, and Attributes
- Administration Panel - Users
- Administration Panel - Requests
- Customer Access Portal
- Customer Access Portal - Rentals
- Customer Access Portal - Invoices
- eCommerce Websites
- eCommerce Websites - Ordering
- Integrations
-
Texada Mobile
-
Payments
-
Texada Web
-
Rental Asset Management
-
Order Fulfillment
-
Power Systems Projects
-
Equipment Quoting
-
Condition Monitoring Portal
-
Equipment Monitoring Toolkit
-
Parts and Service Quoting
-
Service Agreement Quoting
-
Equipment CRM - Additional Tools
User Management (Condition Monitoring Portal)
How to manage user permissions in the Texada Condition Monitoring Portal.
User Management
To access the User Management screen, click the Admin button at the top of any page in the Condition Monitoring Portal.

A list of users will display. Begin typing into the search box in the top-right corner of the screen to filter the list of users by User Name.
Once you have located the user you would like to edit, click the edit button to the right of their row to open the User Admin window.
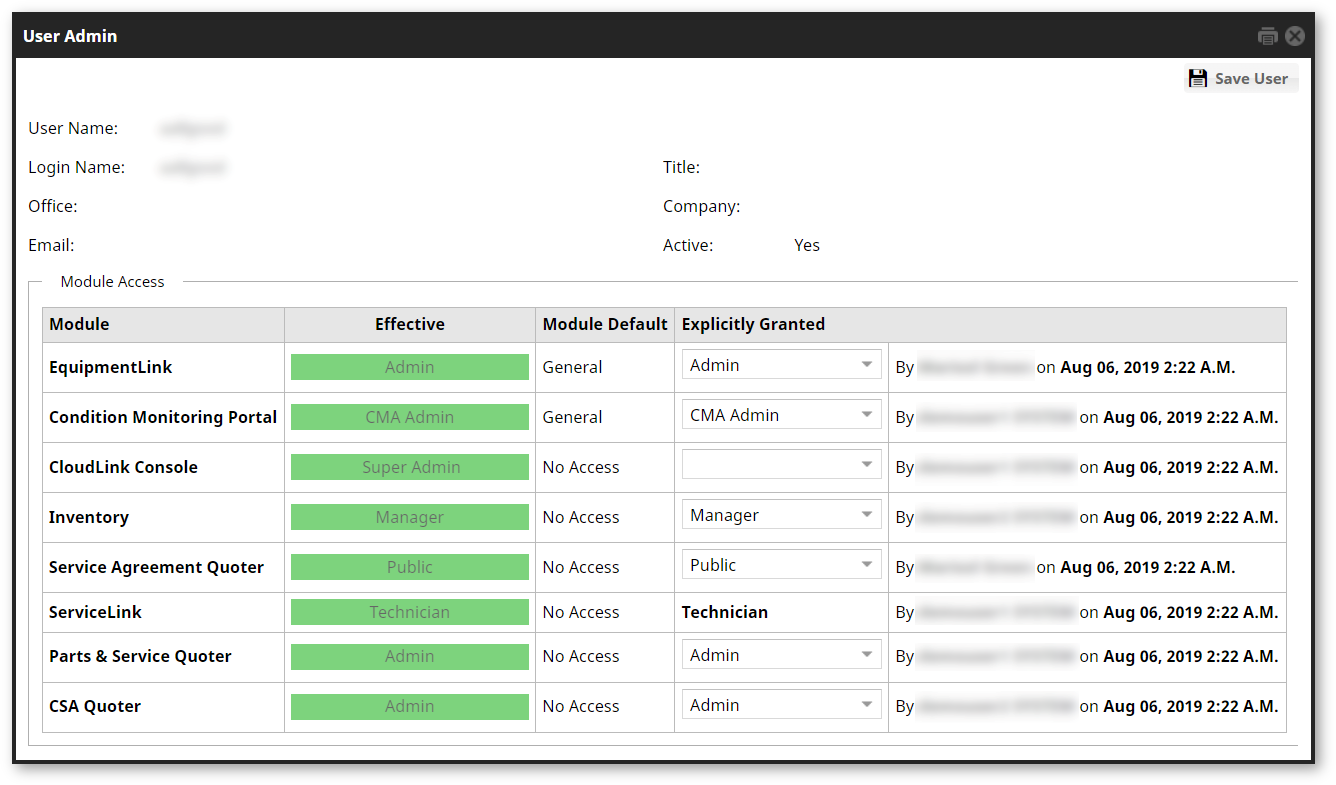
Locate the Explicitly Granted column. Click on the dropdown to reveal the options of access for a user. Note that these can differ from application to application.

Once the desired selection is made, click on the Save User button in the upper right-hand corner.