Quick Reference
- In order to provide the ability to electronically sign documents with iQuote, you will need to configure DocuSign, a third-party electronic signature provider, to communicate with iQuote.
- To configure DocuSign to communicate with iQuote:
- Create a DocuSign developer account at go.docusign.com/o/sandbox. Use a generic email address such as docusign@abcequipment.com, as all emails sent via iQuote will use this address.
- Activate your DocuSign account via email.
- Log in to DocuSign at account-d.docusign.com.
- Navigate to Settings → Apps and Keys.
- Click the “ADD APP AND INTEGRATION KEY” button.
- Enter the name “iQuote” for your application and click “CREATE APP”.
- On the edit screen for your application:
- Select “No” for “Is your application able to securely store a client secret?”
- Click the “ADD URI” button, then input the following redirect URI: “https://www.docusign.com/api”.
- Click the “GENERATE RSA” button, then copy the generated Public Key and Private Key to a safe location.
- Click “Save” to save your changes, then, back on the Apps and Keys page, copy the “Integration Key” value displayed next to the name of the app you just created.
- To consent to iQuote using your DocuSign API Integration Key:
- Navigate to one of the following URLs, after replacing “KEY” with the Integration Key value you copied above:
- Sandbox:
https://account-d.docusign.com/oauth/auth?response_type=token&scope=signature%20impersonation&client_id=KEY&redirect_uri=https://www.docusign.com/api - Production:
https://account.docusign.com/oauth/auth?response_type=token&scope=signature%20impersonation&client_id=KEY&redirect_uri=https://www.docusign.com/api
- Sandbox:
- Navigate to one of the following URLs, after replacing “KEY” with the Integration Key value you copied above:
- Once you have successfully made 20 API calls with your integration key, you can convert it from a Demo key to a Live key. To do this:
- Log in to DocuSign and navigate to Settings → Apps and Keys.
- Click “ACTIONS” next to your integration key, then select “Start Go-Live review”.
- If your key meets the requirements to go live, you will be presented with the option of converting it to a Live key.
Introduction
In order to provide the ability to electronically sign documents, Texada iQuote integrates with DocuSign, a third-party electronic signature provider. The following guide will walk you through the process of creating API credentials in DocuSign so your customers can electronically sign agreements sent from iQuote.
Configure DocuSign
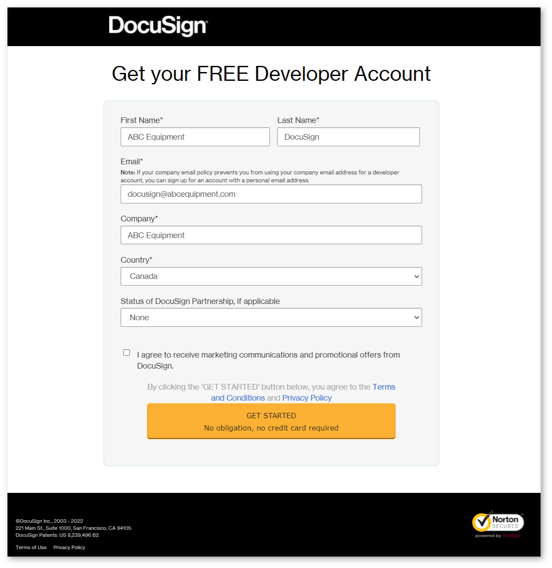
- Open your web browser and navigate to go.docusign.com/o/sandbox, then fill out the application form to create a free DocuSign developer account.
All of the documents sent from iQuote to the customer for signing will use the email address entered on this form as the sender. For this reason, Texada recommends creating a DocuSign-specific email address (such as docusign@abcequipment.com) for the purposes of registering your DocuSign account.
Once you are finished, click “GET STARTED” to create your account.
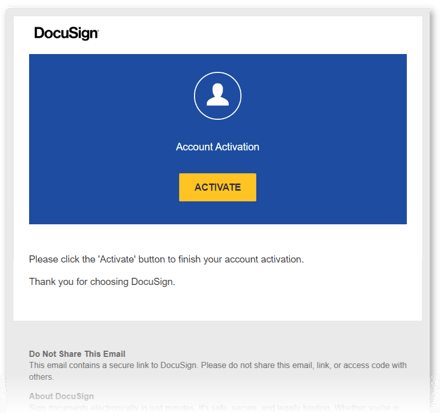
- Soon after creating your DocuSign developer account, you will receive an account activation email from dse_demo@docusign.net to the email address you used to register. Open this email and click the “ACTIVATE” button to create a password and finalize your account.
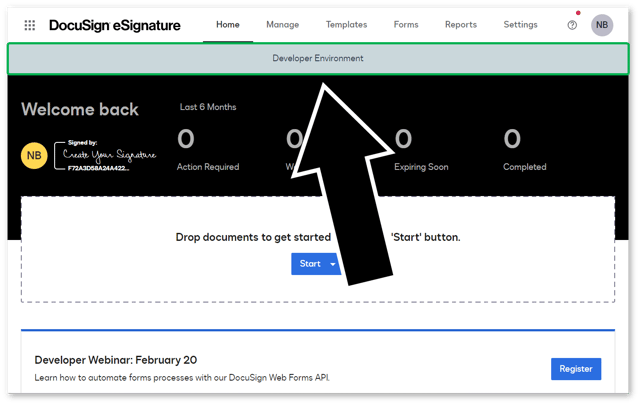
- Open your web browser and navigate to account-d.docusign.com. This is the login page for the developer environment of DocuSign.
Make sure you do not use the standard login page located at account.docusign.com, as this will log you in to the incorrect environment.
Login using the email address and password you established in steps 1 and 2.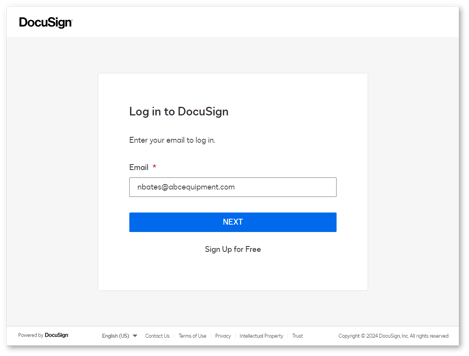
- Once you have logged in, you will be redirected to the DocuSign home page. Confirm that you have logged in to the developer environment by looking for the gray “Developer Environment” banner near the top of the screen.
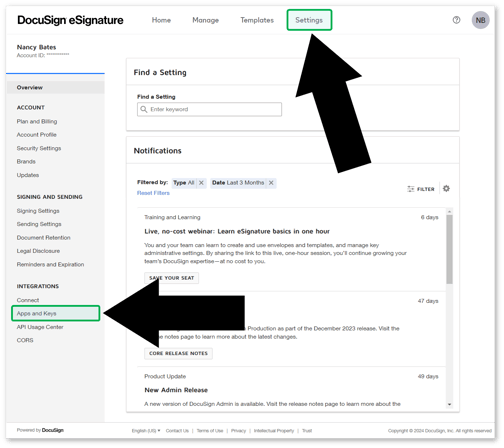
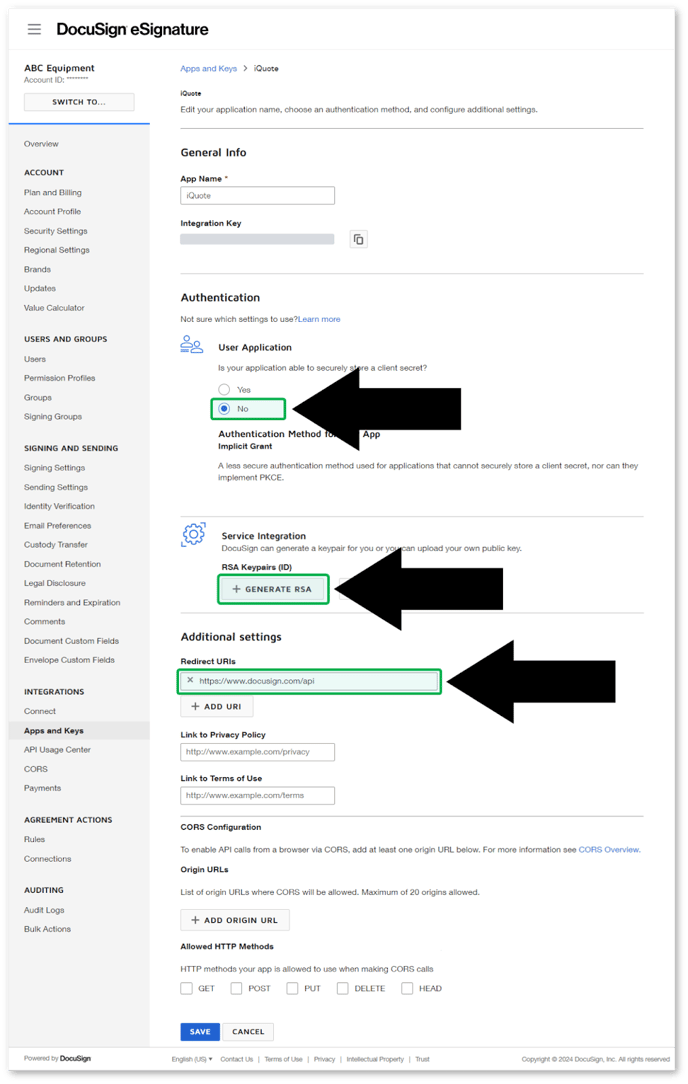
- Select “Settings” in the top menu bar, then select “Apps and Keys” in the left navigation menu to open the Apps and Keys page.
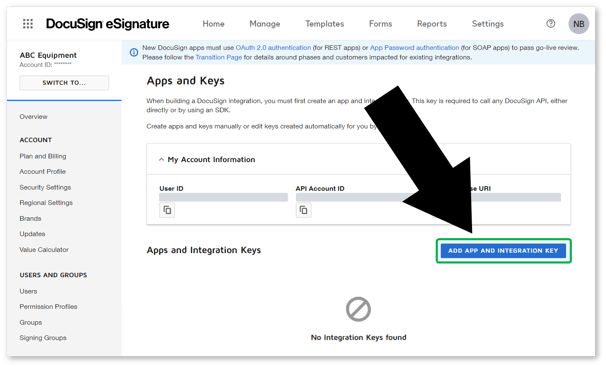
- On the Apps and Keys page, scroll down to the Apps and Integration Keys section and click the “ADD APP AND INTEGRATION KEY” button.
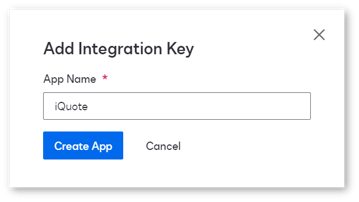
- Enter the name “iQuote” for your application and click “CREATE APP”. This will take you to the edit page for your new app.
- Make the following changes on the edit page for your app:
- Under the User Application section, select “No” for “Is your application able to securely store a client secret?”
- Under the Redirect URIs section, click the “ADD URI” button to add a new redirect URI, then input the following URI: “https://www.docusign.com/api”.
- Under the Service Integration section, click the “GENERATE RSA” button to open the RSA Keypair window, then proceed to step 7.
- In the RSA Keypair window, use the copy buttons
 to the right of the Public Key and Private Key to copy each key and paste them to an external document. Do not use ctrl+C to copy the keys, as it is easy to accidentally miss characters using this method.
Save both keys to a safe location, as they will not be displayed again. Once you are finished, click "CLOSE” to return to the edit page.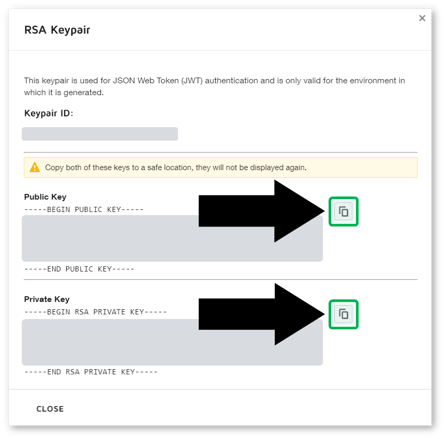
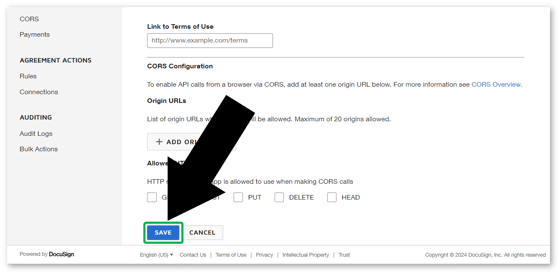
- Scroll down to the bottom of the edit page for your app and click the “SAVE” button. This will save your changes to the current app and return you to the Apps and Keys page.
- Back on the Apps and Keys page, copy the “Integration Key” value displayed next to the name of the app you just created. You will need this key to complete the “Consent to iQuote” process described below.
Consent to iQuote
Each organization needs to give its consent for iQuote to use its DocuSign API Integration Key.
To do this, copy the below web address and replace “KEY” with the Integration Key you saved in step 9 above. Paste the completed address into your web browser and press Enter. You will be redirected to a webpage confirming that you have successfully provided consent.
Sandbox:
https://account-d.docusign.com/oauth/auth?response_type=token&scope=signature%20impersonation&client_id=KEY&redirect_uri=https://www.docusign.com/apiProduction:
https://account.docusign.com/oauth/auth?response_type=token&scope=signature%20impersonation&client_id=KEY&redirect_uri=https://www.docusign.com/api
Convert Demo Integration Key to Live
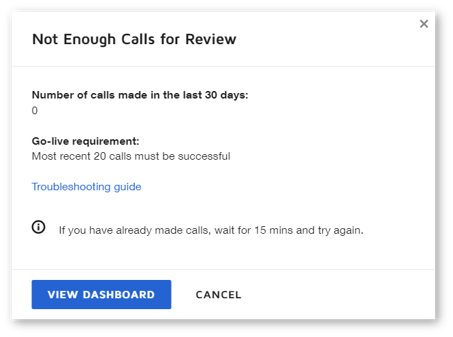
When your Integration Key is first created, it will be in Demo status. Once you have successfully used the key to make 20 API calls, you will have the option of converting it to Live status. To do this:
- Log in to DocuSign at account-d.docusign.com.
- Select “Settings” in the top menu bar, then select “Apps and Keys” in the left navigation menu to open the Apps and Keys page.
- On the Apps and Keys page, look under Apps and Integration Keys for the app whose integration key you want to convert. Click the “ACTIONS” menu to the right of the integration key, then select “Start Go-Live review”.

- A window will open informing you of whether or not your integration key meets the requirements to go Live. In order to go Live, your most recent 20 API calls using that key must have been successful. If your key meets the go-live requirements, you will be presented with the option of converting it to a Live key. Otherwise, you can click the “VIEW DASHBOARD” button to review your API call history.