.png?width=365&height=50&name=Texada%20Logo%20(Black).png)
Overview
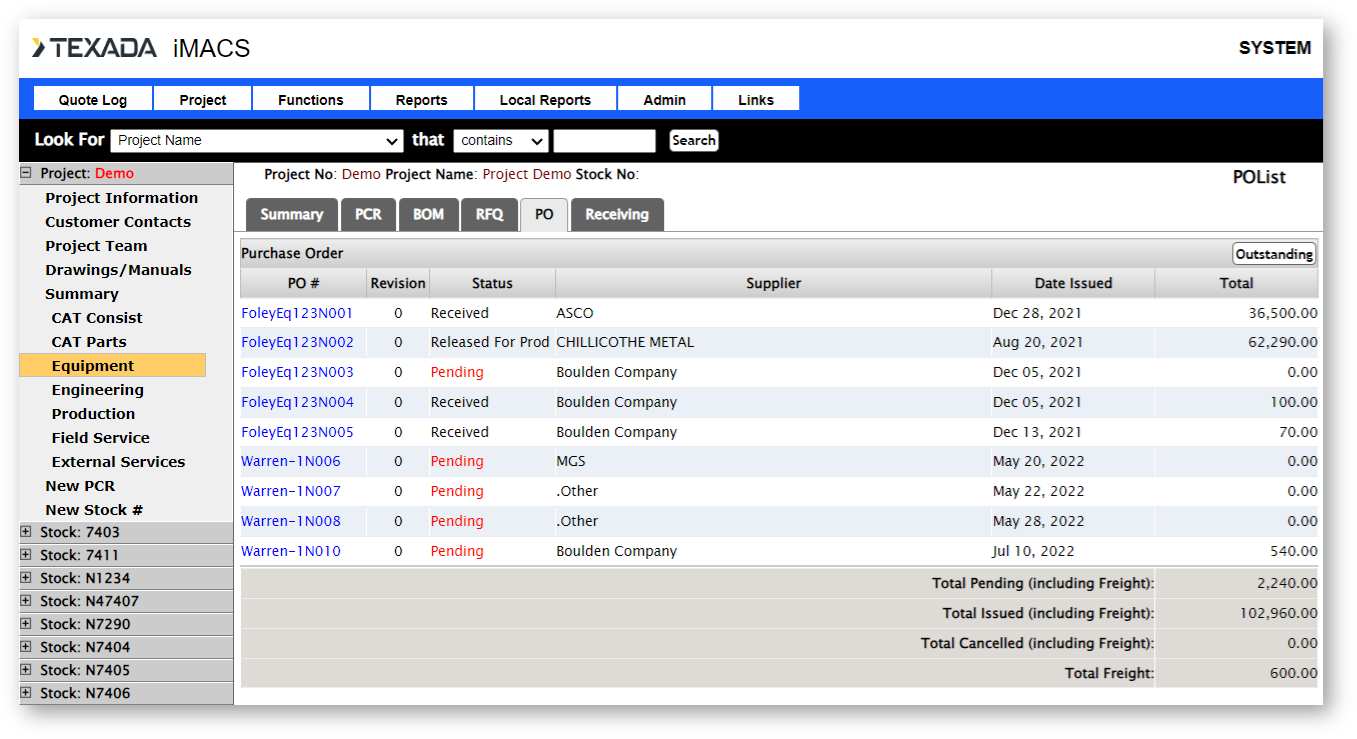
Purchase Order functions are available for the CAT Parts, Equipment, and External Services classes on both the project and stock level. The PO tab defaults to a list of existing purchase orders. Click on the PO number to view or edit the PO.
Outstanding Items
A Purchase Order can be created if there are outstanding items. Outstanding items are items that have been released, but not purchased. Viewing outstanding items on a project class level will show all outstanding items for stock numbers owned by your company. To view outstanding items, click the Outstanding button in the top right corner.
To create a RFQ for any outstanding item, click New RFQ.
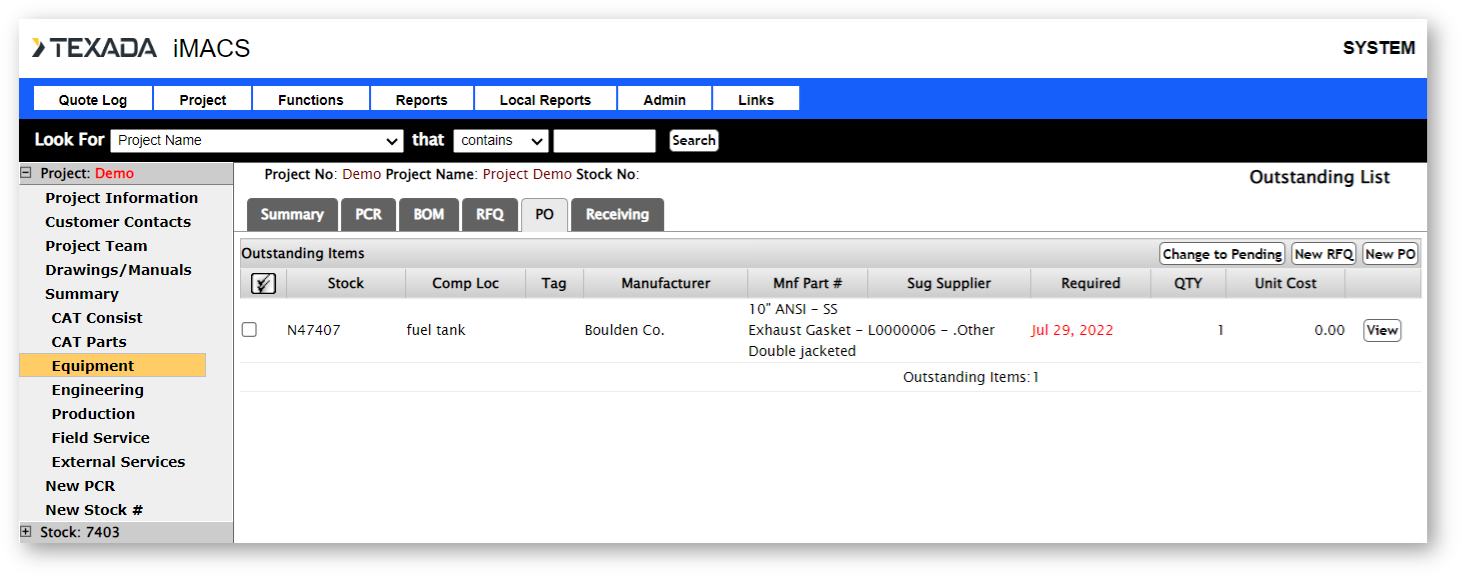
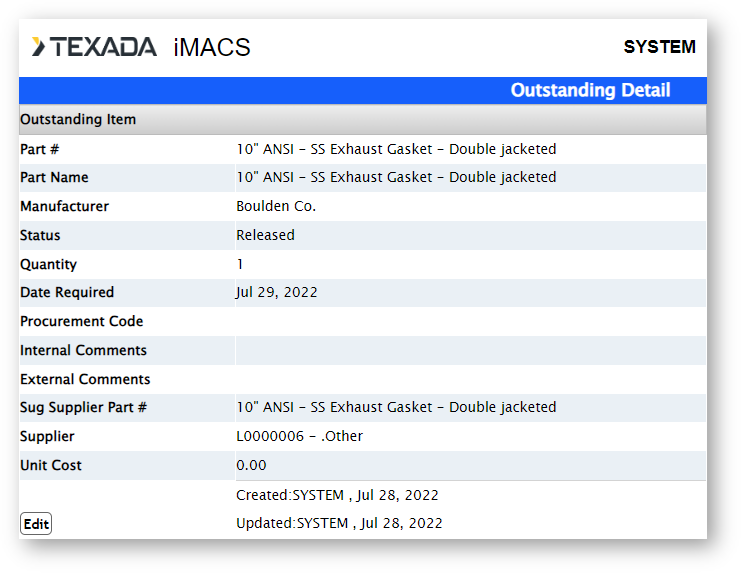
To view the details of an item, click the View button. The Status of the item can be changed from Released back to Pending, which will allow the details of the item to be edited. After the information has been updated, the item will have to be Released again.
Creating a Purchase Order
To create a PO, click the New PO button from the Outstanding Items screen. The supplier drop down box will list all the suppliers that the outstanding parts are available from. After you choose a supplier from the list, the outstanding parts will be listed at the bottom of the screen. If you are on project class level, it will list all outstanding items for stock numbers owned by your company, so you can create one purchase order for multiple stock numbers. Click the Search button, and the contacts for the chosen supplier will be displayed. Click the Add button next to the contact you want to send the PO to. Check off each outstanding item that you want included on the PO. Click the Save button after all the information has been entered.
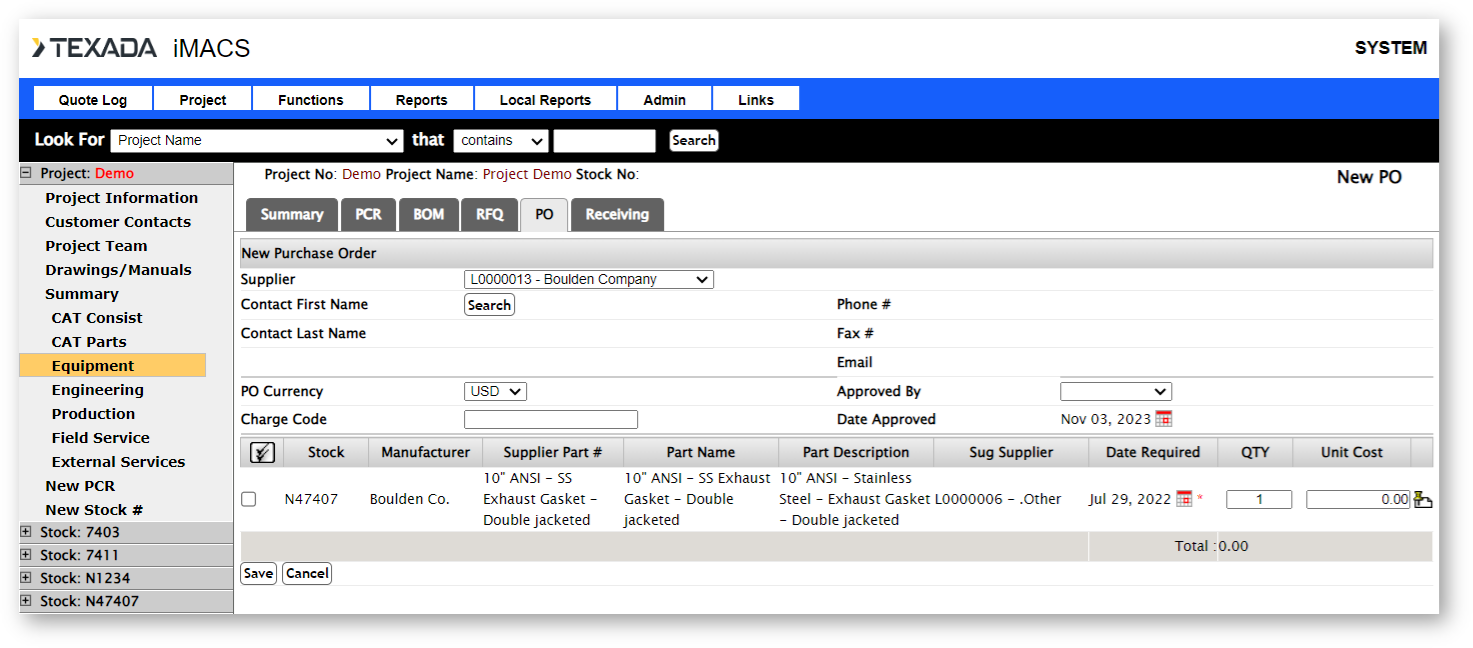
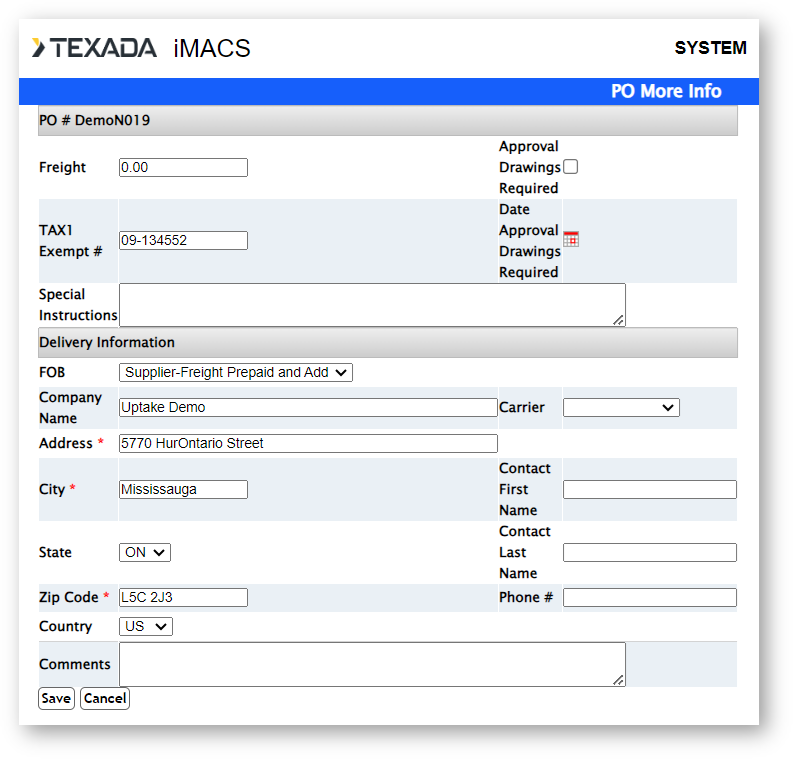
After the information has been saved, a PO number will be generated. A window will open where you can enter any delivery information.
Editing a Purchase Order
To edit the header information of a PO, click the Edit button. Click Save after all the information has been updated. To add a part to the PO, click the Add button. The window will show all outstanding parts that are available from this supplier. If you are on a project class level, it will show all outstanding items for stock numbers owned by your company. Click Add next to the part to add to the PO. The quantity and unit cost can be updated for each part. Click Save after the information is updated. The delivery information can be viewed or edited by clicking the “More” button in the top right corner.
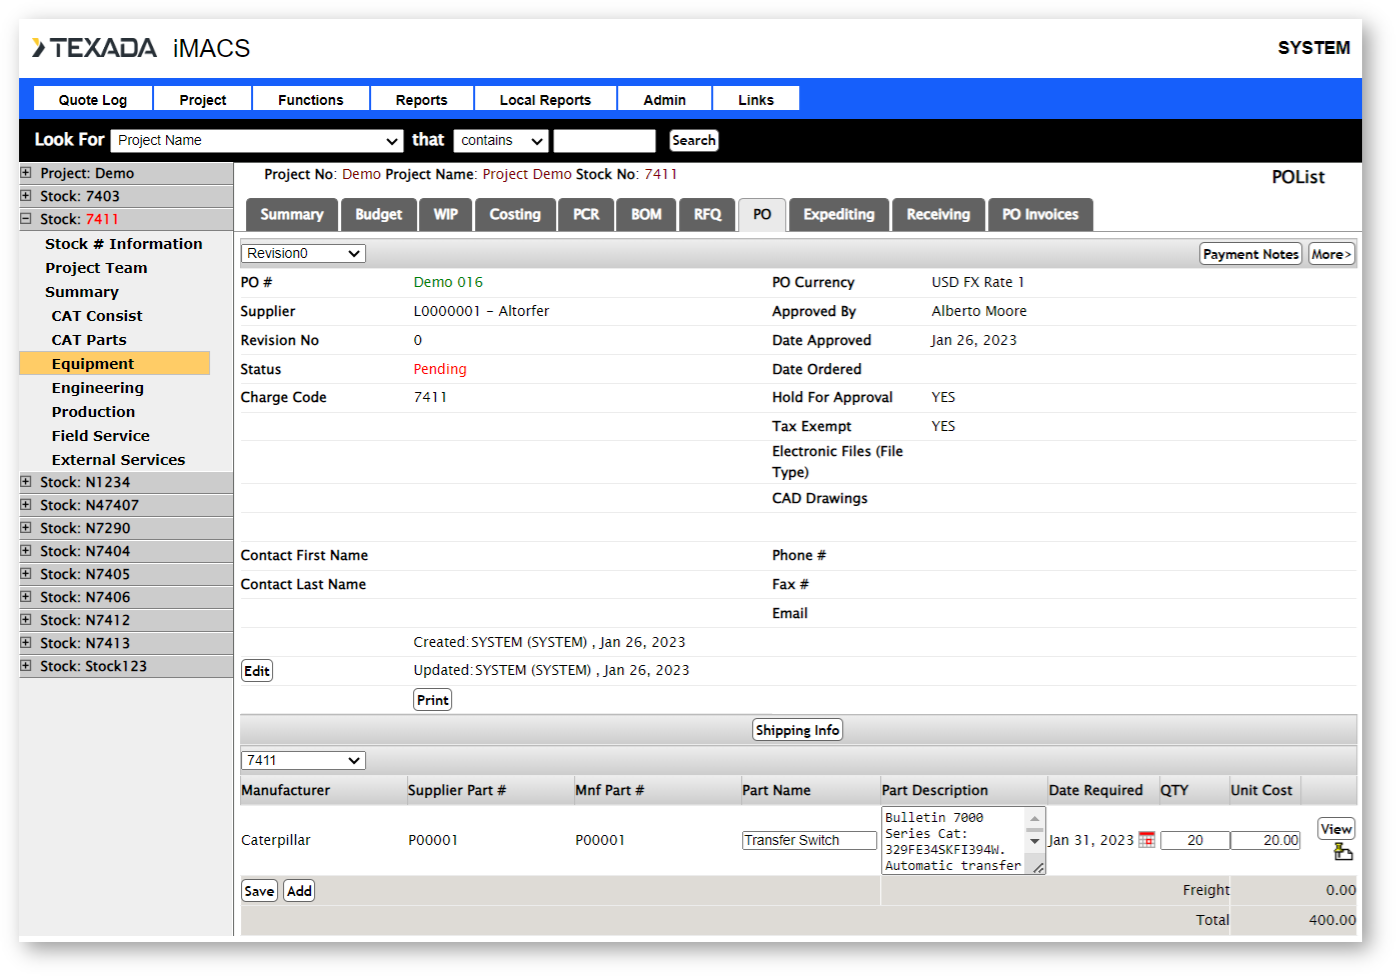
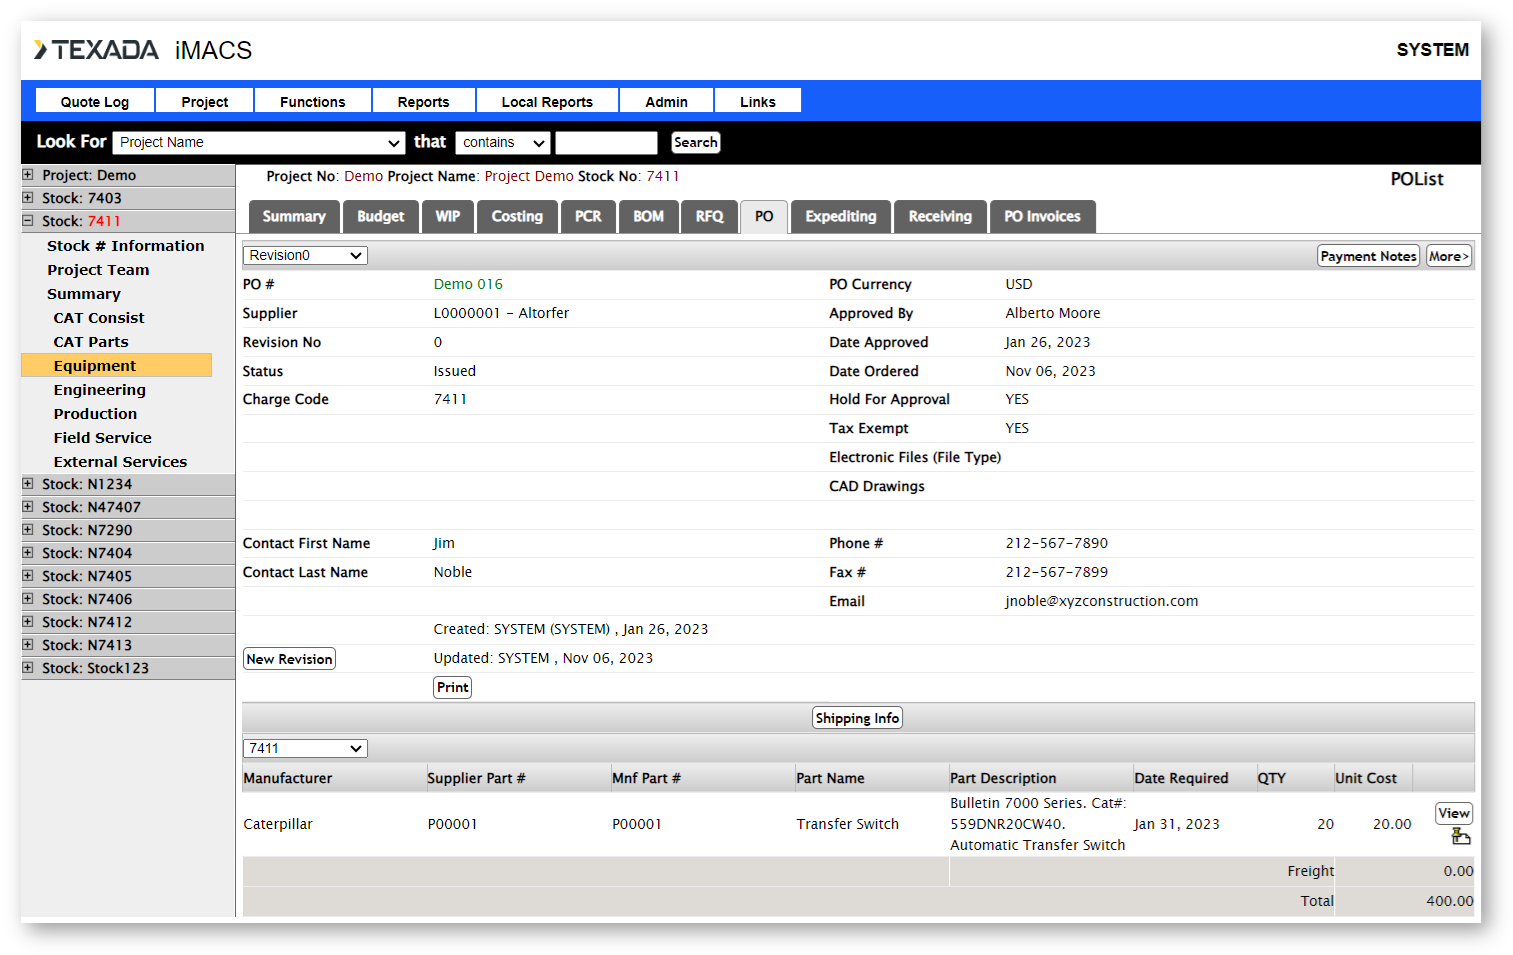
After the status has been changed to Issued, no changes can be made to the PO. Click the New Revision button to create the next revision, which will allow you to make changes to the PO. A drop down box in the top left corner shows you what revision you are currently looking at. You can view previous revisions of the PO by choosing the revision number. Only the current revision of the PO can be edited.
Printing a Purchase Order
The PO can only be printed when the status of the current revision is Issued. Click the Print button to view and print the PO.