.png?width=365&height=50&name=Texada%20Logo%20(Black).png)
Product Barcode Labels can either be printed on demand via Inventory Control, or at time of Warehouse Receiving.
In System Maintenance -> Configure System Settings -> System -> Company & Divisions -> Company Parameters, uncheck the box forUse Zebra Barcode Printers. This will enable you to generate PDF labels that can be printed on a variety of label printers.
Reprint Barcode Labels
To print barcode labels go to Inventory Control -> Reports -> Zebra Barcode Labels.
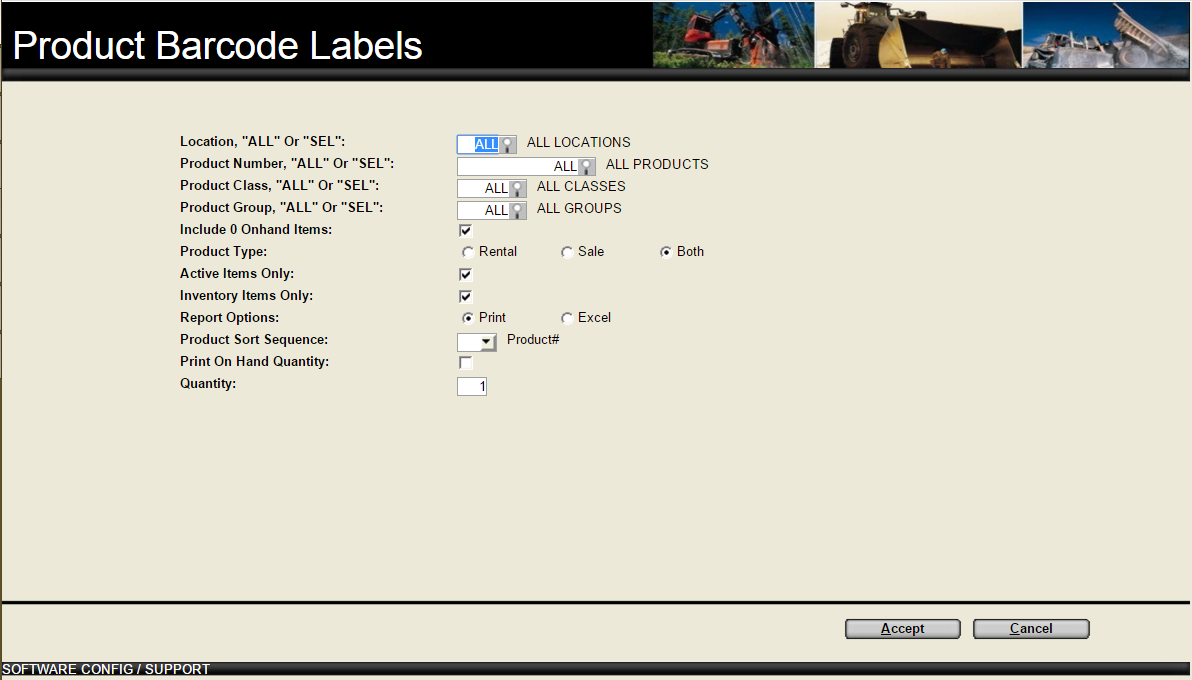
Figure 1: Product Barcode Labels Main Screen
You can select the products to print by Location, by Product Number, by Group, or By Class, or by a combination of those criteria.
Once you have selected what products you would like to print, you can specify a print quantity by entering it into the last field. Alternatively you can have the system pre-populate the quantity to print per product based on the quantity on hand for that location.
To generate a list of labels to print along with the quantity of each label, click on Accept.
.png)
Figure 2: Product Barcodes to Print
You can overwrite the quantity per product, and then Accept to proceed to generating the label, or cancel the process.
Clicking Accept will generate a PDF file for all of the labels you have selected to print. Open and print the labels with a PDF viewer such as Adobe Acrobat Reader.
Automatically Generate Product Barcode Labels at Warehouse Receiving
To enable this feature there are a couple steps that will need to be completed first.
First go to Utilities -> Inventory Control -> Write Product # Into Barcode and select Rental, Sale, or Both and click Accept.
.png)
Figure 3: Write Product # into Barcode Utility
Then you will need to go to System Maintenance -> Configure System Settings -> System -> Company & Divisions -> Company Parameters -> Inventory Parameters. Ensure the following options are set to either Sales, Rental or Both:
- Add Barcode Matching Product # Automatically
- Print Barcodes in Warehouse Receiving by PO #
.png)
Figure 4: Inventory Control Barcode Settings
When you have completed the warehouse receiving process, select Yes to print, and the system will generate the warehouse receipt as well as bring up the barcode label printing dialogue.