
Quick Reference
- A Contract is a binding document between a rental company and their Customer, containing details of a rental or sale.
- New Contracts can be created in Texada Web and Texada SRM in a number of ways, including converting a Reservation, Quote, or Counter Worksheet into a Contract, or creating a new Contract manually.
- To manually create a new Contract in Texada Web:
- Navigate to Contracts → Create Contract in the left side menu.
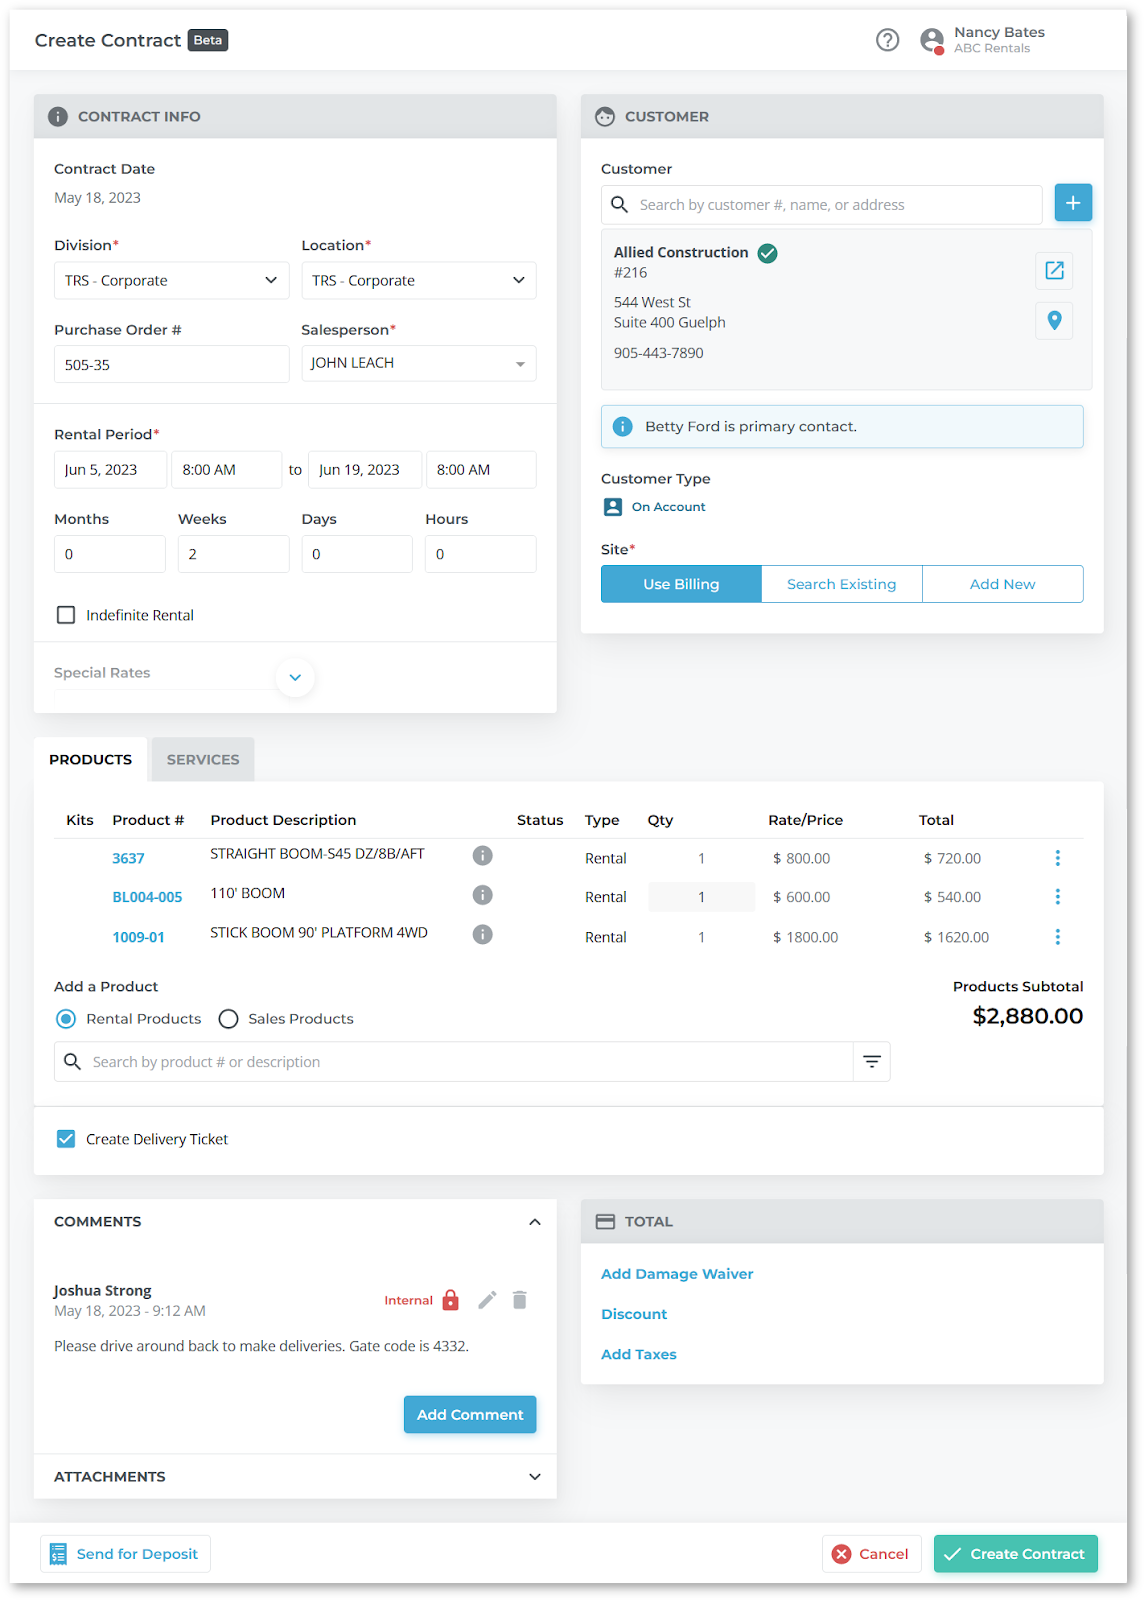
- Enter all relevant information for the Contract, including Customer, Site, Product, Service, and financial information.
- Click “Create Contract” to save the new Contract, or click “Send for Deposit” to both save the new Contract and email your Customer with a request for a deposit.
Introduction
A Contract is a binding document between a rental company and their Customer, containing details of a rental or sale. Most rentals and sales processed using Texada software will have an associated Contract.
There are a number of ways to create a new Contract in Texada Web and Texada SRM, including:
- Converting a Reservation into a Contract.
- Converting a Quote request into a Contract.
- Converting a Counter Worksheet into a Contract.
- Manually creating a Contract in Texada Web or Texada SRM.
The following article will detail the process of manually creating a new Contract in Texada Web.
Create a Contract
To create a new Contract in Texada Web, follow the steps below.
- Initialization
Log in to Texada Web and navigate to Contracts → Create Contract in the left side menu. - Enter Contract Information
On the Create Contract screen, fill out all the information for the new Contract, including at minimum:- A Division and Location.
- The Salesperson responsible for securing the Contract.
- The Contract’s Rental Period.
- A Customer and Customer Site.
- At least one Product (Rental or Sale).
- Create Contract
Once you have entered all relevant information for the Contract, click the “Create Contract” button to save the Contract, or the “Send for Deposit” button to both save the Contract and email a copy of it to your Customer with a request for a deposit.
Once you have created the new Contract, it can be viewed via the Contract List page in Texada Web.
For a detailed breakdown of the contents of the Create Contract page, see “The Create / Edit Contract Page.