
- Texada Knowledge Base
- Rental: SRM
- Inventory Control
-
Release Notes
-
Texada Academy
-
Rental: SRM
-
Rental: Texada Web
-
Rental: Texada Mobile
-
Rental: GateWay
- Getting Started
- Administration Panel
- Administration Panel - CMS
- Administration Panel - Products, Categories, and Attributes
- Administration Panel - Users
- Administration Panel - Requests
- Customer Access Portal
- Customer Access Portal - Rentals
- Customer Access Portal - Invoices
- eCommerce Websites
- eCommerce Websites - Ordering
- Integrations
-
Rental: WorkFlow
-
Rental: Texada Pay
-
Rental: Analytics
-
Sales & Service: CloudLink
-
Sales: SalesLink
-
Sales: Customer Order to Invoice
-
Sales: iQuote
-
Sales: iMACS
-
Service: ServiceLink
-
Service: Parts & Service Quoter
-
Service: Condition Monitoring Portal
-
Service: Equipment Monitoring Toolkit
-
Service: Service Agreement Quoter
-
Handle CRM
-
Sales & Service: Tools
-
Support & Troubleshooting
Service Vans as Inventory Locations
To start;
Create a new Division for each Service Van (ie. VN1 = Service Van One)
- Go to Config. > System Tab > Company & Divisions > Division
- Click the ADD button
- Create a name for your Van Division
- Enter Address needed for Tax purposes
- Phone # could be a mobile if it is always with the Van
- Enter the appropriate Tax Codes
- Decide whether taxes should be done by Division (the Van) or by Customer
- Division Type should be Inventory Location
If in doubt about any of the fields - check the help file - hit F1 while on the Division screen to read about each field and its options.
NOTE the follwoing:
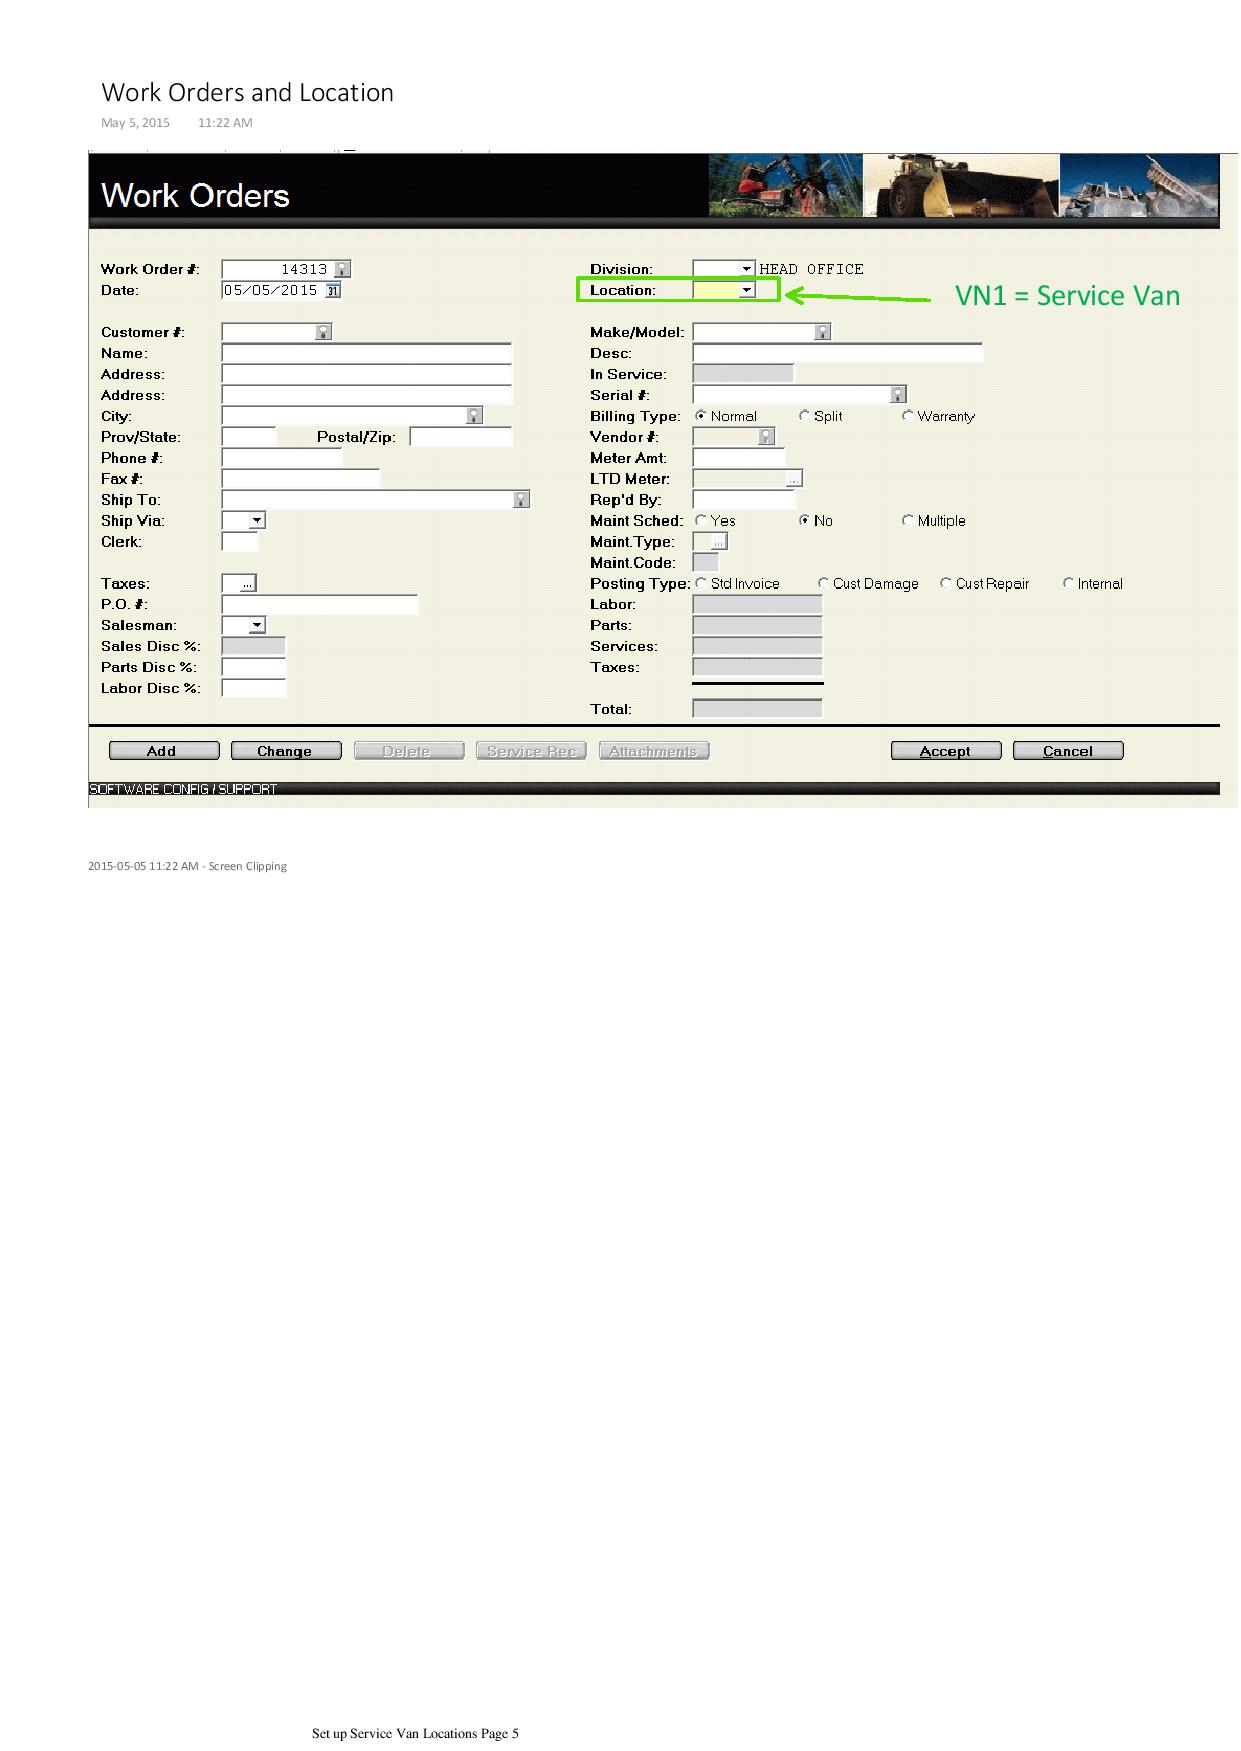
- Advise those creating Work Orders associated with the Service Vans to leave the Division as Head Office (or where ever) and enter the Van' s Code for Location - see attached screen shot.
- Remind operators to transfer products on and off the vans as required using the Inventory Transfer function.
- Confirm that operators have permission to assign the New Division(s) on Work Orders. [see Divisional Restricted Views]
.jpg)
.jpg)
.jpg)