
The acquisition, configuration, and use of a handheld scanner to read Driver's License information into SRM
To successfully scan a Driver's License the specific 2D scanner model that must be used is the Zebra DS4308-DL unit.
It is very important that the device be the sub-DL (Driver's License) model. The base DS4308 model will not be able to parse Driver's License information.
Configure Scanner
- Plug the scanner in a USB port on a computer to power the scanner.
- Reset the scanner to default settings: out of box this should be the case, but the ensure this state reference the manufactures guide that should be included with the scanner for the "Set Defaults" reset barcode and scan it with the device:

- After the reset is complete, scan this QR Code to program the device:
Scanning from the computer screen can work, but it may be necessary to print this QR Code/documentation to paper depending on local monitor display settings.
Configure SRM to prompt for a scan of a Drivers License
- The prompt to scan a Drivers License is enabled at the Division level, so this can be enabled/disabled per division. Navigate to: System Maintenance Menu -> Configure System Settings -> System -> Company & Divisions -> Division Parameters -> Contract Parameters -> Customer Tab
- Add a checkbox to "Prompt For Driver's License/ID:" to enable to scan prompt for counter documents entered in this division.
- "Use IDScan Image Capture" should be set to No when operating in the current SRM SAAS web platform. This is a legacy parameter for older standalone versions of SRM and is not compatible with the current web based platform.
- "Search Customers When License Not Found" Check this box so that when a new Driver's License is entered or scanned that does not match an existing customer record, a customer lookup window is opened allowing the operator to select an existing customer #. The new license number will be added to this customer.
Uncheck this box to prevent the customer lookup window from appearing automatically when a new license number is entered.
The operator can still access this lookup window by pressing the Right Arrow key. - "Update Customer with Driver's License Data" Enter or select one of the following update options from the drop-down list:
Type Y (Yes) to always update the Customer Information with any changed Driver's License name and address information.
Type N (No) to never update the main Customer record, when Driver's License information is changed.
Type C (Cash) to always only update Cash Customer records in Customer Information with changes to Driver's License information.
Scanning a License
- To initiate a scan begin a new Counter Document (Quote/Reservation/Contract) and do not enter the Customer Number but press ENTER on that field and the Driver's License Scan screen will display:
- Ensure the cursor is on the Perform Scan field, and scan the License as follows:
- Cover the ID Bar Code with a finger or other object.
- Scan the 2D Barcode from the bottom up.
- The fields should then populate with the License information:
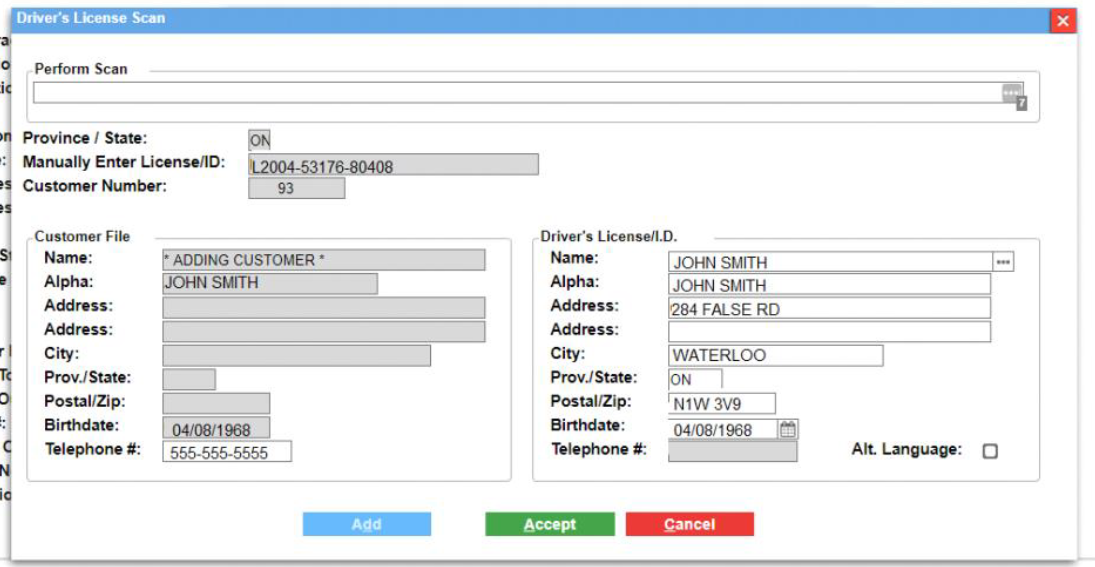
- If the license information does not exist in SRM then either a new AR Customer can be created pre-populating this information, or if it is found then that AR Customer will be populated into the document information.