
Describes how to create a new product category for your ecommerce website in the GateWay Administration Panel.
Type
How to
Audience
GateWay Administrator
Products
GateWay Administration Panel, ecommerce
Context
Create a product category for your ecommerce website when you have a product that you need to rent or sell that does not fit an existing category.
Use your categories to organize your products on your website so that your customers can easily locate and buy or rent them from you.
You can use your product categories to set up your ecommerce website homepage. See: “Edit Your Ecommerce Website Homepage Product Categories in the Administration Panel” for more information.
When you first set up your ecommerce site, your implementation specialist can assist you with importing your product categories, subcategories, and specifications from your company’s SRM (Systematic Rental Management) application. Once imported you can edit and update these categories as you would any you create yourself.
Note: You cannot edit the name of categories or sub-categories that are imported from SRM.
The categories that import from SRM are named automatically based on the class description.
Before You Begin
Required: Valid GateWay account, valid login credentials and access permissions
Optional: Valid SRM account, valid login credentials and access permissions, existing product category, existing product sub-category, existing product attribute
Steps
To create a product category, do the following:
- In the Administration Panel header menu, navigate to Category > New Category
The New Category page opens in the main area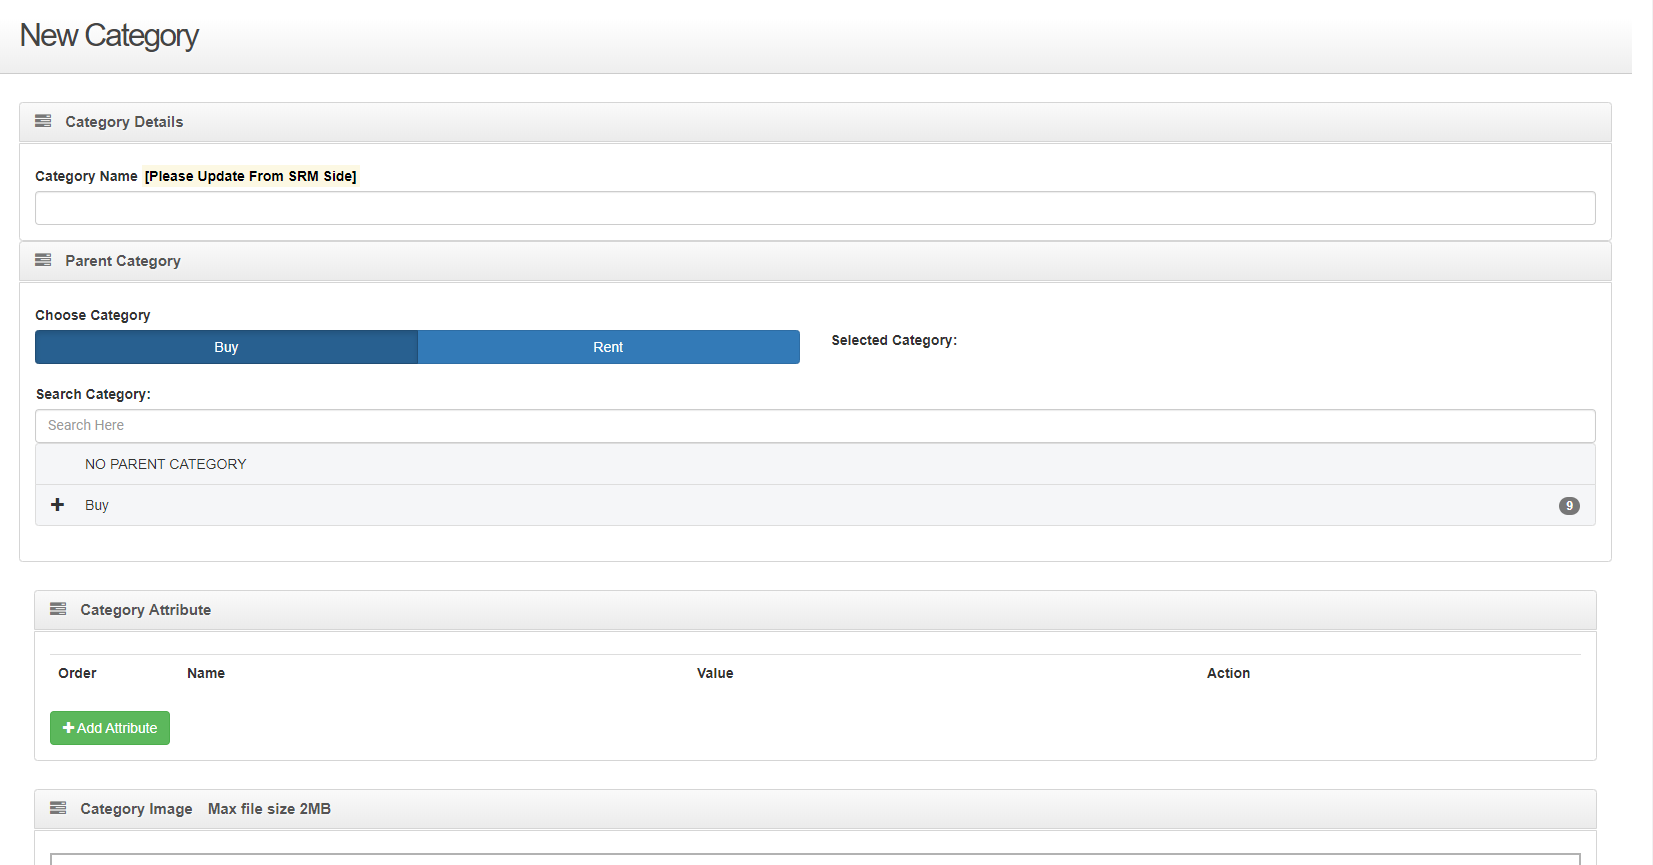
- Type a name for the category in the Category Name field
- In the Parent Category panel, under Choose Category, do one of the following:
- Click Buy if this is a category of products that you are selling to your customers
- Click Rent if this is a category of products that you are renting to your customers
Note: If this is a category that you are both renting and selling, you must create the product category twice, one for Buy and one for Rent - Optional: Type the name of the category that this product category is a sub-category of in the Search Category field. For example, if the product category is a 50-foot boom lift, you might make it a sub-category of your lifts category
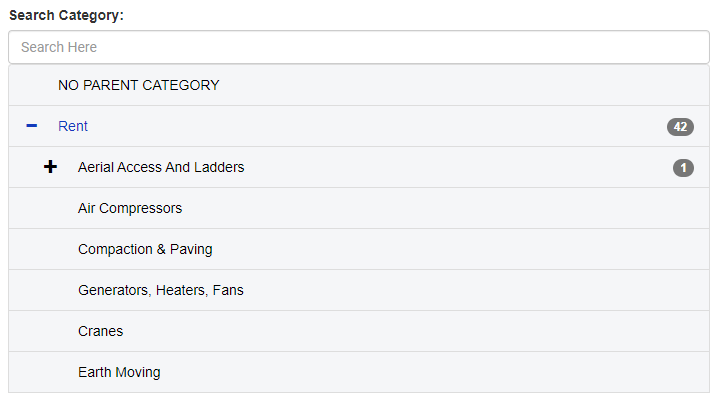
The list of existing categories is narrowed to reflect your search term(s)
Note: Your categories may have any number of sub-categories. Categories with associated sub-categories have a + next to them.
- Click + to view the list of sub-categories associated with a specific category
- In the list of categories, click the category or sub-category that you need to associate the product category with. For example, if the product category is a 50-foot boom lift, you might associate it with your boom lifts sub-category
Note: At a minimum, the product category must be associated with the Buy or Rent categories - Optional: To add an existing category attribute to this category, such as the maximum lift height, in the Category Attribute panel, do the following:
- Click + Add Attribute
The Category Attribute panel expands to display additional fields
- Type the name of a product attribute, such as boom type, in the Search here field
The list of attributes is narrowed to reflect your search term(s) - Select the attribute you need to add to this product category from the dropdown
The Value column is updated to include additional selections
- Use the Value dropdown to select the value that applies to the category
Note: You can add multiple values to the same attribute for the same product category by repeating steps a-c for each value
Note: See “Create an Ecommerce Product Category Attribute in the Administration Panel” for more information on creating product attributes and values - Optional: You can rearrange the order the attributes appear in on your ecommerce website by dragging and dropping the order drag handle

- Click + Add Attribute
- Optional: To add a product image to this category, in the Category Image panel, do one of the following:
- Drag and drop a file from your device into the Click or Drop Files Here to Upload area
- Click the Click or Drop Files Here to Upload area, and use your device’s file manager to select the image you need
- Drag and drop a file from your device into the Click or Drop Files Here to Upload area
- Click Save
The product category is saved and is added to the list of categories