
Describes how to edit the details of a product on your ecommerce website in the GateWay Administration Panel.
Type
How to
Audience
GateWay Administrator
Products
GateWay Administration Panel, ecommerce
Context
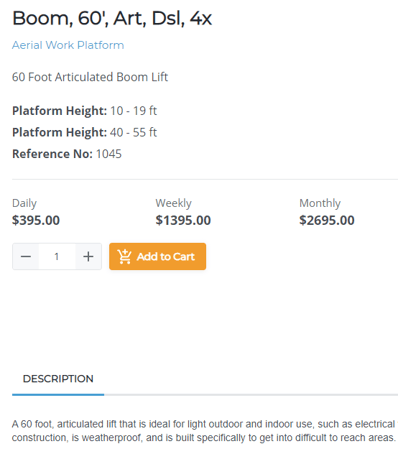
Edit the details of a product, when you need to add or update information about a product that appears on your ecommerce website. For example, you can add images, or update the description of the product to make it more customer-friendly. The updates you make appear immediately on your ecommerce website.
Note: Your product listings come from your company’s SRM (Systematic Rental Management) application. As a result, you cannot alter the product name, class or group in GateWay. Your company’s SRM administrator must make any required changes.
Before You Begin
Required:Valid GateWay account, valid login credentials and access permissions, existing product
Steps
- In the GateWay header menu, navigate to Products > Manage Products
The Products List page opens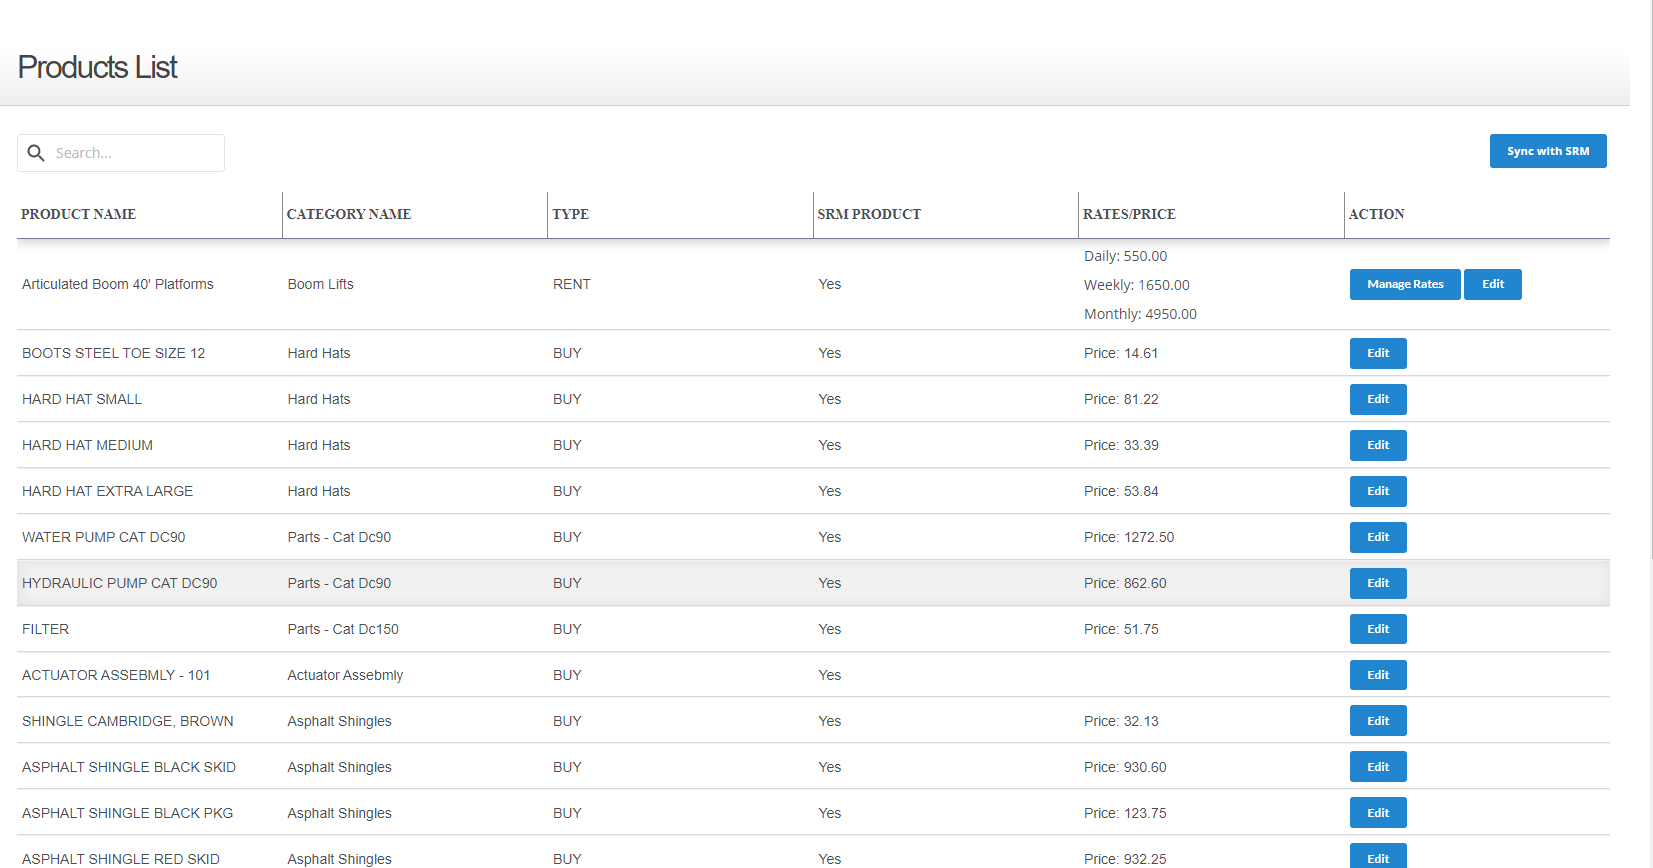
- Locate the product you need to edit, and click Edit
The Edit Product page opens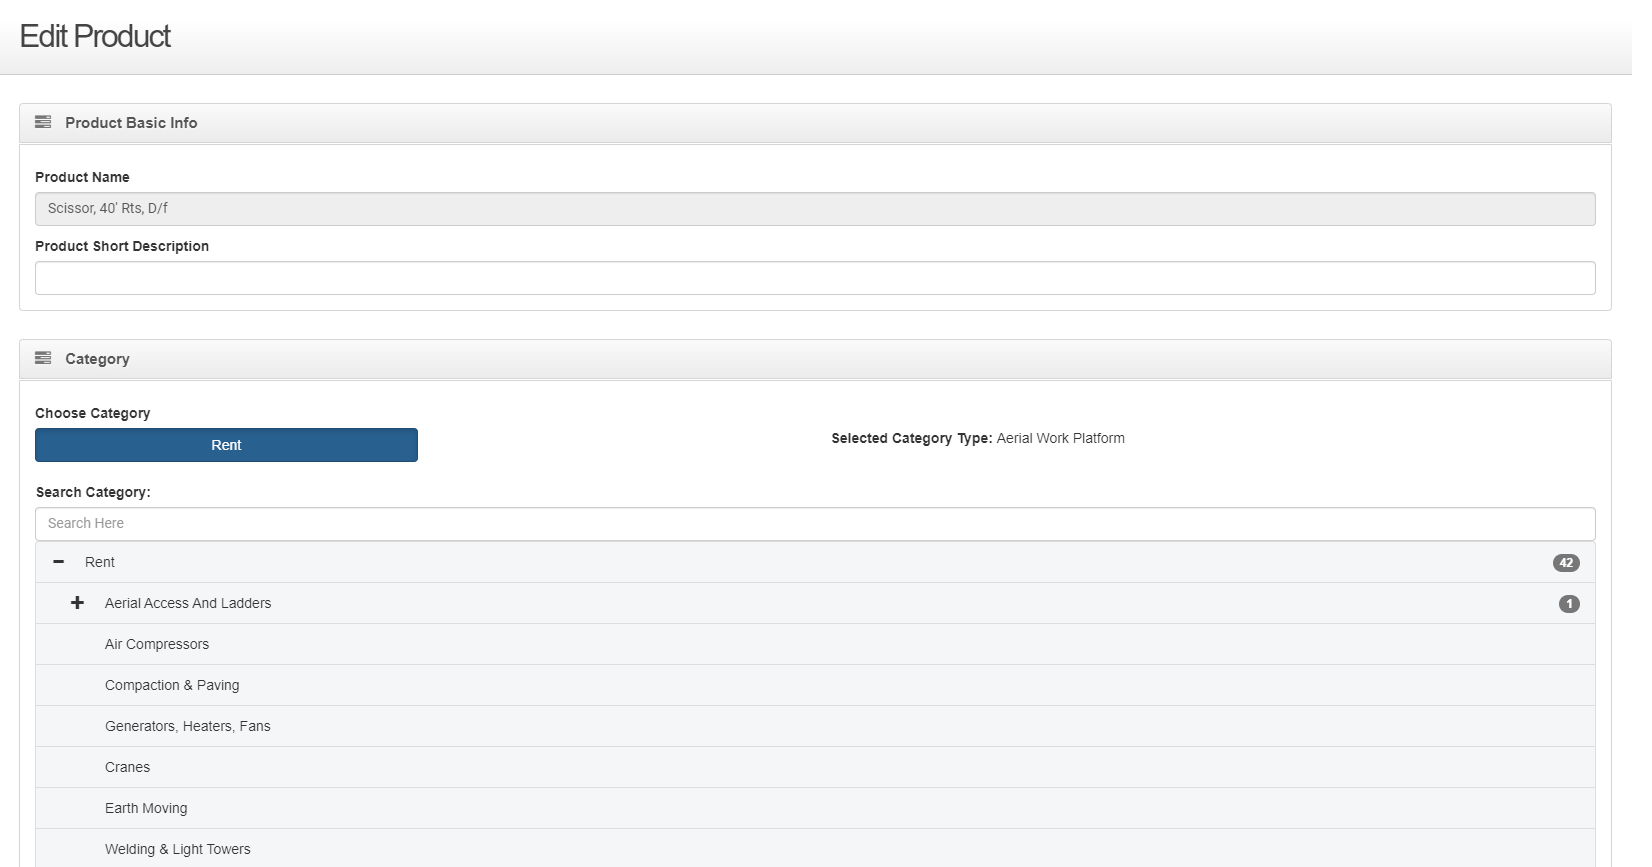
- Optional: Type a brief description of the product in the Product Short Description field
Note: The product short description appears as a note beneath the product name when you view the details of a product on the ecommerce website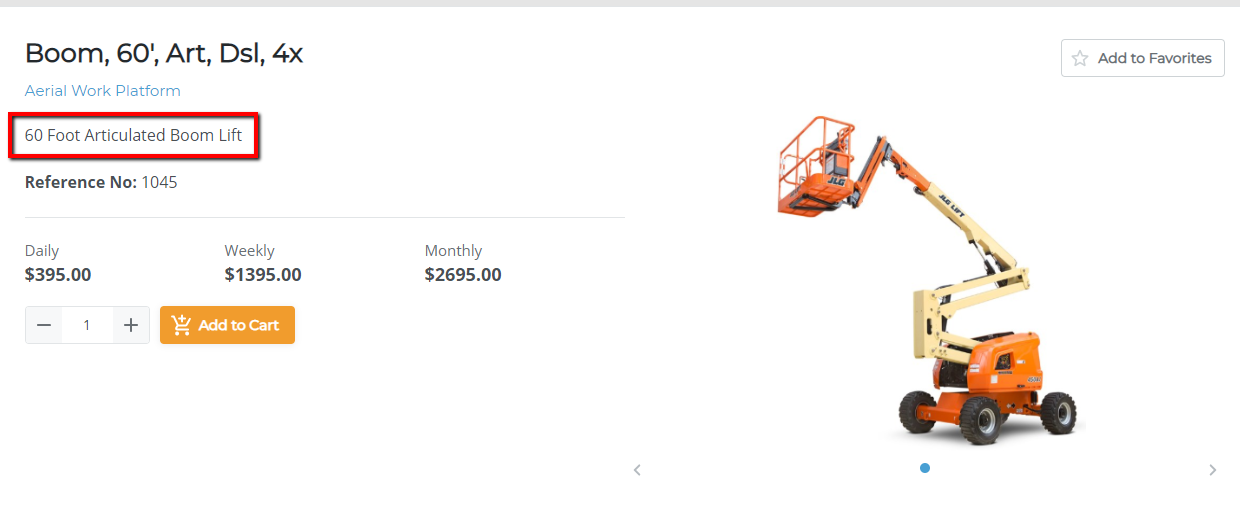
- Optional: Type the name of the category/sub-category that this product is associated with in the Search Category field. For example, if the product is a 50 foot boom lift, you might associate it with your boom lifts sub-category
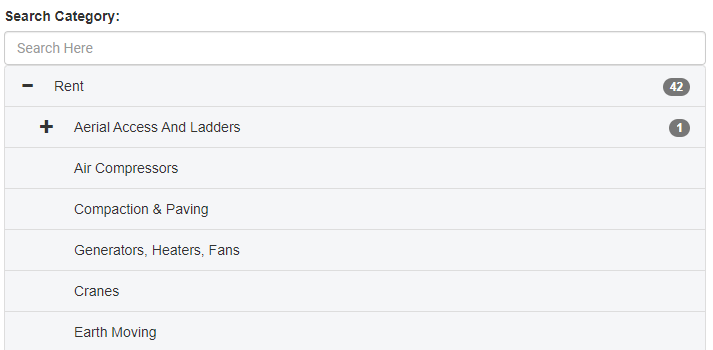
The list of existing categories is narrowed to reflect your search term(s)
Note: Your categories may have any number of sub-categories. Categories with associated sub-categories have a + next to them.
- Click + to view the list of sub-categories associated with a specific category
- In the list of categories, click the category or sub-category that you need to associate the product with. For example, if the product is a 50 foot boom lift, you might associate it with your boom lifts sub-category
Note: At a minimum, the product must be associated with the Buy or Rent categories - Optional: To add an existing product attribute to this product, such as the maximum lift height, in the Product Attribute panel, do the following:
- Click + Add Attribute
The Product Attribute panel expands to display additional fields
- Type the name of a product attribute, such as the maximum lift height, in the Search here field
The list of attributes is narrowed to reflect your search term(s) - Select the attribute you need to add to this product from the dropdown
The Value column is updated to include additional selections
- Use the Value dropdown to select the value that applies to the product
Note: You can add multiple values to the same attribute for the same product by repeating steps a - c for each value
Note: See “Create an Ecommerce Product Category Attribute in the Administration Panel” for more information on creating product attributes and values - Optional: You can rearrange the order the attributes appear in on your ecommerce website by dragging and dropping the order drag handle

- Click + Add Attribute
- Optional: To add a product image to this product, in the Product Image panel, do one of the following:
- Drag and drop a file from your device into the Click or Drop Files Here to Upload area

- Click the Click or Drop Files Here to Upload area, and use your device’s file manager to select the image you need
- Drag and drop a file from your device into the Click or Drop Files Here to Upload area
- Optional: To add more details to the product page on the ecommerce website, In the Product Details panel, do the following:
- Under Descriptions, click +New
The Descriptions section expands to display additional options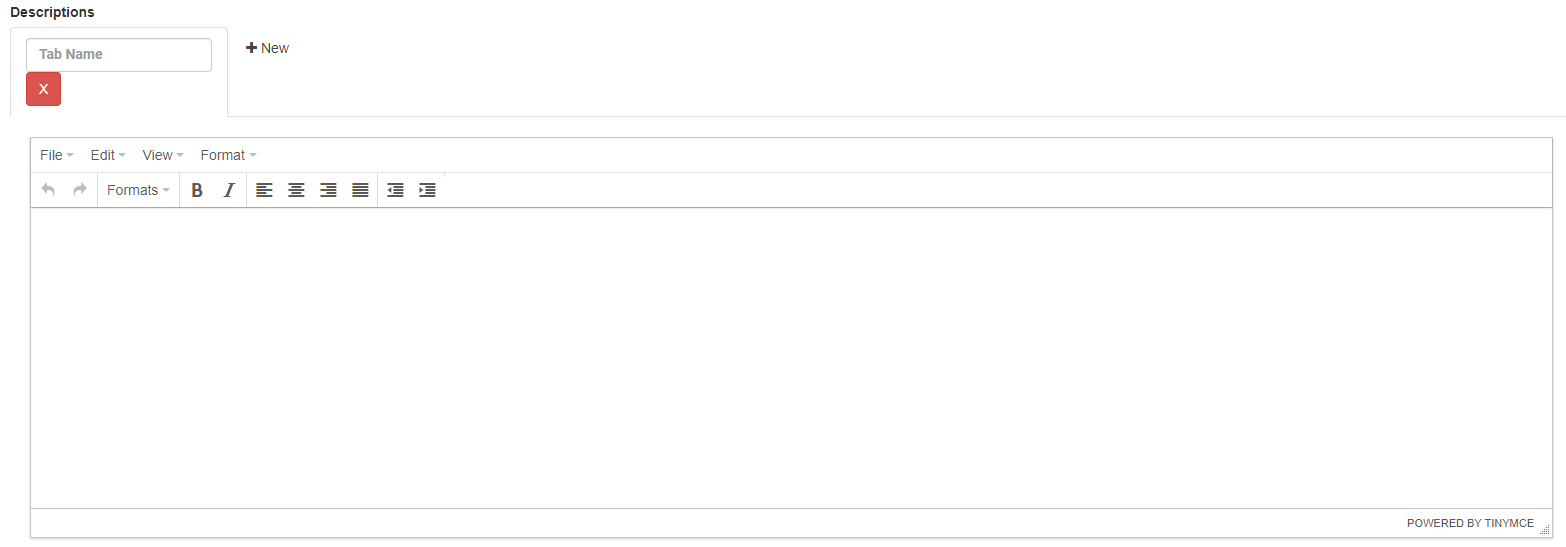
- Type a name for the details section in the Tab Name field. For example, if you are providing a description of the product, you might name the section Description. If you are providing specifications, such as weight or dimensions, you could name the section Specifications
Notes:- The details section appears at the bottom of the product page as a tab. The leftmost tab is the one that is visible by default when a customer accesses the product details
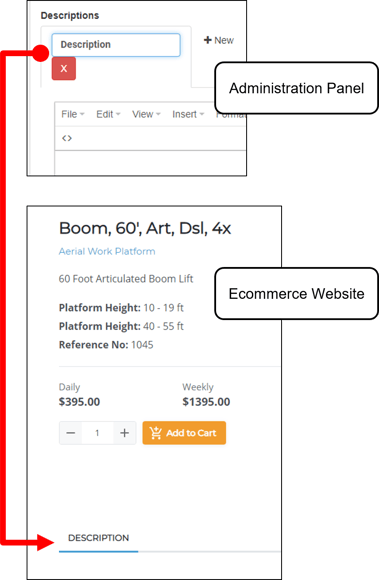
- You can create multiple tabs on a product page to organize and separate your different pieces of product information by clicking +New
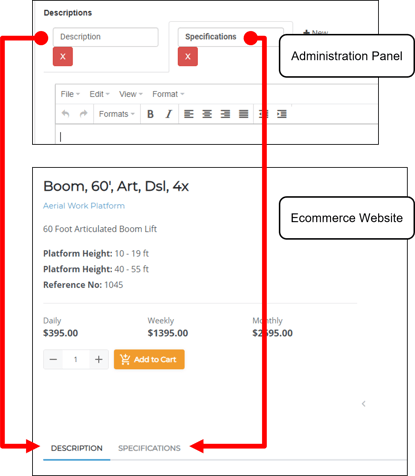
- The details section appears at the bottom of the product page as a tab. The leftmost tab is the one that is visible by default when a customer accesses the product details
- Optional: Type the details for the tab in the body field
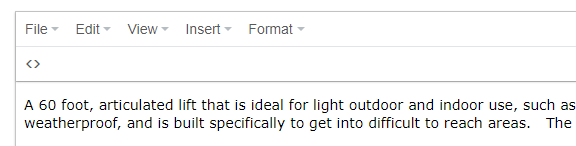
Notes:- You can use the available menu options to format your details and add media such as images, links and videos to each tab
- The content of each tab appears beneath the tab on the product details page of the ecommerce website
- Under Descriptions, click +New
- Click Save
The product details are updated and the changes appear immediately on your ecommerce website