
A collection of sample inspection forms that can be downloaded and imported into Texada SRM.
Quick Reference
- This article contains a list of sample inspection forms that can be imported into SRM.
- To import an inspection form into SRM:
- Ensure that you have added all the necessary multiple choice responses to the MC Options list in SRM. See “Manage MC Options” for more information.
- Locate the form you wish to import and click “Download” to download it. You will receive a .zip file containing the inspection form.
- Extract the .zip file you just downloaded to receive a tab-delimited text (.txt) file. This is the file you will import into SRM.
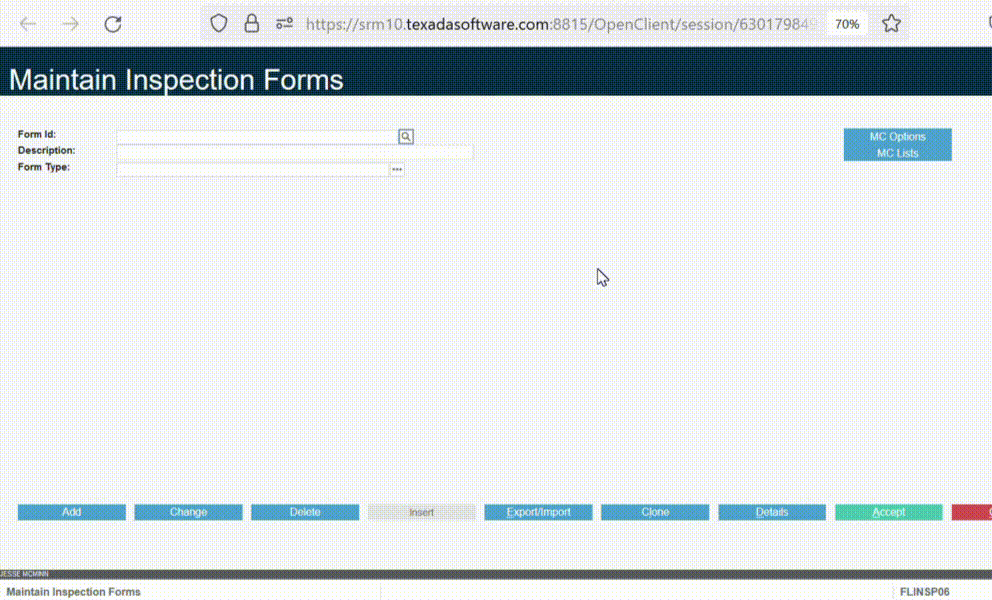
- Log in to Texada SRM and navigate to System Maintenance → Configure System Settings → Operations → Inspection Forms. Click “Import/Export” to open the Inspection Form Export/Import window. Click “Upload File” to upload the .txt file you extracted, then click “Import” to import the form into SRM.
- If the import was successful, you can now review and edit your inspection form by selecting it from the list and clicking “Details”.
Introduction
The following article contains a list of sample inspection forms that can be freely downloaded, modified, and imported into Texada SRM. The contents of these forms are based on inspection forms used by real equipment rental companies such as Skyjack and JLG.
How to Use These Forms
To import the forms found in this article into SRM, you will need an SRM Operator account with access to the System Maintenance menu. If you wish to optionally edit your forms outside of SRM, you will also need spreadsheet software such as Microsoft Excel.
To import a form into SRM, follow the steps below.
- Ensure you have added the necessary MC Options to SRM
In order to import an inspection form that contains multiple choice questions, you must first add all possible answers to those questions to the MC Options list in SRM. See “Manage MC Options” for more information. - Download inspection form
Locate the form you wish to download and click “Download”. You will receive a .zip file containing the inspection form. Depending on your browser’s settings, you may be prompted to select a download location, or the file may be automatically downloaded to your Downloads folder.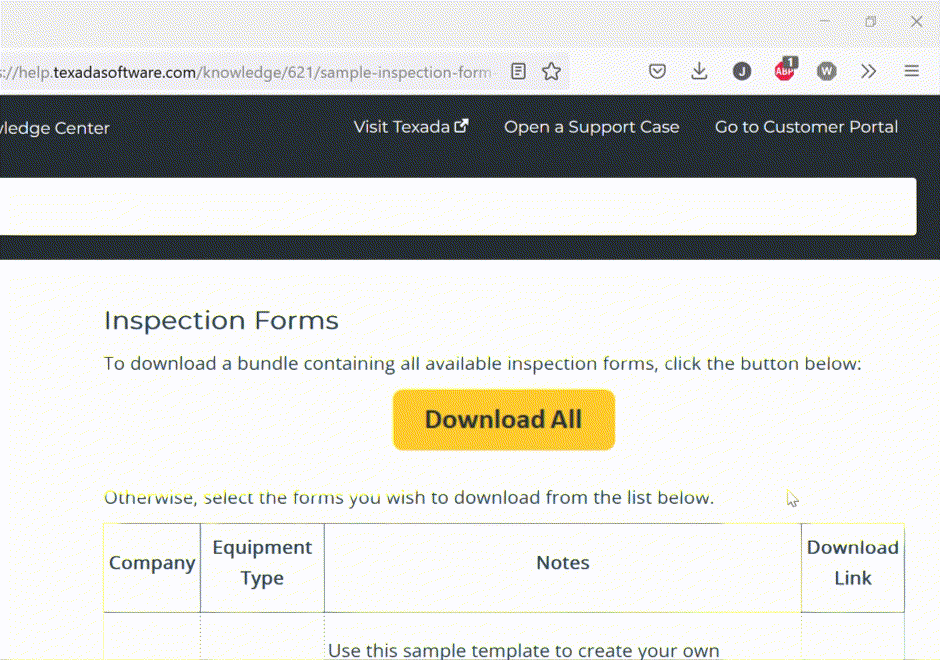
- Extract inspection form
Locate the .zip file you just downloaded and right-click it to open the context menu. Click “Extract All…” to extract the inspection form. You will receive a tab-delimited text (.txt) file. This is the file that you will import into SRM.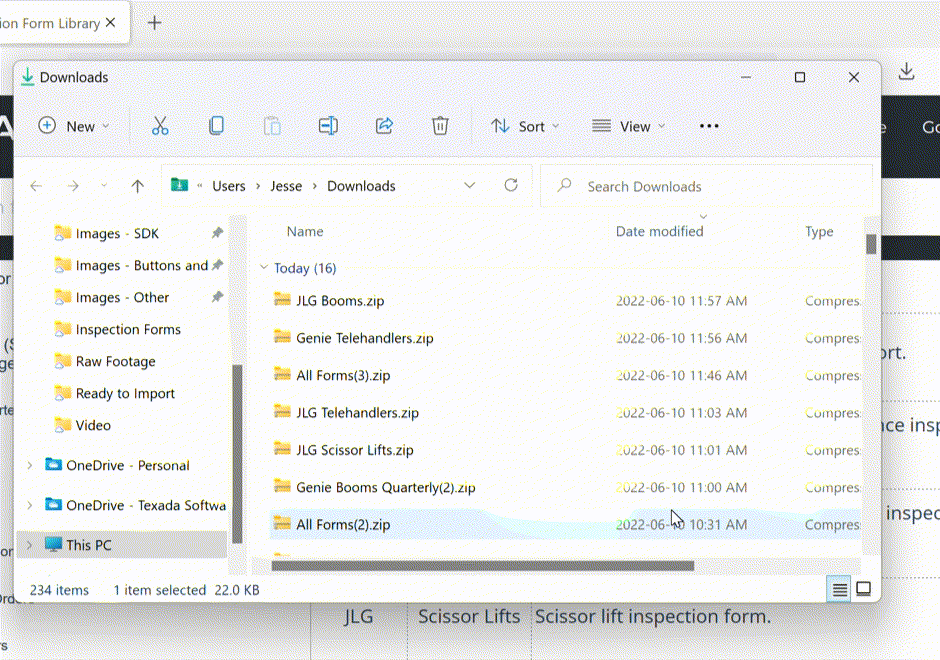
- OPTIONAL: Edit inspection form prior to importing
If desired, you may now open the inspection form (using spreadsheet software such as Microsoft Excel) and edit it prior to importing it into SRM. Please note that SRM requires inspection forms to be specifically formatted for importing, and that making edits may cause importing to fail. If you are not comfortable with making edits at this stage, remember that you can also edit the form in SRM after it has been imported. If you do decide to make edits prior to importing, ensure that you follow the existing formatting and that you save the edited file as a tab-delimited text (.txt) file. - Import form into SRM
Once you are satisfied with the inspection form, import it into SRM by following the steps below. For more information, please see “Inspection Form Export/Import” (SRM help file).- Log in to Texada SRM and navigate to System Maintenance → Configure System Settings → Operations → Inspection Forms.
- Click “Export/Import” to open the Inspection Form Export/Import window.
- Select “Upload File”, then click “OK”.
- Click “Browse…” and locate the inspection form you wish to import. Double-click it to select it, then click “Upload”.
- If the upload is successful, you will receive a message that reads “File uploaded to inspection_form.txt in the data directory.” Click “OK” to return to the Export/Import window.
- Select “Import”, then click “OK”.
- If the inspection form was not formatted correctly, you will receive a message that reads “Errors found. Please correct and re-import file.” Your browser will automatically download a copy of the inspection form with error messages included in the last column; review and update the form as necessary, then return to step d.
- If the inspection form was formatted correctly, you will receive a message that reads “Do you wish to import the inspection forms?” Click “Yes” to finalize the import.
- Review and edit inspection form
Once your inspection form has been imported, you can review it by clicking the search icon on the Maintain Inspection Forms screen, selecting it from the list of inspection forms, and clicking “Details”. You can now edit your form in SRM the same way you would edit any other inspection form. For more information on managing inspection forms, please see “Maintain Inspection Forms” (SRM help file).
Manage MC Options
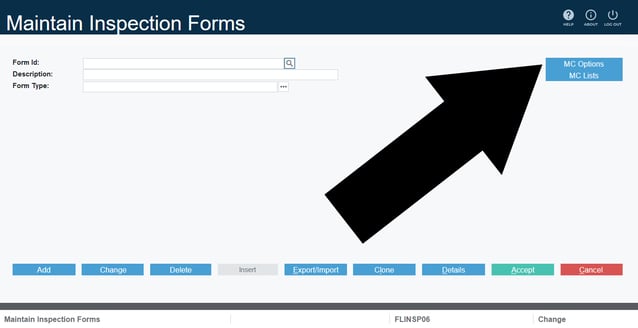
In order to import an inspection form that contains multiple choice questions, all possible answers to those questions must be included in the MC Options list in SRM. You can manage this list via the Maintain Inspection Forms page.
- Log in to SRM and navigate to System Maintenance → Configure System Settings → Operations → Inspection Forms.
- Click the “MC Options” button near the top-right corner of the screen to open the Inspection Form Multiple Choice Options window.
- In this window, click “Add” to add a new possible multiple choice answer. Enter the desired Option code, then press Enter to jump to the Description field. Enter a description and press Enter again to save the new option.
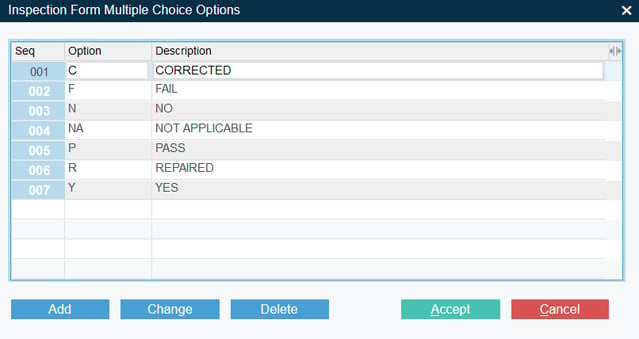
- Repeat step 3 for as many options as you want to enter, then click “Accept” to save your changes and close the window.
The below table shows you which MC Options will need to be added to use each of the inspection forms included in this article. Options that are repeated across multiple companies only need to be included once; for example, adding a single “NA - Not Applicable” option will cover all three of Genie, JLG, and Skyjack forms.
|
Company |
Option |
Description |
|
Genie |
Y |
Yes |
|
N |
No |
|
|
R |
Repaired |
|
|
NA |
Not Applicable |
|
|
JLG |
Y |
Yes |
|
N |
No |
|
|
C |
Corrected |
|
|
NA |
Not Applicable |
|
|
Skyjack |
P |
Pass |
|
F |
Fail |
|
|
R |
Repaired |
|
|
NA |
Not Applicable |
Inspection Forms
To download a bundle containing all available inspection forms, click the button below:

Otherwise, select the forms you wish to download from the list below.
|
Company |
Equipment Type |
Notes |
Download Link |
|
Texada Software |
Sample Template |
Use this sample template to create your own inspection forms. This template can also be downloaded from Texada SRM, at System Maintenance → Configure System Settings → Operations → Inspection Forms → Export/Import → Sample Template. Note that this template is in .xls format. Before you are able to import this file into SRM, you will need to save it as a tab-delimited text (.txt) file. |
|
|
Genie |
Boom Lifts |
Quarterly inspection form. |
|
|
Genie |
Scissor Lifts |
Scheduled maintenance inspection report. |
|
|
Genie |
Telehandlers |
Scheduled and programmed maintenance inspection report. |
|
|
JLG |
Boom Lifts |
Boom lift and trailer-mounted boom lift inspection form. |
|
|
JLG |
Scissor Lifts |
Scissor lift inspection form. |
|
|
JLG |
Telehandlers |
New machine and pre-delivery inspection report. |
|
|
JLG |
Vertical Lifts |
Vertical lift inspection form. |
|
|
Skyjack |
Boom Lifts |
Boom lift PDI and annual checklist. |
|
|
Skyjack |
Electric Boom Lifts |
Electric boom lift PDI and annual checklist. |
|
|
Skyjack |
Scissor Lifts |
Scissor lift PDI and annual checklist. |